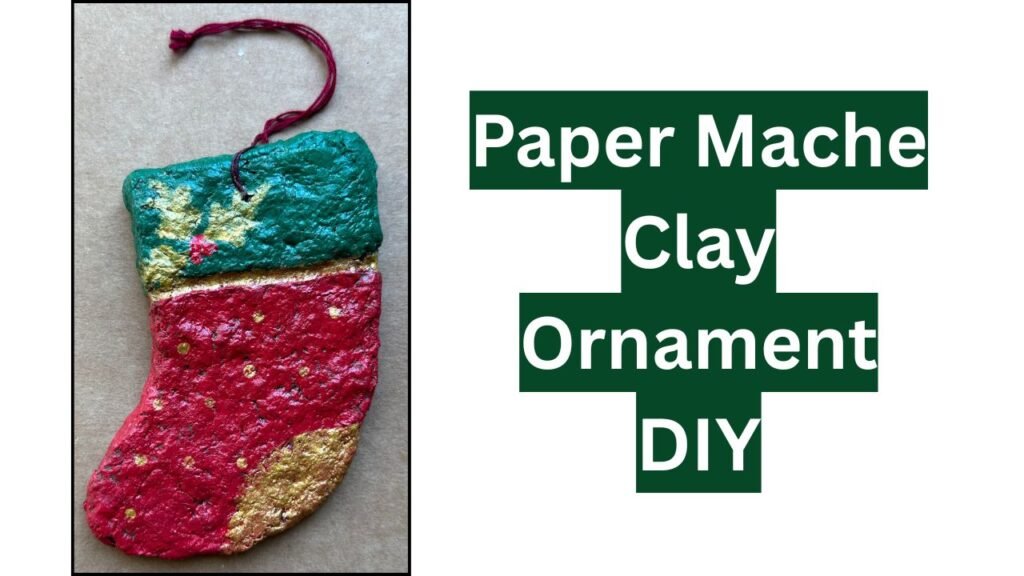
Easy And Quick Ornaments with Paper Mache Clay and Cardboard
Description
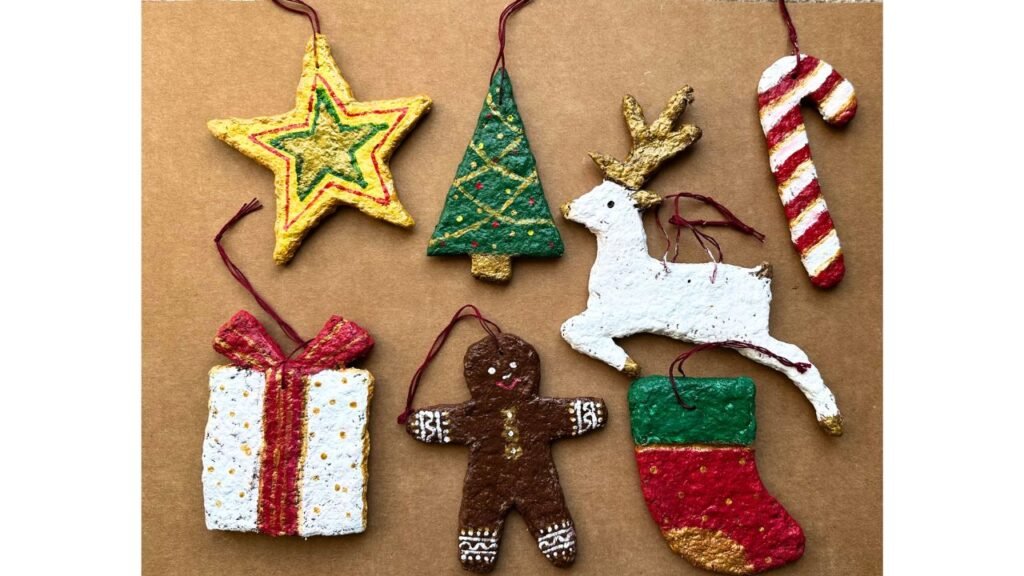
Make beautiful Christmas ornaments as a gift using paper mache clay and cardboard cutouts. It is an easy, inexpensive, eco-friendly DIY craft.
Materials List
- Air dry Clay Or Paper Mache Clay (I used cardboard Paper Mache Clay)
- Recycled cardboard Cutouts.
- Acrylic Paints
- String
- Needle
- Hammer and Nail
- Aluminum Foil
Backstory
I had a batch of cardboard paper mache clay ready, but since it didn’t contain any flour, I knew it wouldn’t behave like regular soft clay, and it wasn’t a paste either. The clay was firm but rollable, so I could form simple shapes, but not sculpt fine details. I needed a different approach.
With the holiday season approaching, I cut out simple ornament shapes from cardboard as a sturdy base. Then, I rolled the clay flat with a rolling pin and carefully stuck it onto the cutouts. By shaping it this way, I was able to give the ornaments a hand-sculpted look. That’s how these beautiful handmade Christmas ornaments came to life.
Video Tutorial
Click Below to watch video tutorial
Step- By-Step Written Instructions
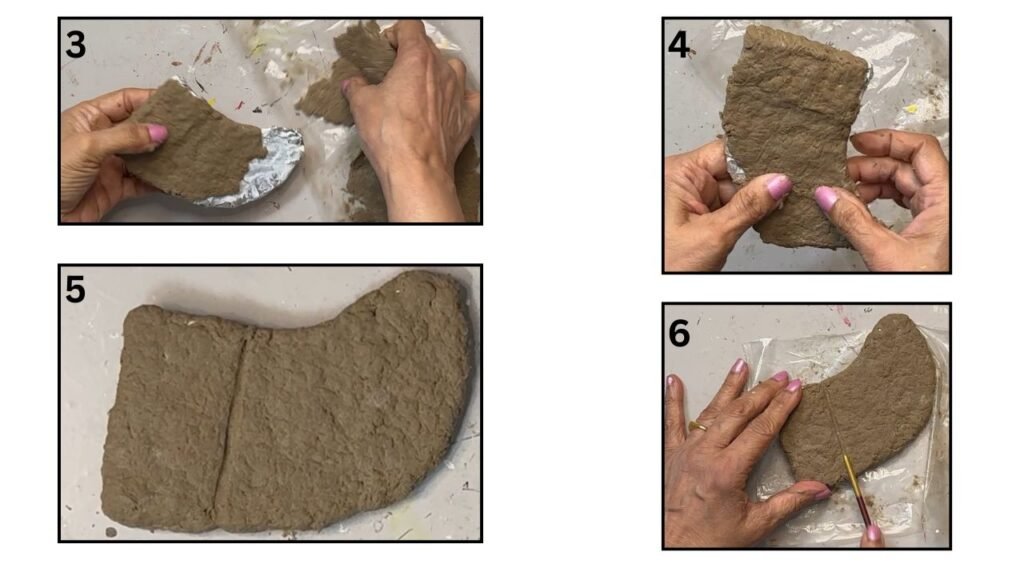
- Cut cardboard in ornament shape.
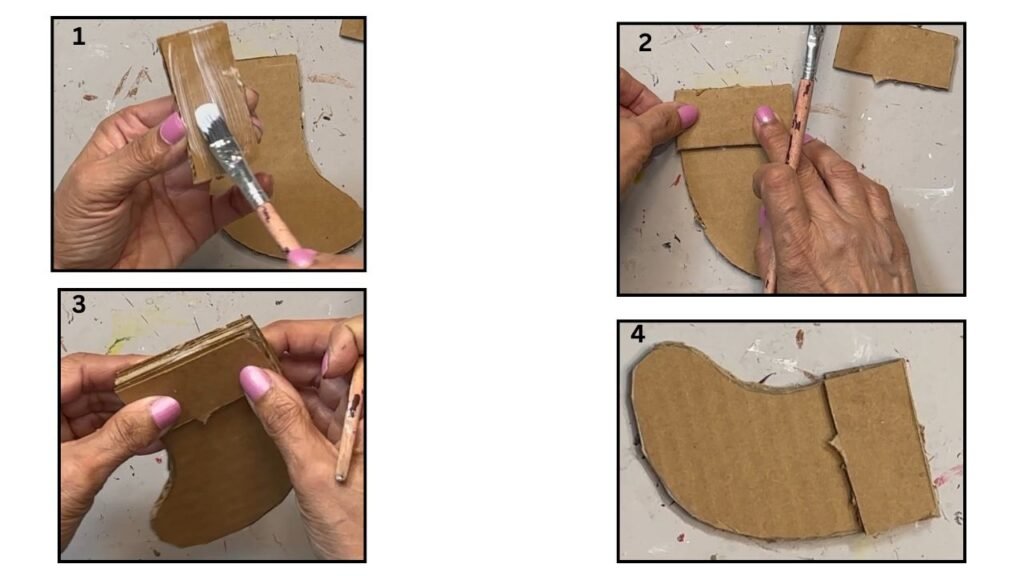
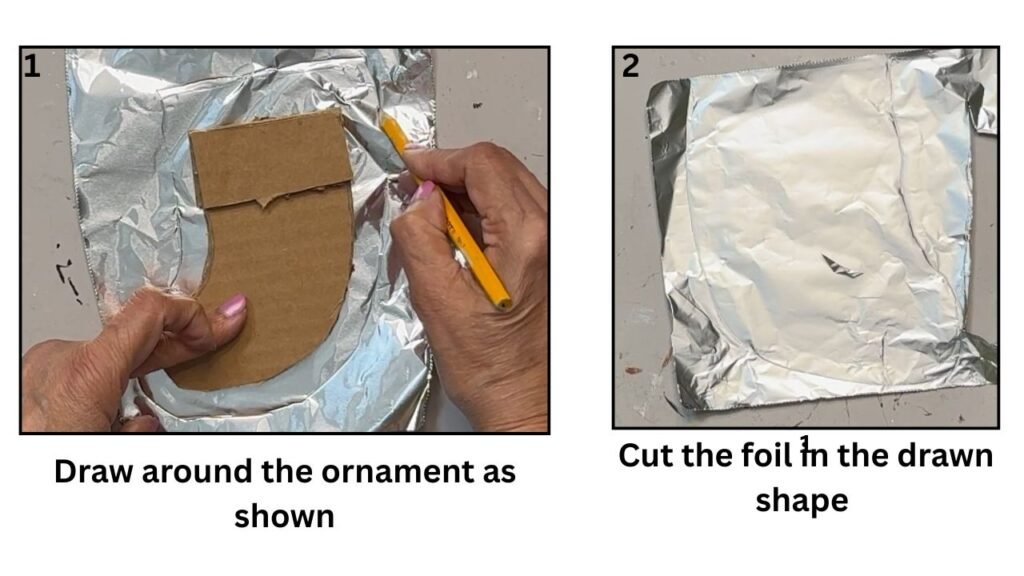
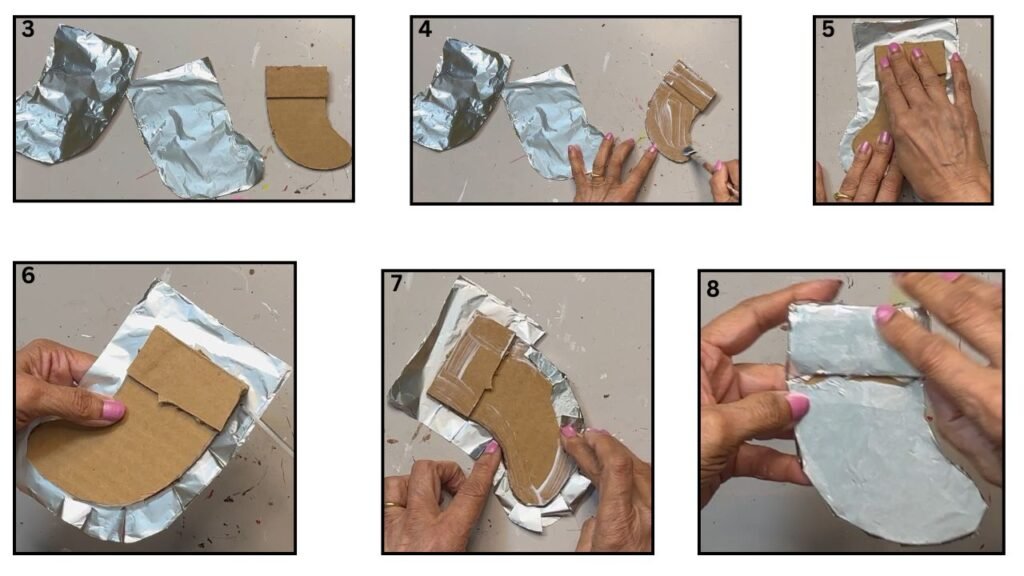
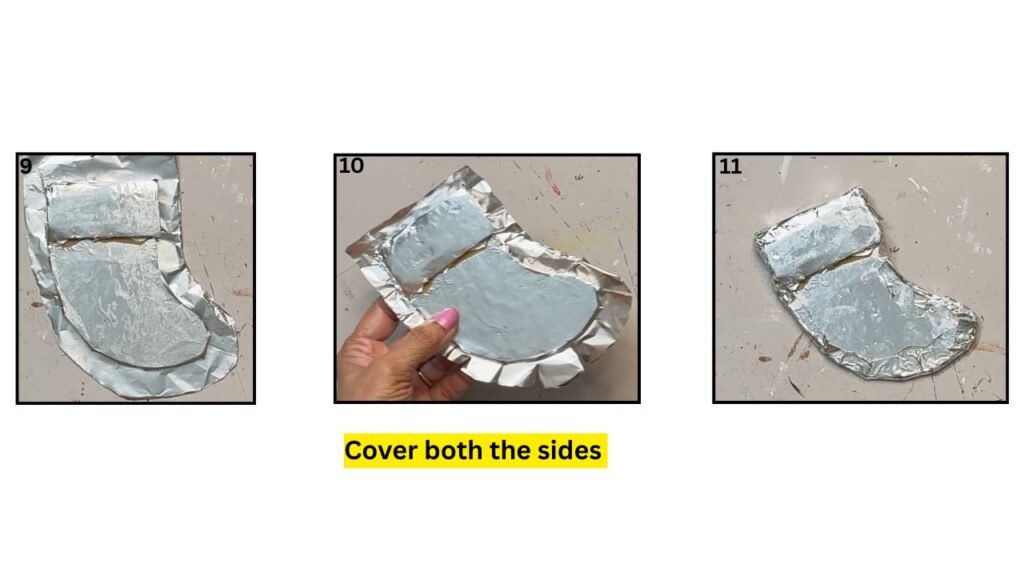
2. Cover the ornament with aluminum foil. The steps are shown below.
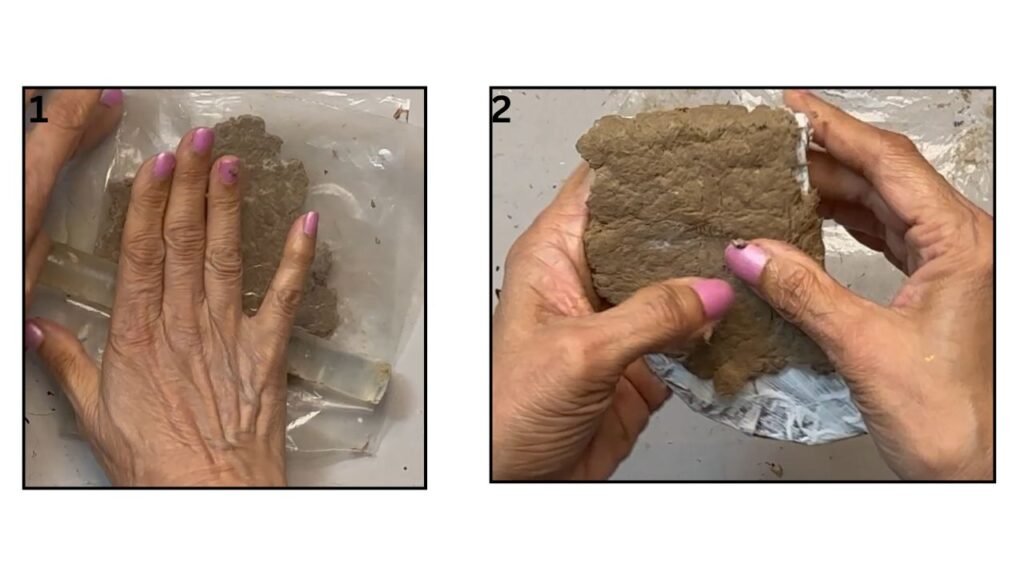
3.Roll the flourless paper Mache clay using rolling pin between the plastic layers. then apply it on the ornament as shown. The recipe for my flourless Paper Mache Clay Recipe is on my blog
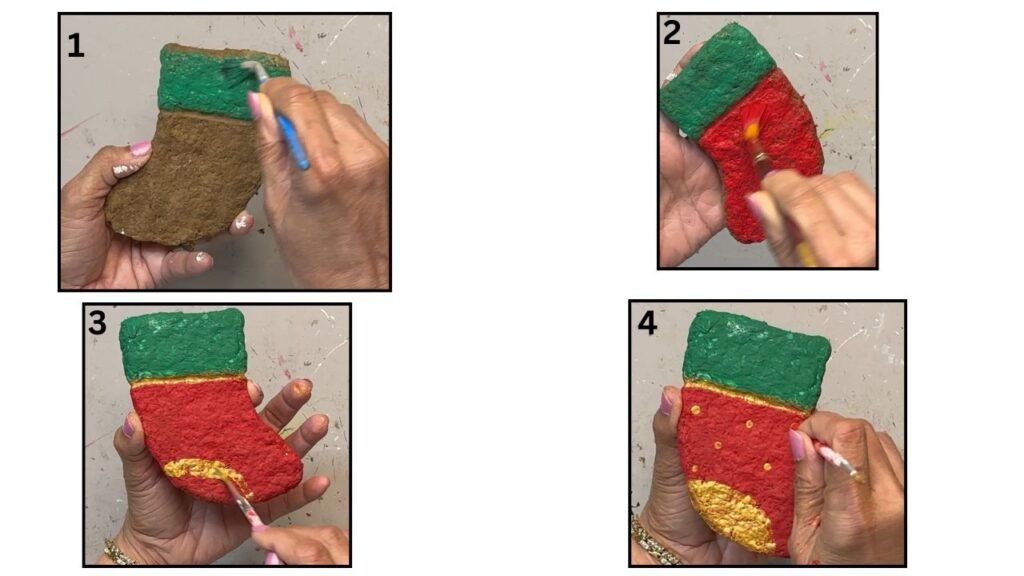
4. Let the clay dry. Then paint the ornament with acrylic paints.
5. After paints dry, make a hole in the ornament. Placed the ornament on an empty can and using a nail and a hammer made a hole. Then put the string through the whole to make a hanger for the ornament. The steops are shown below.
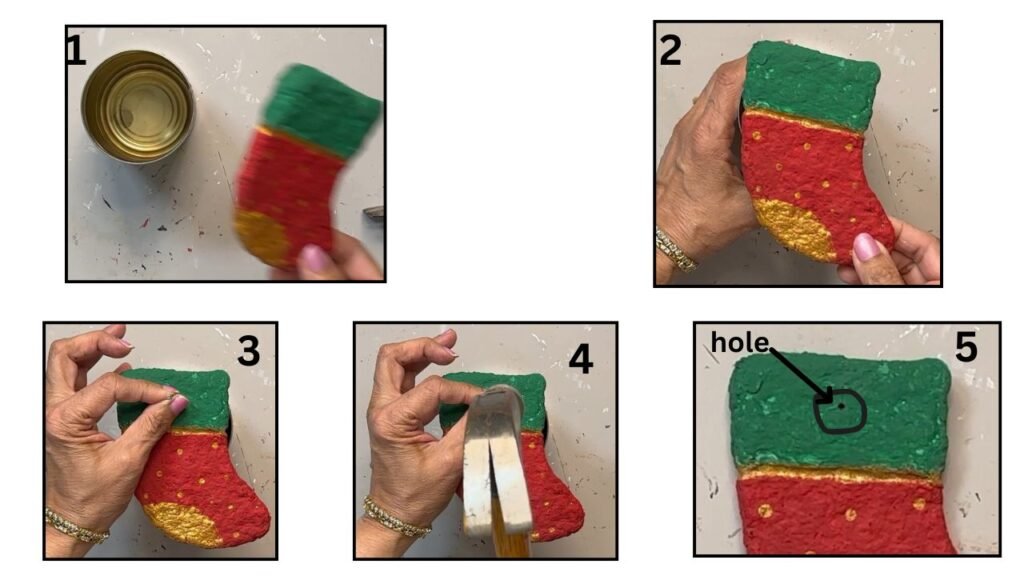
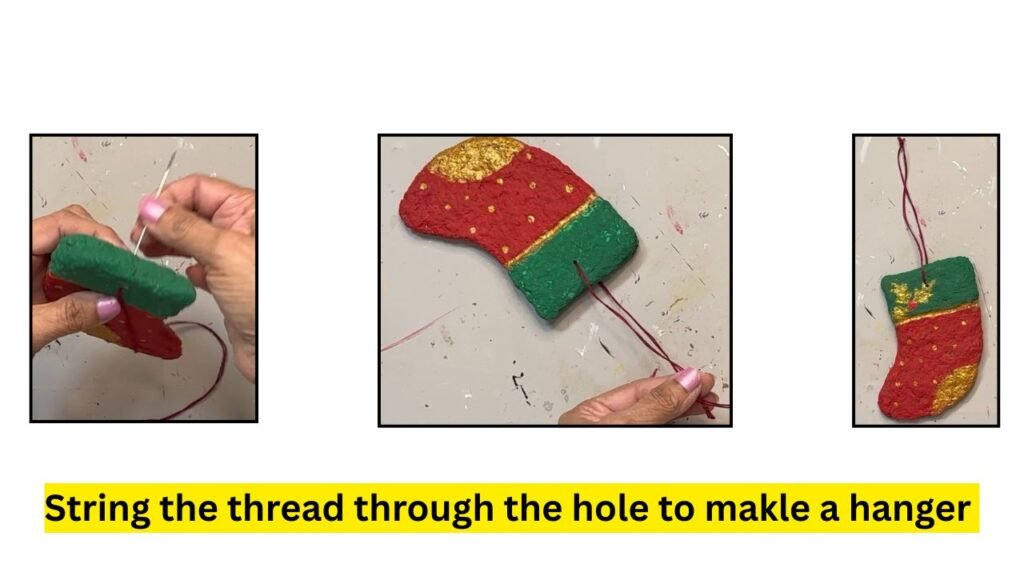
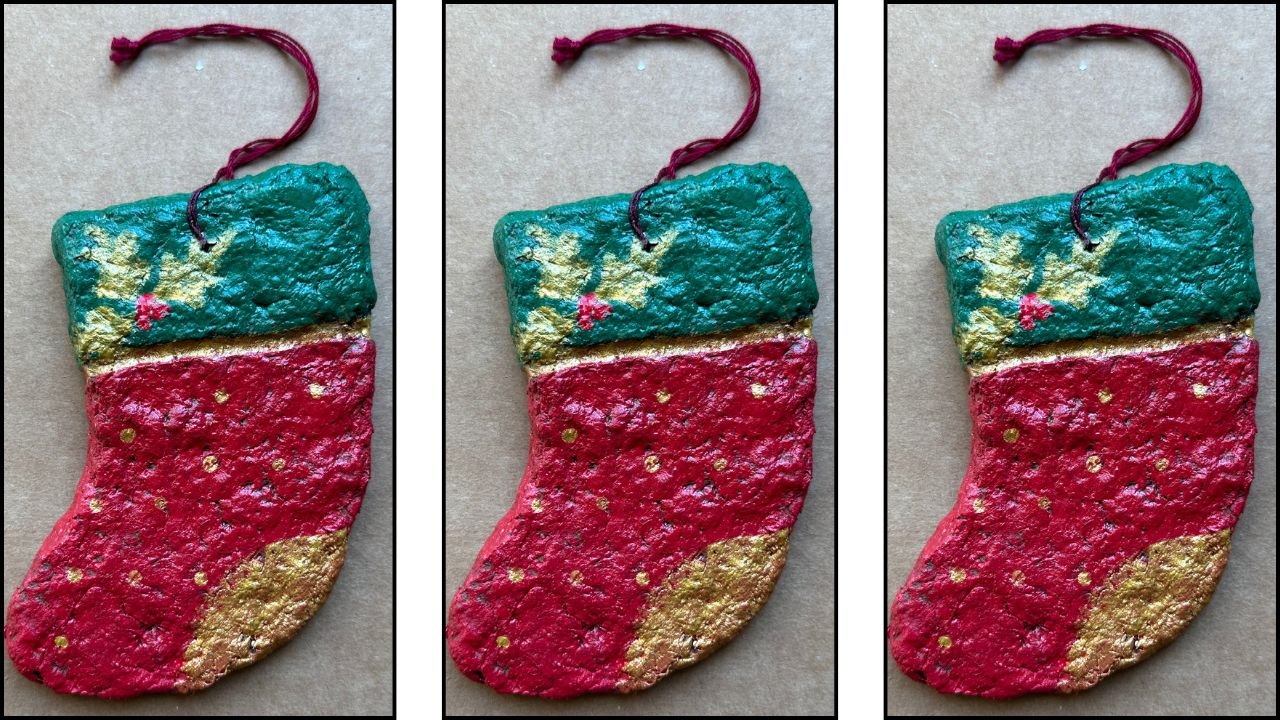
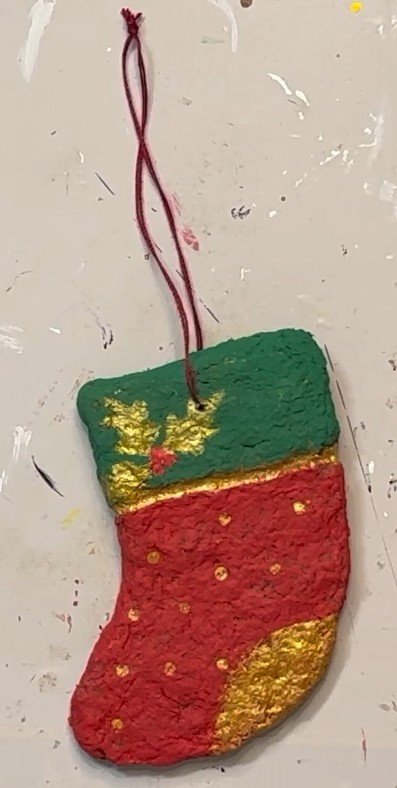
This is how the ornament looks.
Tips And Tricks
- Avoid warping
2. Hole Making
It is a good practiuce to make hole in an ornament before painting. That way paints wouold stay intact.
3. I used a hammer to make a hole but you can use a drill as well.
4. Since the clay is flourless, roll the clay between the plastic layers that way it stays together.
Final Word
I hope you enjoyed this simple and eco-friendly way of making Christmas ornaments. It’s fast, easy, budget-friendly, and perfect for holiday crafting. I created a few different ornaments using the same method (shown below), and I’ll be uploading two handmade Christmas toys that make lovely gifts! so stay tuned!
If you’d like to explore more of my DIY projects, please visit my blog. Don’t forget to subscribe to my monthly newsletter for new craft ideas and updates.
Thanks so much for stopping by!