Material List
- Cardboard
- Craft Stick
- Bamboo Skewers
- Acrylic paints
- Glue Gun
- White Gel Pen
Description
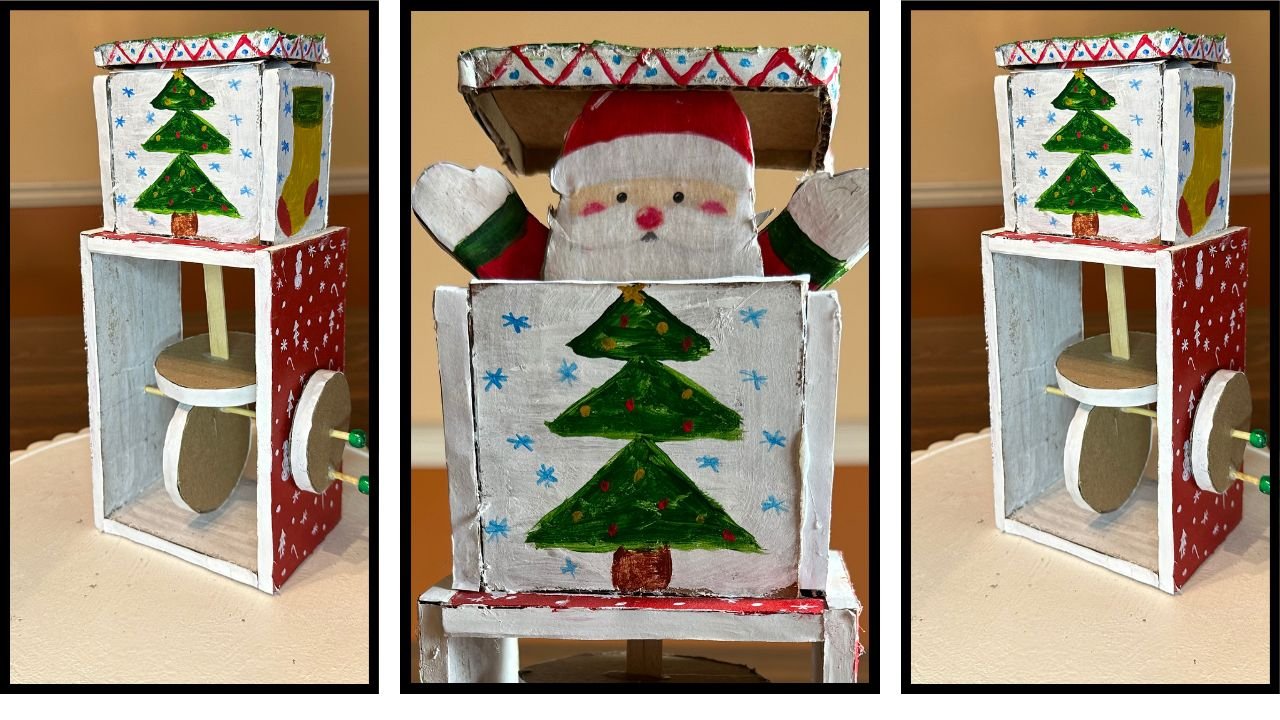
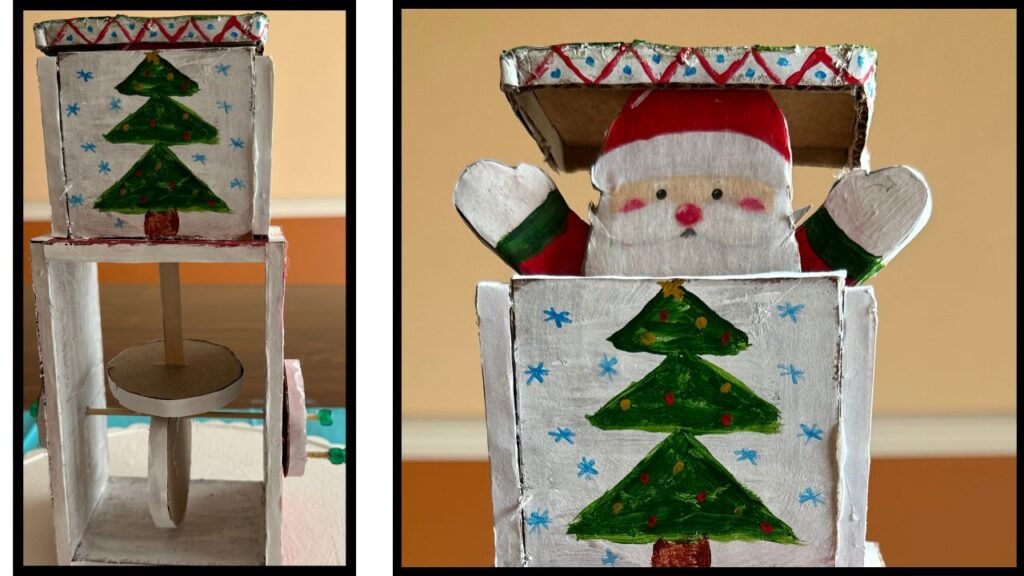
This magical peeking Santa Christmas toy is eco-friendly, budget-friendly,and made entirely from cardboard. Not to mention but it is full of festive charm! It’s a simple DIY that’s sure to bring a big smile to any child’s face. Surprise your kids or grandkids this Christmas with this adorable, easy-to-make moving toy!
Backstory
While surfing the internet, I came across this adorable toy. It was made of wood, and the mechanism wasn’t revealed. But I noticed the turning wheels and knew it had to be an automata. After a lot of thinking, and watching how different automata are built, I finally figured out the mechanism for this toy! It was my true Eureka moment!
That’s how this peeking Santa came to life. Once the mechanism was solved, choosing the material was easy! As usual I decided to use recycled cardboard instead of wood. And from there, everything fell perfectly into place
Video Tutorial
To watch video tutorial click on the video below.
step By Step Written Instructions
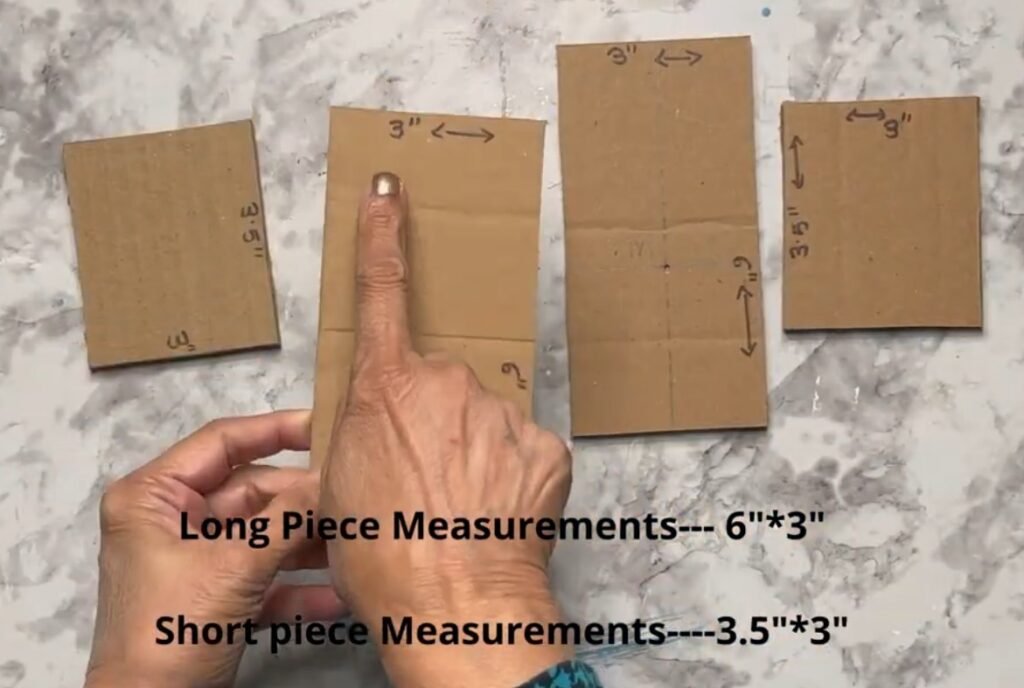
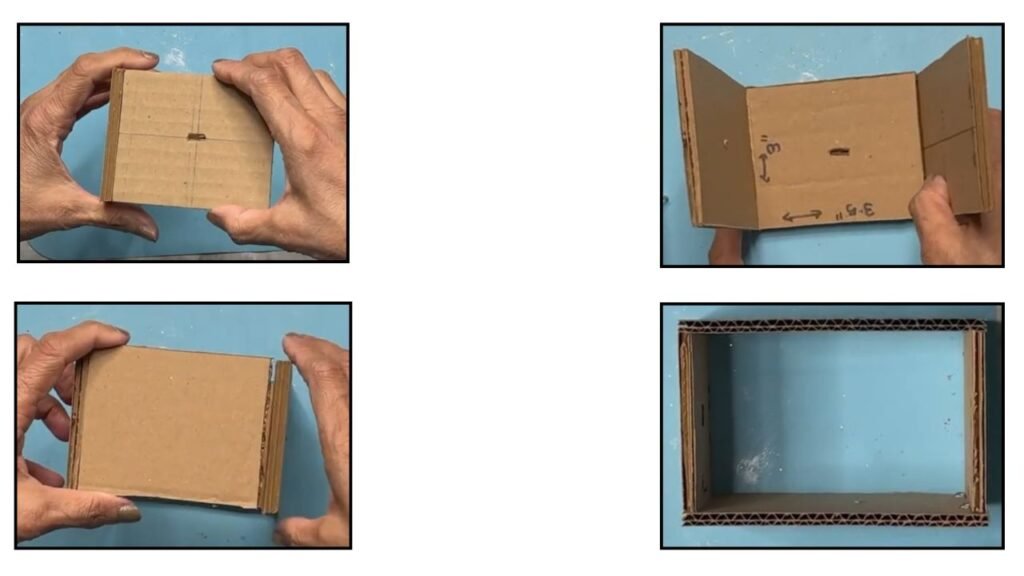
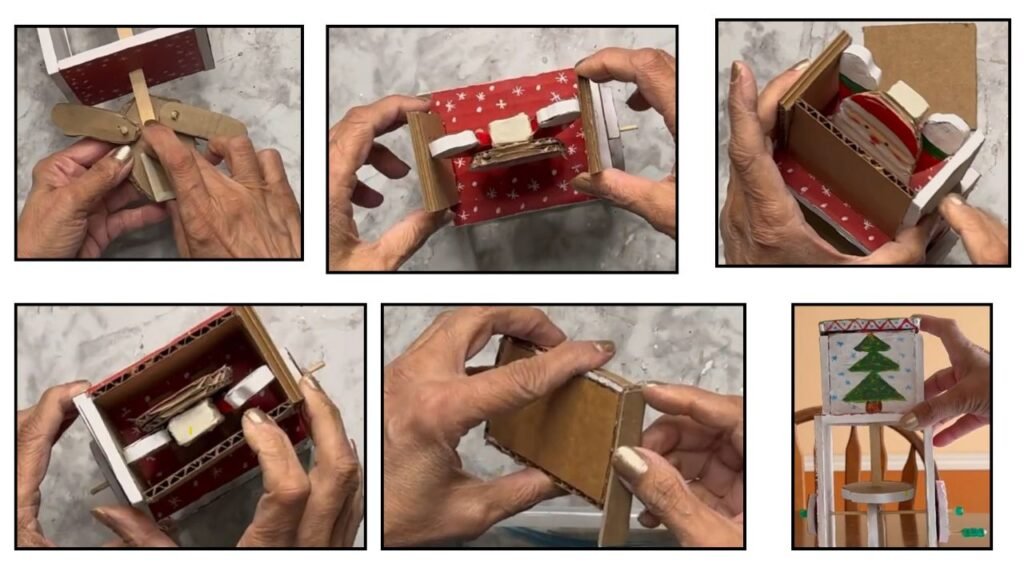
- First Cut out rectangles out of cardboard to make basic frame for this toy!
2. Next, Make a hole in the long pieces at 2.5″ And make a slit to insert a small craft stick in it.
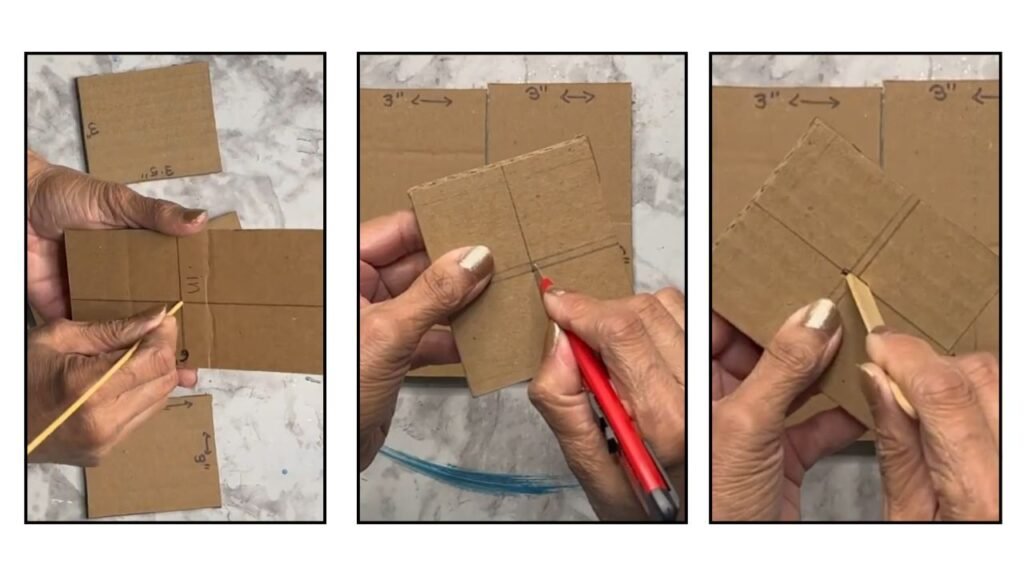
2. Next, stick the pieces together to make a frame as shown.
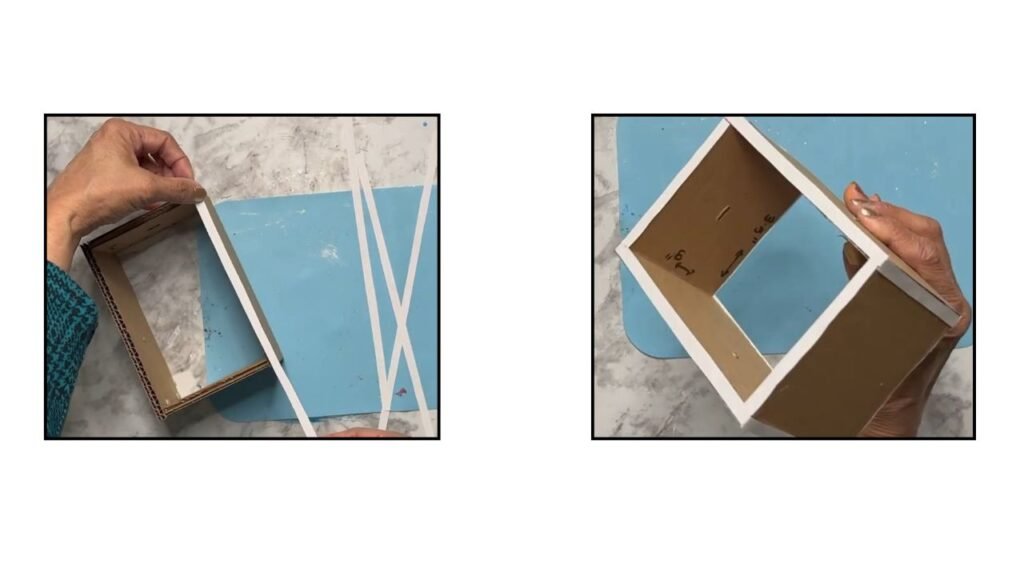
3. Next, covered rough edges of the frame with white paper strips.
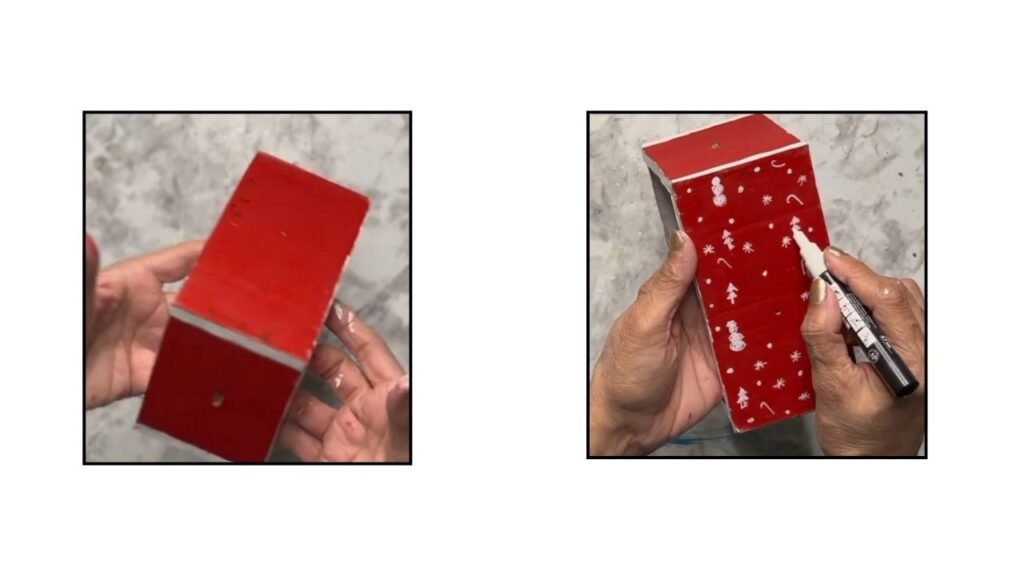
4. Next, Paint and decorate frame.
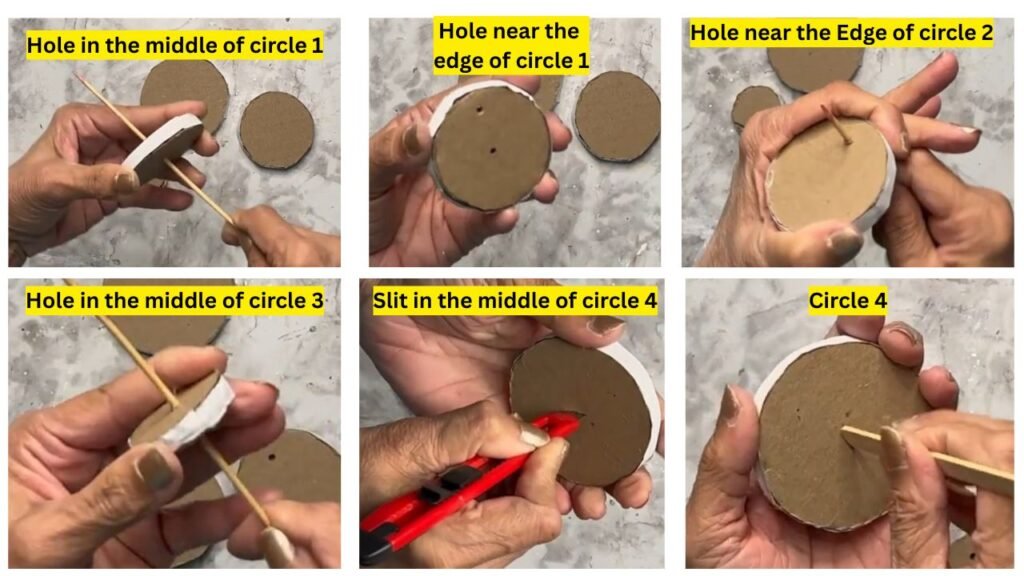
5. Make 4 wheels out of cardboard
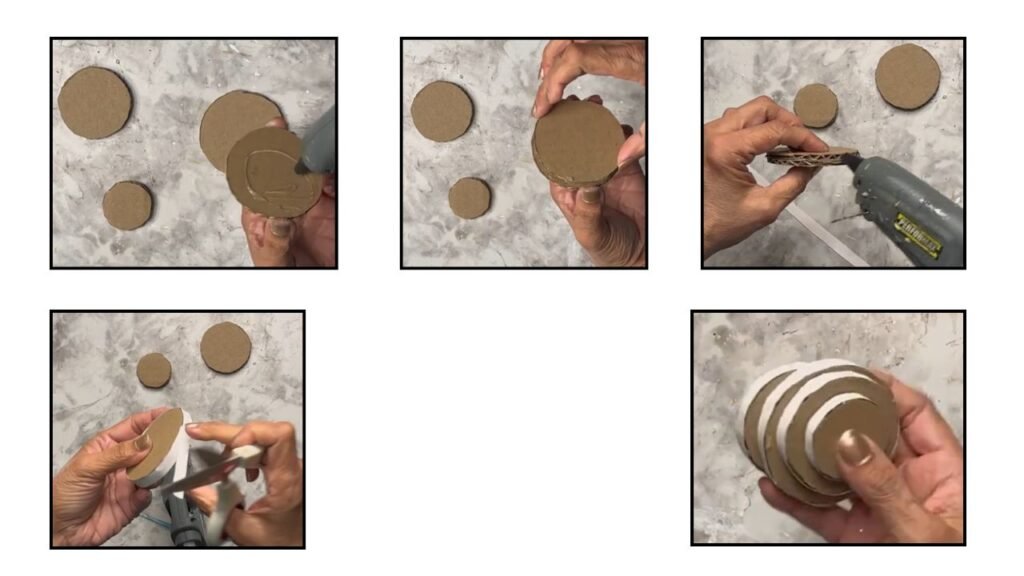
6. Make holes in the wheels as shown.
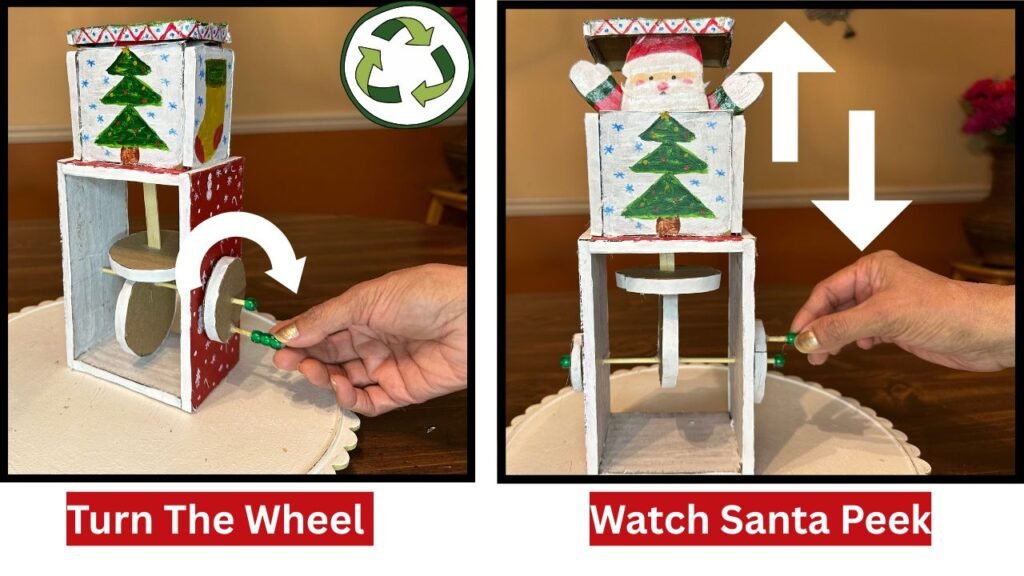
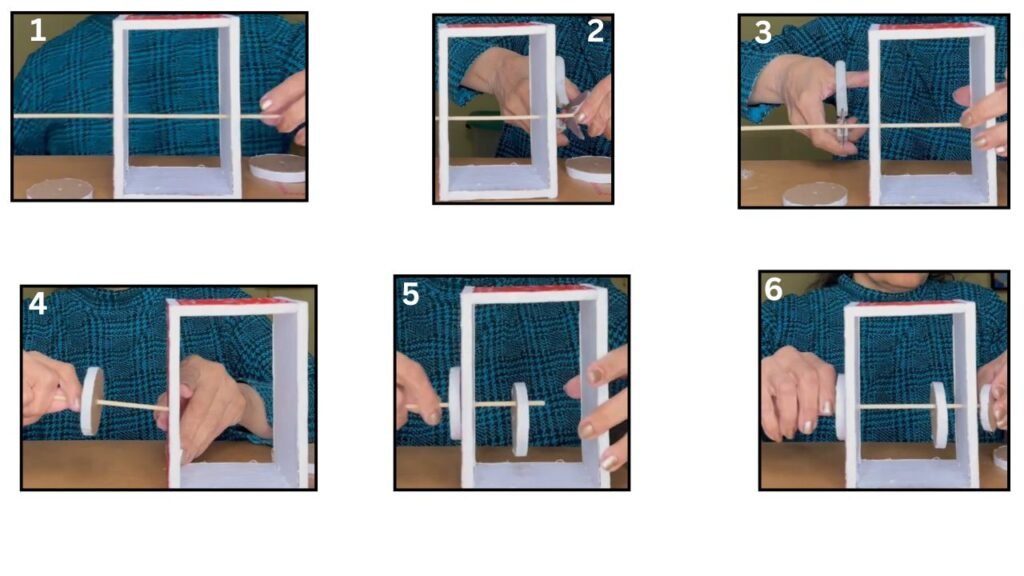
7. Now put the automata mechanism together. Placed wheels in place as shown. For more clarity and to watch this step in action, please watch video from 4:16 to 6:11

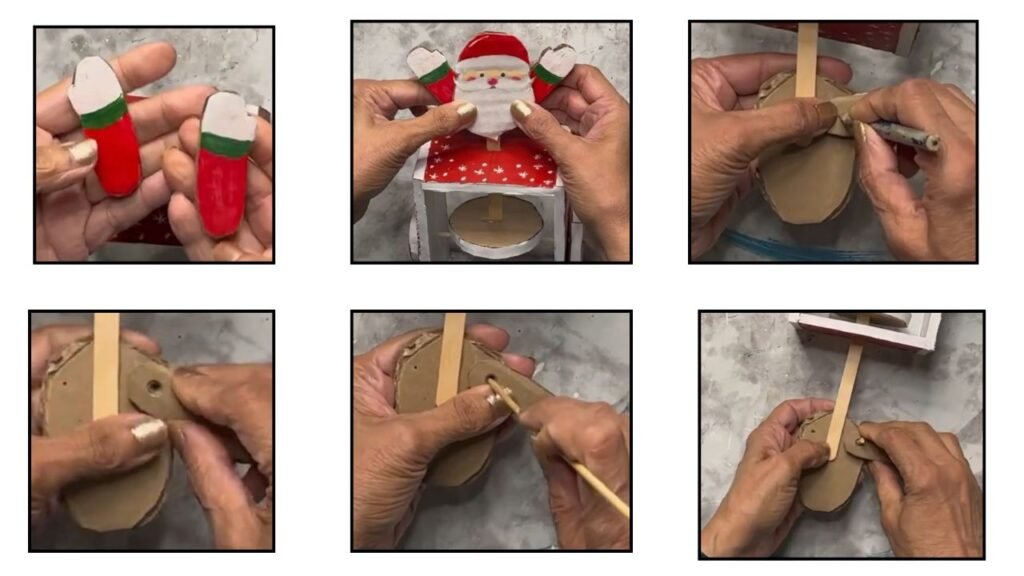
8. Next, Attach Santa figure on the craft stick
9. Next attach arms to Santa as shown. You can watch video from 6:27 to 8:15

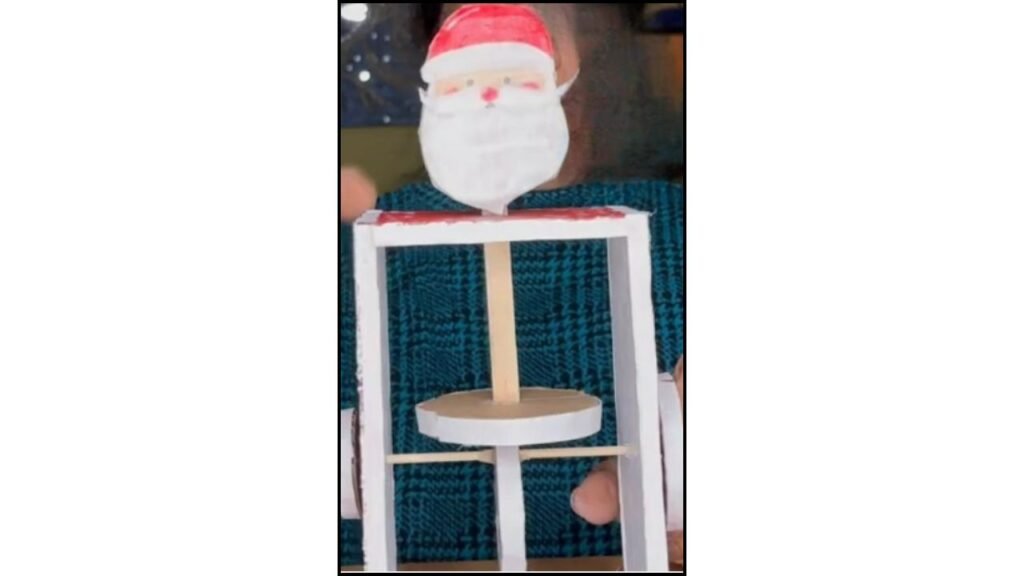
10. Next, Build a box around santa to hide 8:39-9:52
Tips And tricks
Here are a few tips based on my own experience while making this toy:
- Hole placement: I originally made the hole on the long side of the rectangle at 2.5″, but I now suggest placing it at 3″.
2. Wheel size: Make the wheel a little bigger so it pushes Santa upward more and gives a wider waving movement.
3. Wheel clearance: Ensure the wheel does not touch the bottom of the frame, or it won’t move smoothly.
4. Santa’s arms: Keep the arms short enough; if they’re too long, the box won’t close properly and the mechanism won’t work.
5. Arm stoppers: When attaching the arms to the wooden sticks, I used a glue bead as a stopper. It works, but there’s a chance the arm may stick to the stick. Using real beads as stoppers is a better option.
6. Watch the video: I highly recommend watching the steps in real time in the video. Some things are easier to understand when seen in action rather than just in photos.
Final Word
I hope you enjoyed this magical Peeking Santa toy! This unique, eco-friendly, budget-friendly creation is sure to bring a big smile to any child’s face when you gift them this handmade surprise. I’d love to hear about your own experience making it, any challenges you faced, mistakes you learned from, or clever solutions you discovered along the way. Feel free to share them here; I’d be delighted to pass your tips on to others.
Thanks for stopping by, and happy crafting to you all!