
Description
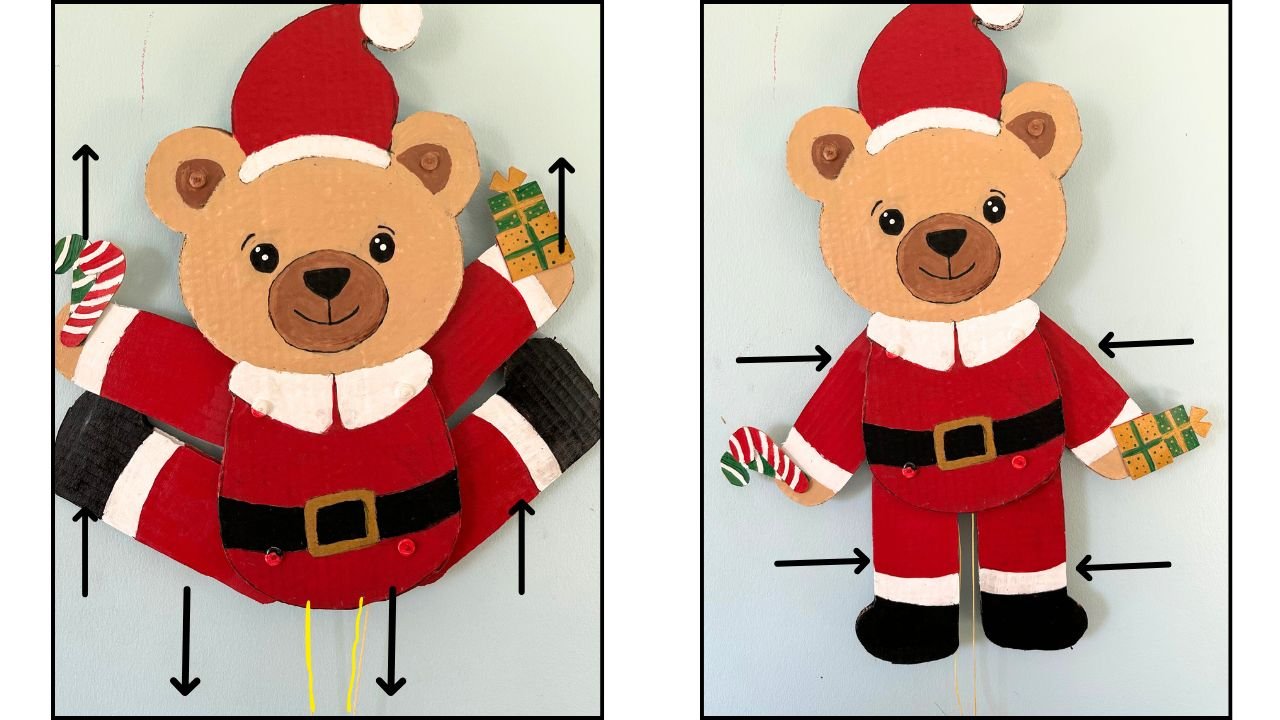
Turn simple cardboard into this adorable, wall-mountable Jumping Jack Christmas Teddy Bear! This budget-friendly and eco-conscious DIY toy is perfect for kids, grandkids, or anyone who loves handmade holiday crafts. Pull the strings to make the teddy’s arms and legs move it’s cute, interactive, and makes a wonderful handmade Christmas gift or festive decoration.
Material List
- Cardboard
- Acrylic paints
- Craft Knife
- String
- Flat Beads/Beads
- 1.5″ Nails (length varies according to thickness of cardboard)
Backstory
I’ve always been fascinated by moving toys. There’s something magical about watching cardboard come to life! I already have another Jumping Jack toy tutorial on my blog, and you’ll find two more moving-toy DIYs on my YouTube channel. I originally planned to create a more advanced Jumping Jack with additional moving parts, but with limited time this season, I decided to go with a simpler Christmas version. Don’t worry though, an upgraded Jumping Jack is definitely coming soon! This Jumping Jack is easy to make and advanced version is going to be easy too!
For Video Tutorial Click below
Step-by-Step Written Instructions
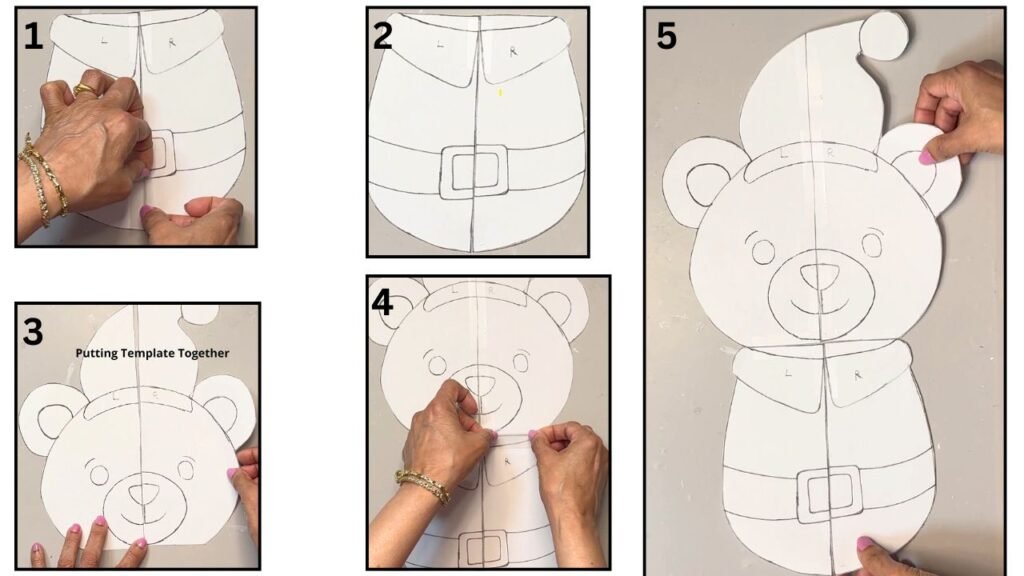
- Put the template together for teddy bear’s body.
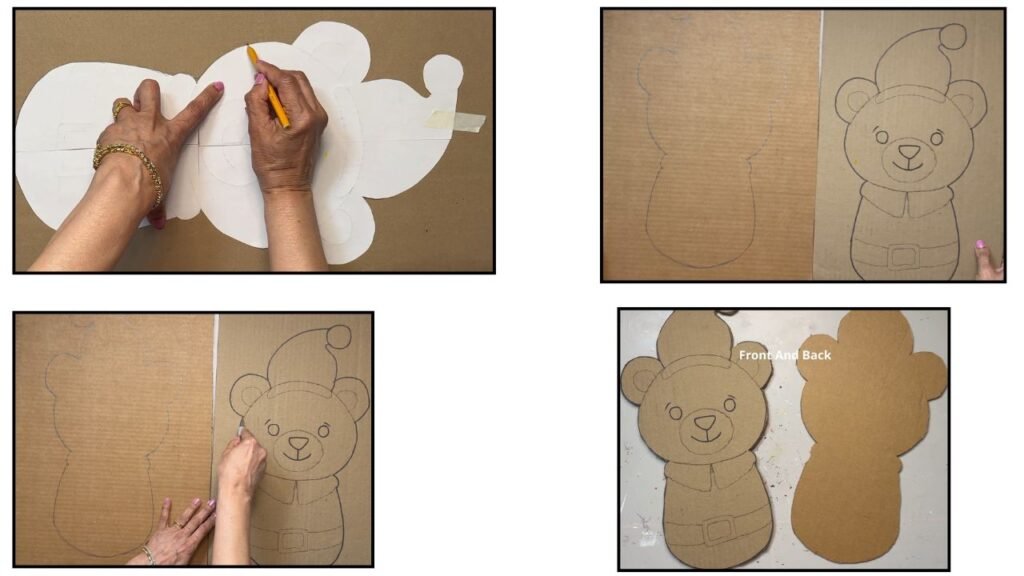
2. Place this template on a sheet of cardboard and draw around the shape. Used carbon paper to trace parts in the middle of body like ears, eyes, mouth etc.

3. Flipped the template and traced the mirror image of the shape to make back of the teddy. This will work just as a cover later. Now I got Back and front of the teddy which I cut out using craft knife.
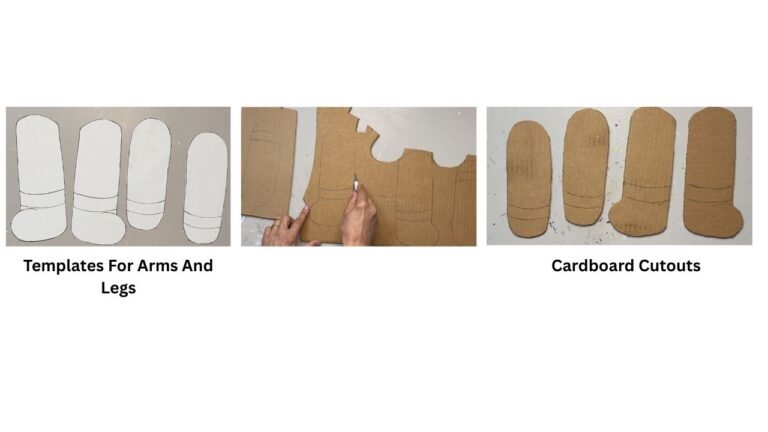
4. Next I cut out arms and legs for the teddy out of cardboard using templates for arms and legs.
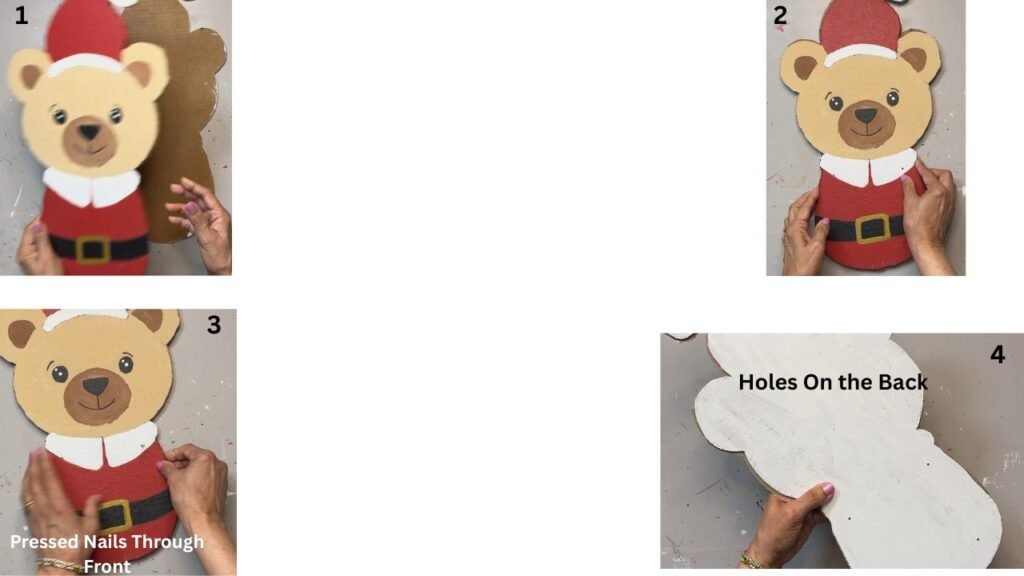
5. Next I painted all the parts making teddy look like Christmas Teddy Bear.
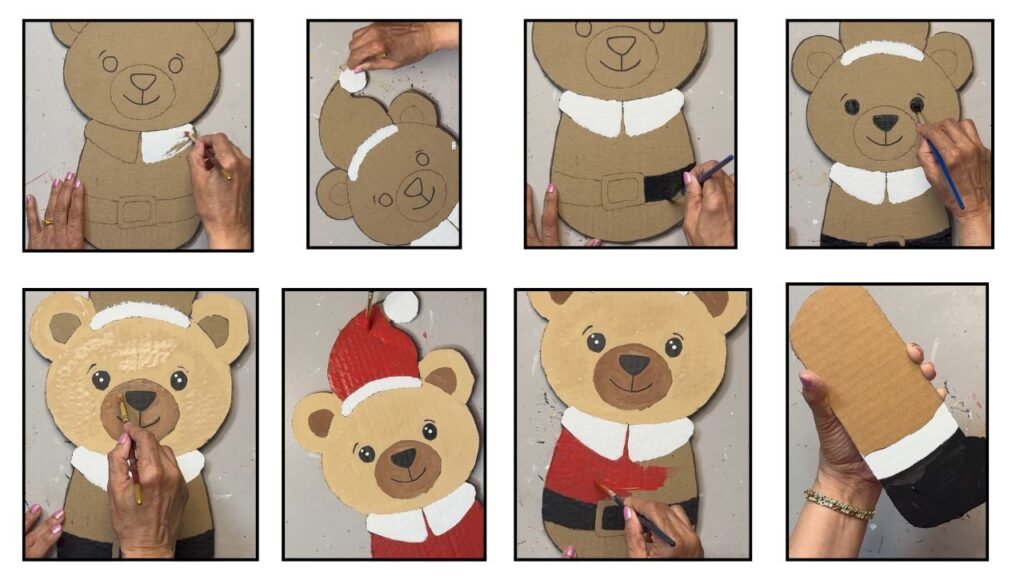
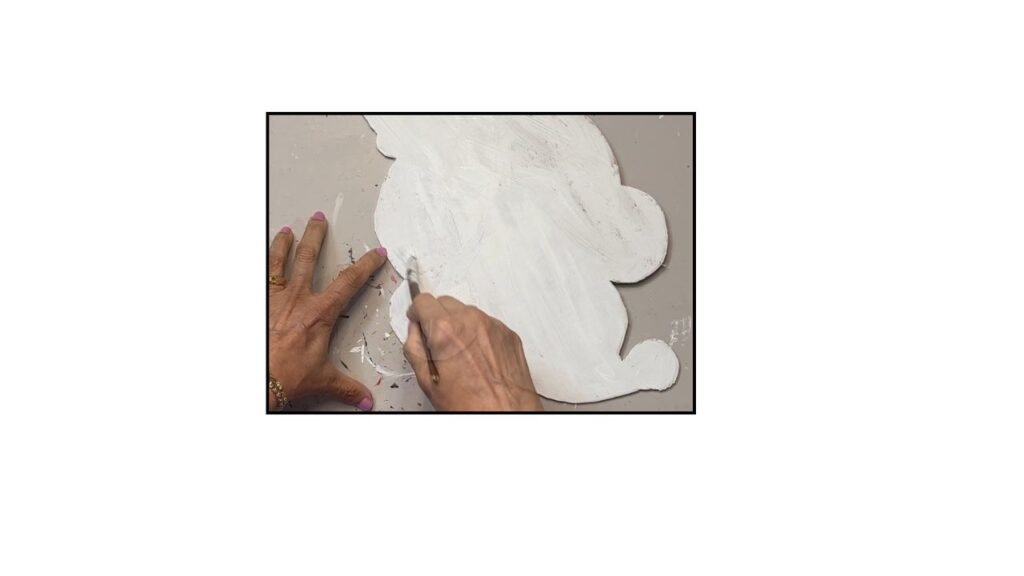
6. Paint back of the Teddy any color of your choice since its not going to show up anyways!
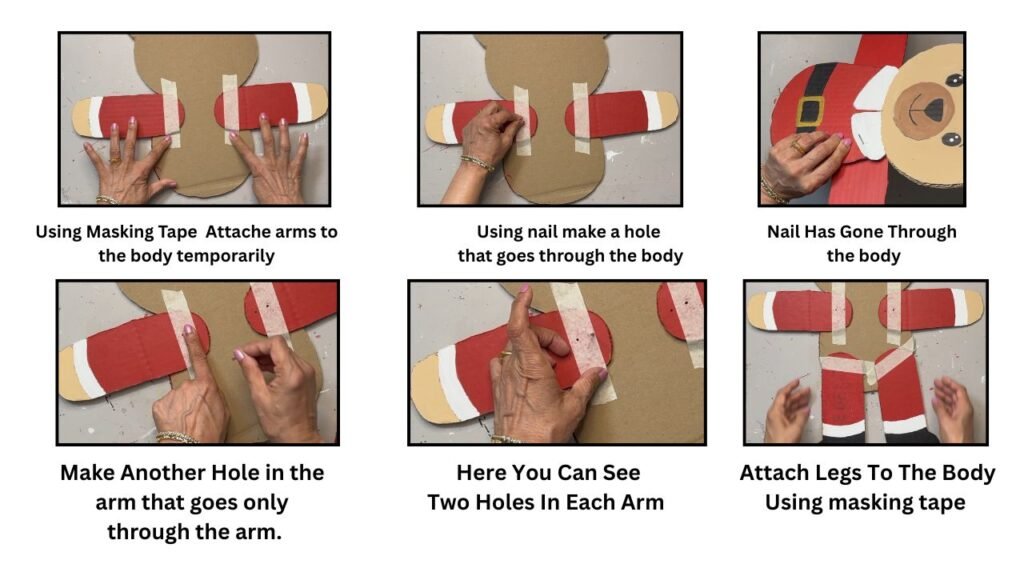
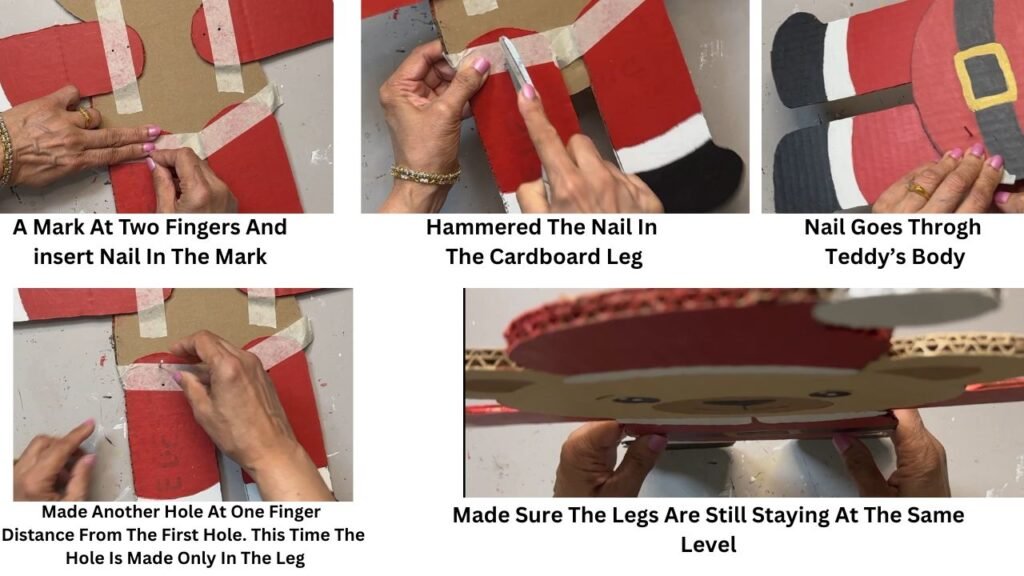
7. Decide placement of arms and legs of teddy and make holes to attache them as shown below.
8. Next Make Coordinated holes in th back part Of Teddy. Hold back and front of Teddy together and insert nails through top part and make impressions on the back part of teddy as shown
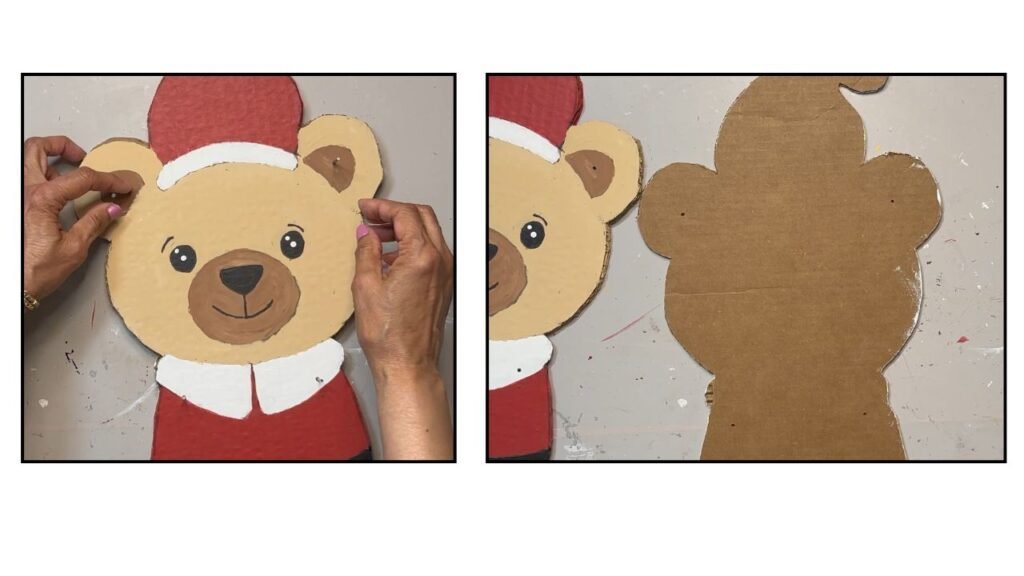
9. Next, Made holes in the Teddy’s ears. First insert nails in the holes of teddy’s body. Then Insert nails in the ears and press them to make impressions on the back part as shown.
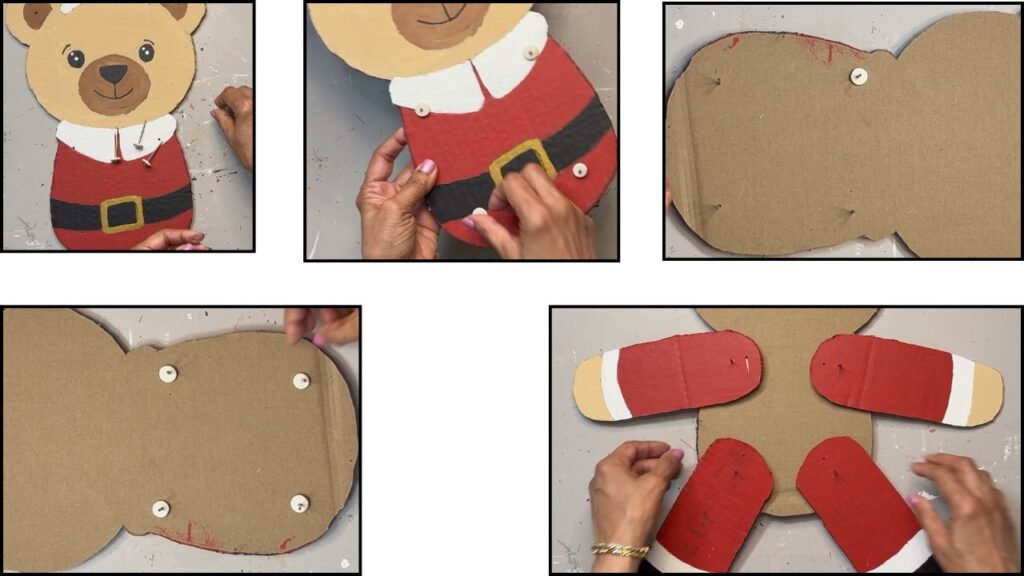
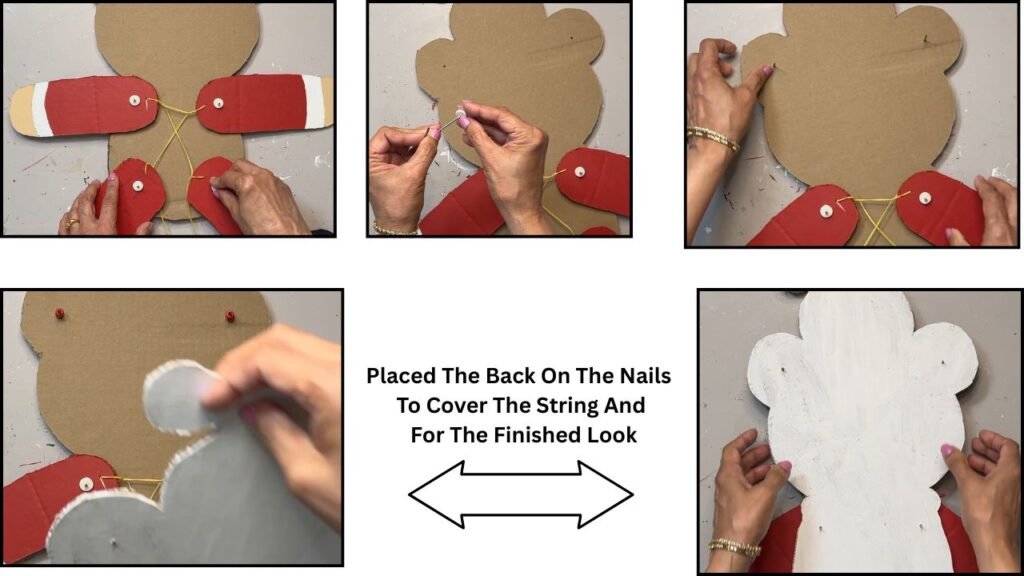
10. Once all the holes are made, inserted flat beads in the nails put the nails through the holes. Then again insert flat beads on the nails. Then strung arms and legs through the nails as shown.
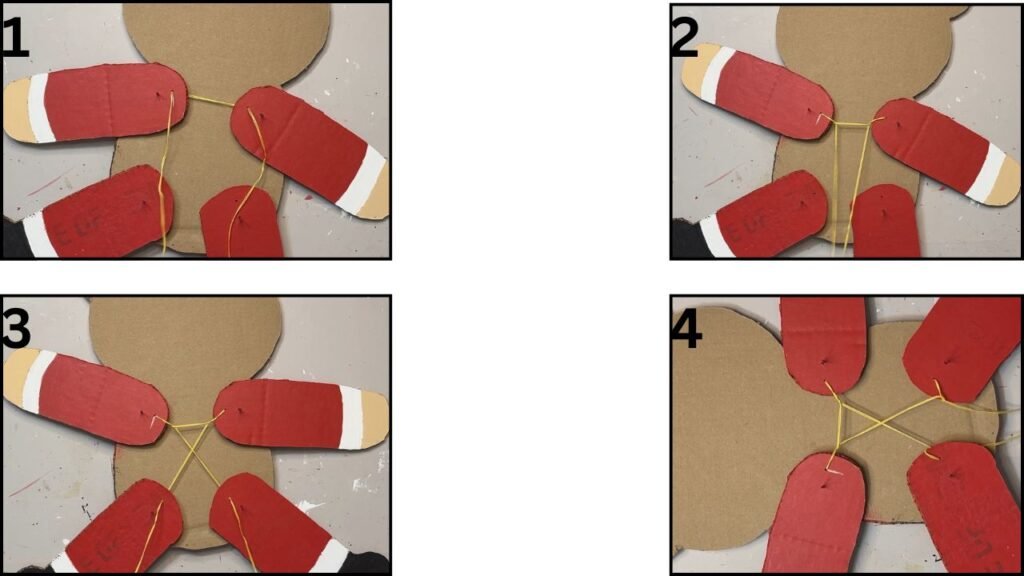
12. Now I strung the string through the arms and legs. You can watch this in action on my video for more clarity. The time period is from 5:25 To 6:37
13. Place flat beads and ponybeads on arms and legs nails and place pony beads on nails going through ears. And then placed back of the teddy bear on nails to cover the string as shown
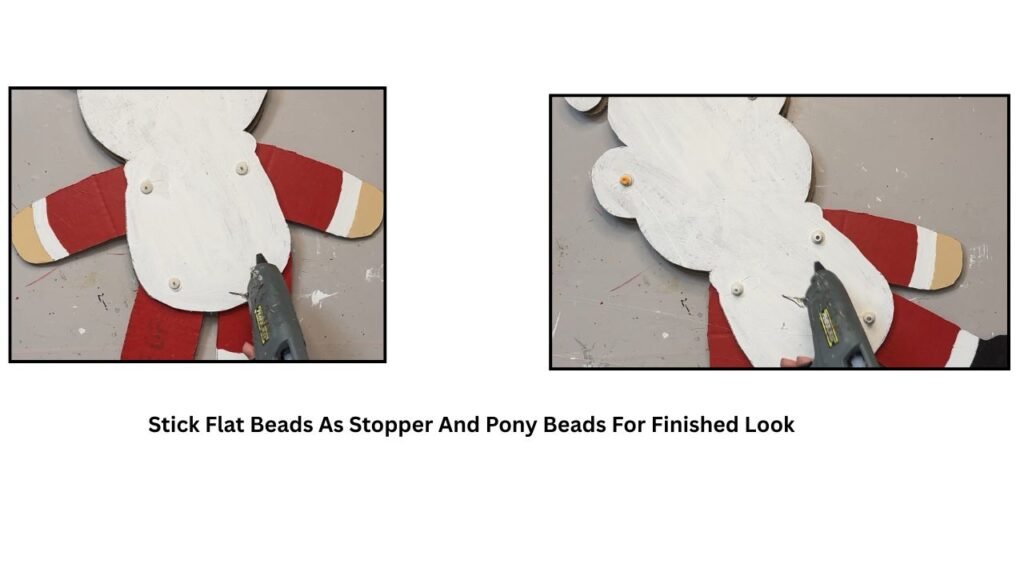
14. Next, placed the beads on the back part for finished look.
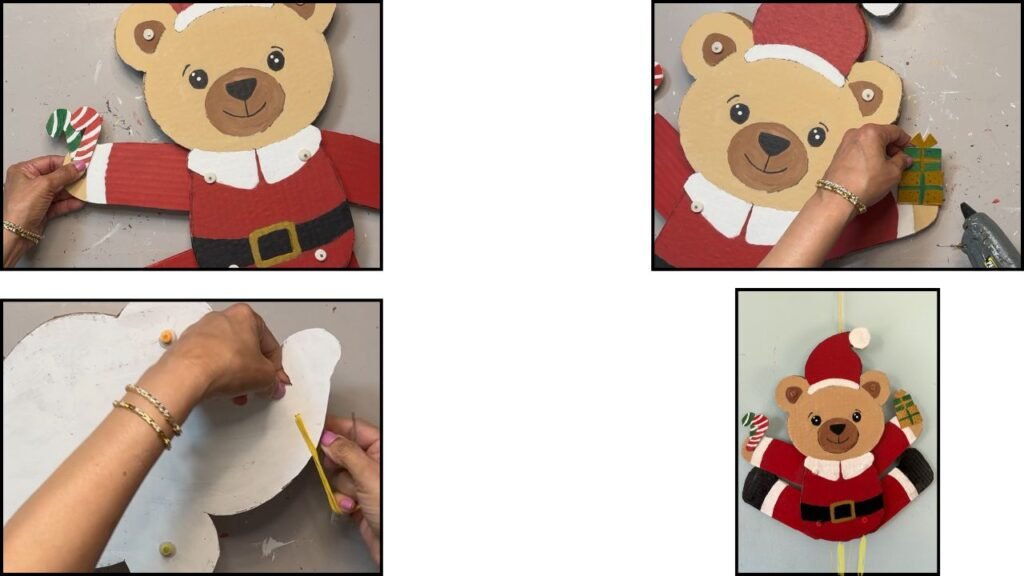
15. Stuck candy cane and gifts on the bear’s arms and finally inserted hanger on the Teddy.
Tips And tricks
Choose nail length based on cardboard thickness. Thicker cardboard requires longer nails so the tips extend out the back. This allows you to add beads and keeps the mechanism strong.
Use a sturdy string. Pick a string that won’t snap, even with repeated or rough pulling.
Avoid placing holes too close to the edges. Holes made near the edge can tear easily during play.
Align the legs correctly. When taping the legs to the body with masking tape, make sure both legs are positioned at the same height—otherwise the toy will look lopsided.
Final Word
This Christmas, you might want to make this little toy and impress your kids or grandkid, or simply enjoy crafting it for yourself. It’s easy, fun, and eco-friendly. As I mentioned above, I’ll be sharing one more moving Christmas toy that you’ll love making, and I’m also planning another eco-friendly Christmas decoration tutorial.
Thanks for stopping by