
Description:
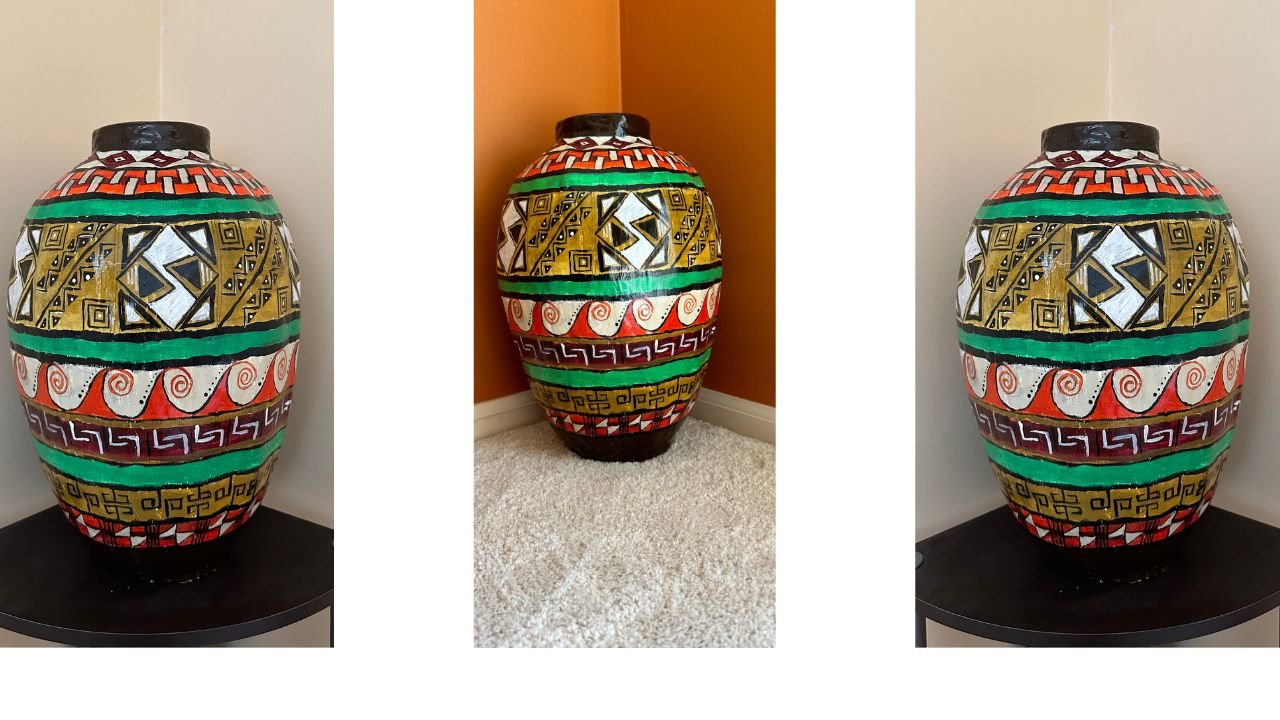
Inspired by bold and vibrant Inca designs, this floor vase is handmade from cardboard, painted with acrylics, and finished with wall putty for a ceramic-like feel.
Materials Used:
- Cardboard
- Wall Putty
- Acrylic Paints (regular or metallic as you wish)
- Paint Brushes
- Gloss Varnish
- Glue Gun
My Inspiration:

Backstory:
While searching for inspiration for my next vase project, I came across stunning Inca vases. Their bold patterns and vibrant colors instantly drew me in. Of course, those vases were ceramic. But I knew I wanted to recreate the look using recycled materials. I decided to make my version out of cardboard and painted it with acrylics. The traditional Inca vases I saw were smaller, but I envisioned something bigger. So, I made a floor vase instead, and I’m so happy with how it turned out!
For video instructions click on the video below.
Step-By-Step Written Instructions:
- First step is to build the vase armature. I Rolled soft cardboard to make a tube as shown.


2. To figure out the size of cardboard pieces I needed, I marked both ends of the tube onto a sheet of corrugated cardboard.


3. Next drew a line connecting the two marks. Also made a mark at 3/4th inch from top as shown. This 3/4th margin will be the rim of the vase.

4. Next, I drew a curved shape on cardboard to define the vase’s form. I cut out 24 identical pieces and glued them around the tube I made earlier. Used a template I prepared ahead of time.


5. I also marked ¾ inch from the top of the tube to indicate where the rim of the vase would be.

6. Next stuck the cardboard pieces. Stuck cardboard pieces opposite of each other as shown.


7. Then I glued additional pieces between the ones I had already attached. By the end of this step, I had a total of 8 pieces fixed around the tube.

Next, I added 2 pieces between each pair of existing pieces. By the end of this step, I had a total of 16 pieces attached around the tube.

Finally, I added one more piece between each pair of the previously attached pieces. By the end of this step, all 24 pieces were glued around the tube. And now I have vase armature almost ready.


8.Next, I closed the bottom of the vase armature by placing it on a piece of cardboard, tracing around its base to draw a circle. I then cut out the circle and glued it to the bottom of the vase, as shown in the following steps.


After drawing the circle I smoothed it out.


9. Built the rim of the vase by gluing the cardboard strips on the rim as shown


10. Next I started covering the vase armature with masking tape.


11. I made paste using wall putty and water. and applied it over the masking tape.


11. After the whole armature was covered with wall putty paste and dried, it looked like this.

12. Next I sanded it.

13. After sanding, it still wasn’t as smooth as I wanted. So I applied wall putty dough instead of the wall putty paste. Once it dried, I sanded it again. And this time, it looked just right.

14. I painted the vase with white acrylic paint. I used white acrylic paint as primer.

15. Next I drew design on the vase. First I drew lines to divide the vase in small and large parts. To make sure the markings stay uniform all around the vase, I used a strip of cardboard as a flexible ruler.
In the photo below I already drew a line at the neck of the vase. Then made a mark on cardboard strip(ruler). And using that mark drew a line all around the neck of the vase right under the line I already have drawn.

In the photo below you can see how I made a mark on the vase right at the red mark on the cardboard strip ruler.

16. Once all the marks are done all around the vase I drew a line connecting those marks as shown in the photos below.


17. In the photo below I made another mark on the cardboard strip ruler and as above I made marks all around the vase and drew lines connecting those marks. I showed this one more time below.


Photo below shows all the lines drawn.

18. Next I painted the vase with acrylic paints.

19. After paints dried I drew patterns on the vase and painted them.


20. After the paints dried Applied gloss varnish on the vase.

21. After varnish dried, this is how it looks.
Displayed on the side table

Displayed on the floor.

Final Note:
I’ll be emailing special tips to my subscribers, so your craft might even turn out better than mine! If you enjoyed this DIY, please subscribe to my blog and hit the Like button. It’s a quick way to let me know you appreciated this project. I’d also love to hear from you, so feel free to leave a comment below.
Don’t forget to check out my other blog posts for more creative inspiration. Thanks for stopping by, I hope to see you again soon!