Description
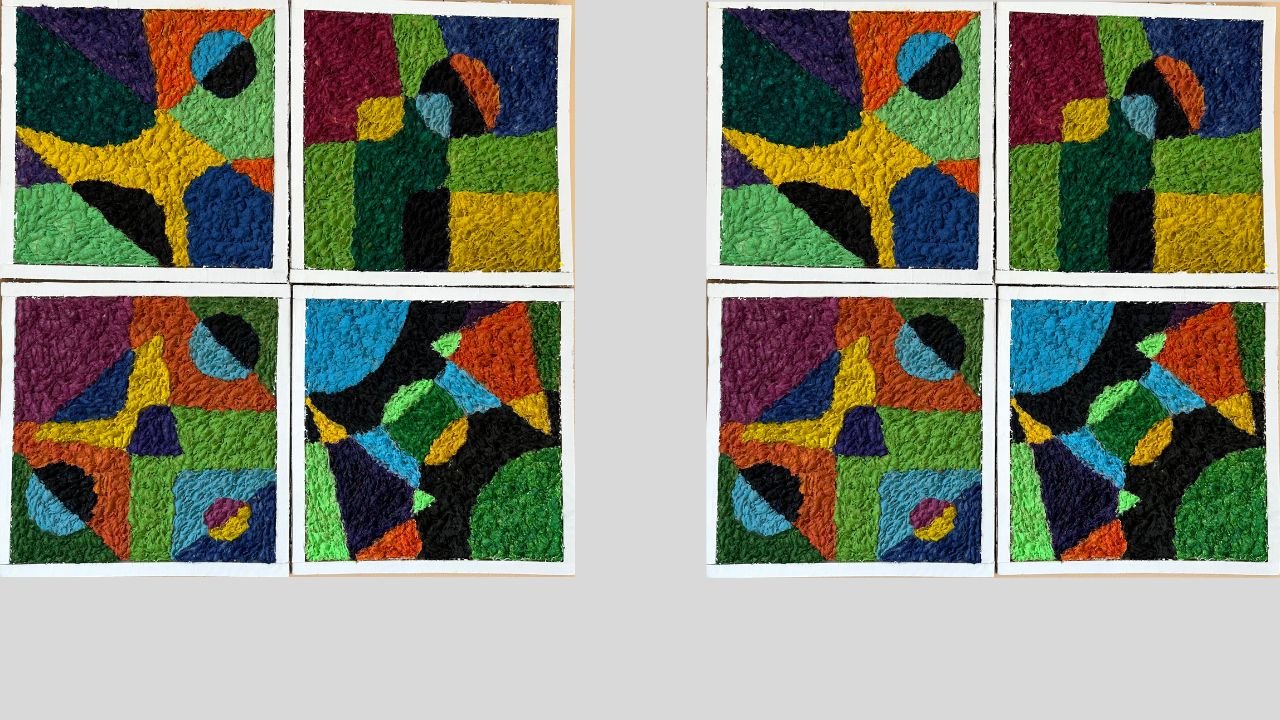
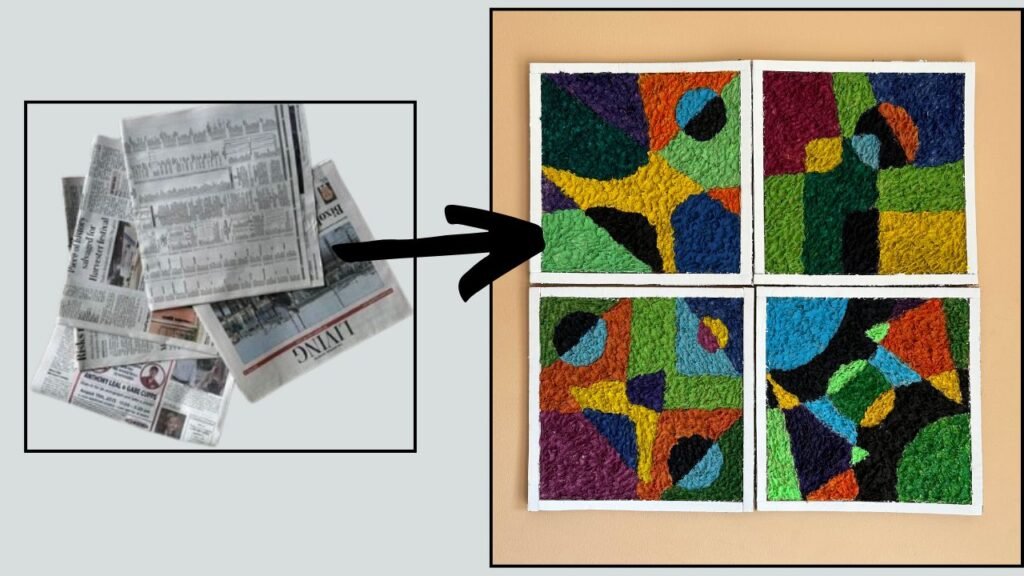
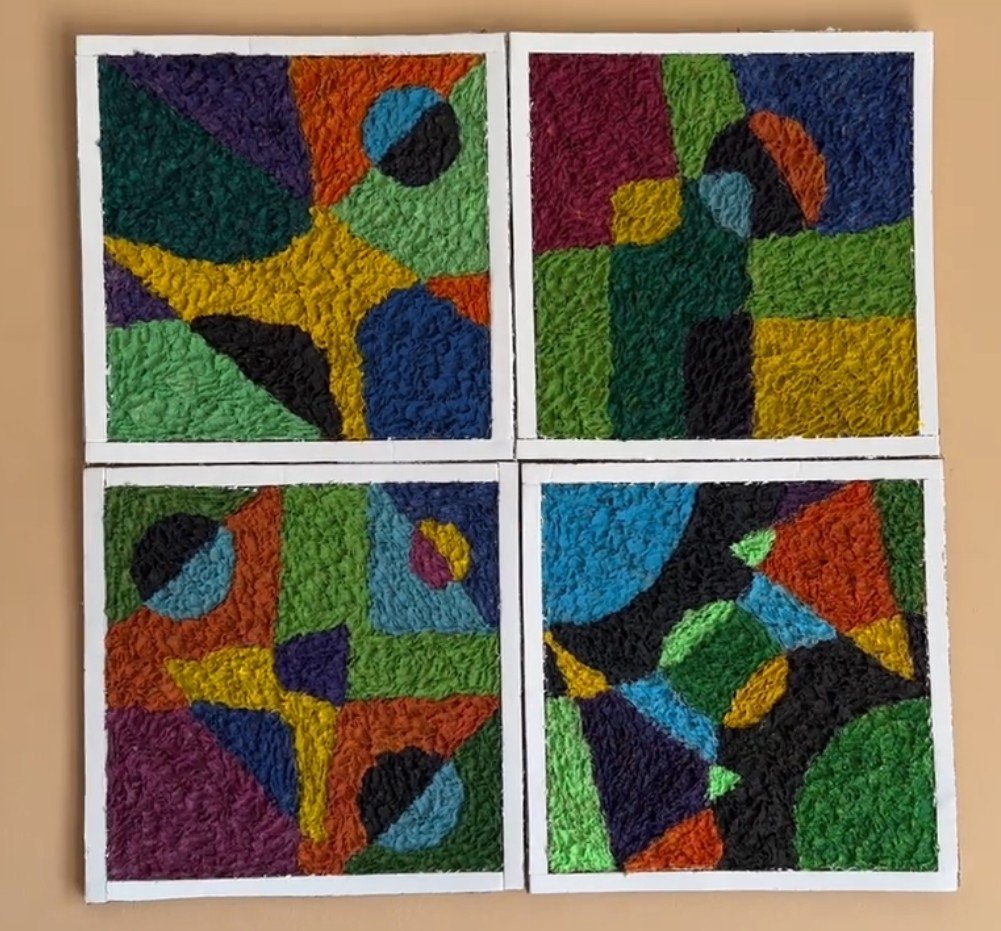
I created this wall decor using paper mache pulp. While paper mache is most commonly used for sculpting, here I’ve given it a twist and turned it into a vibrant piece of wall art. Mine is colorful, but you can make yours black and white, or choose any color palette that suits your space.
Backstory:
I wanted to make a paper mache project but didn’t want to sculpt, so, as usual, I turned to the internet for ideas. I came across small tiles made with paper mache using the same technique I used in this project. But most artists had made a scenery with it. So inspired I decided to create a colorful abstract art!
Material List:
- Newspapers Or any other paper
- School Glue or White Glue
- Cardboard or MDF Board
- Foam Board
- Acrylic Paints
- Paint Brushes
- Craft Sticks
- Small Plastic Cup or a container
- Pencil
- Paper (I used Tracing Paper)
If you want to watch a video tutorial, watch the video below.
Step-By-Step Tutorial:
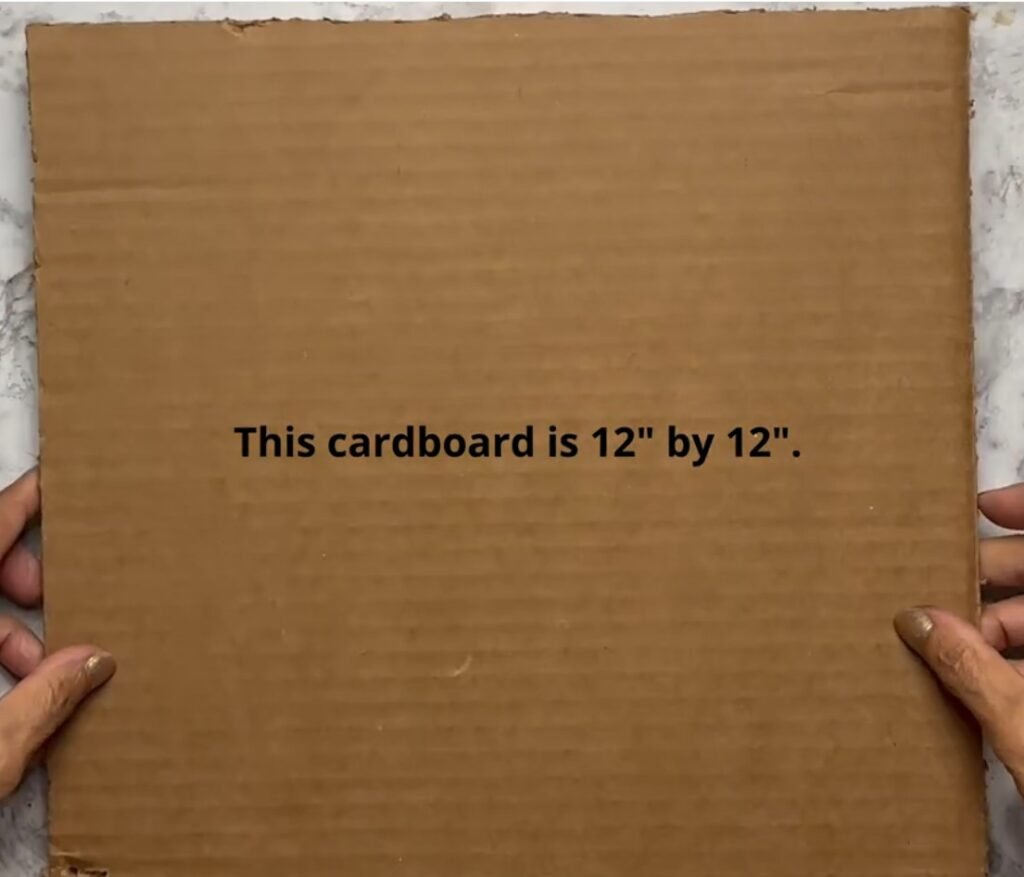
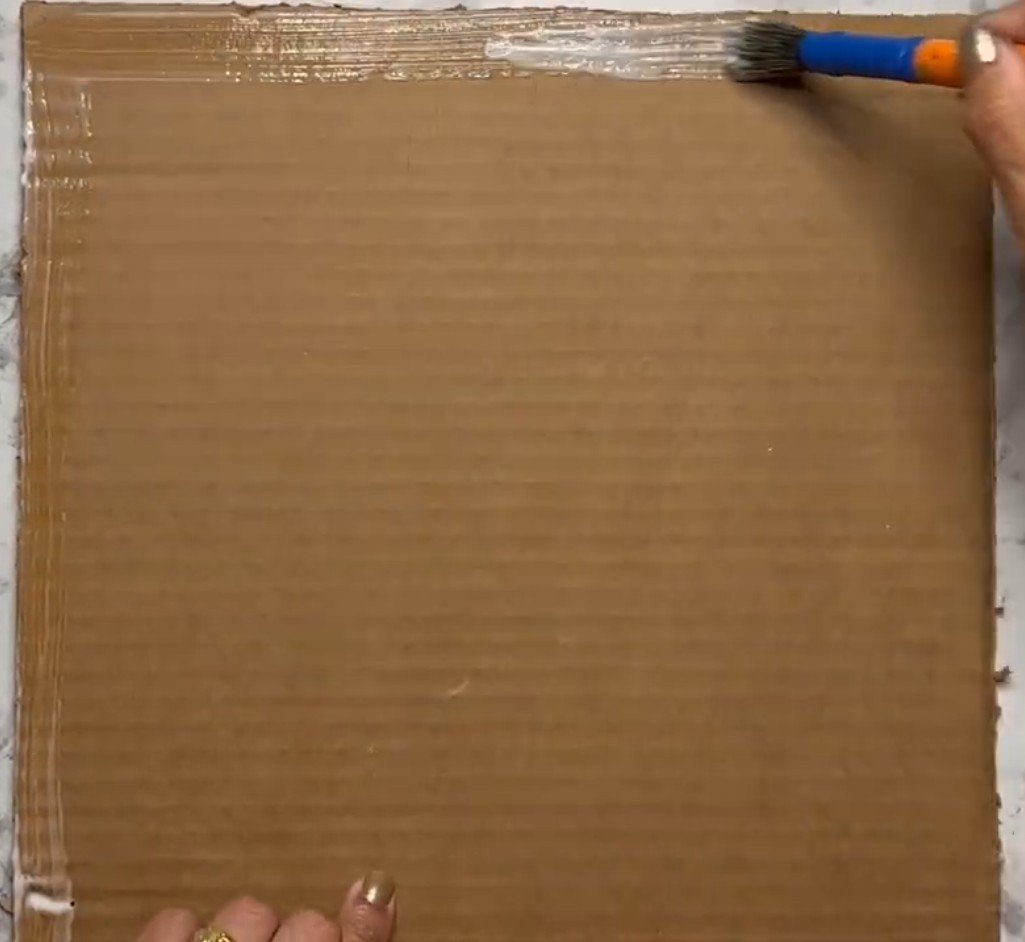
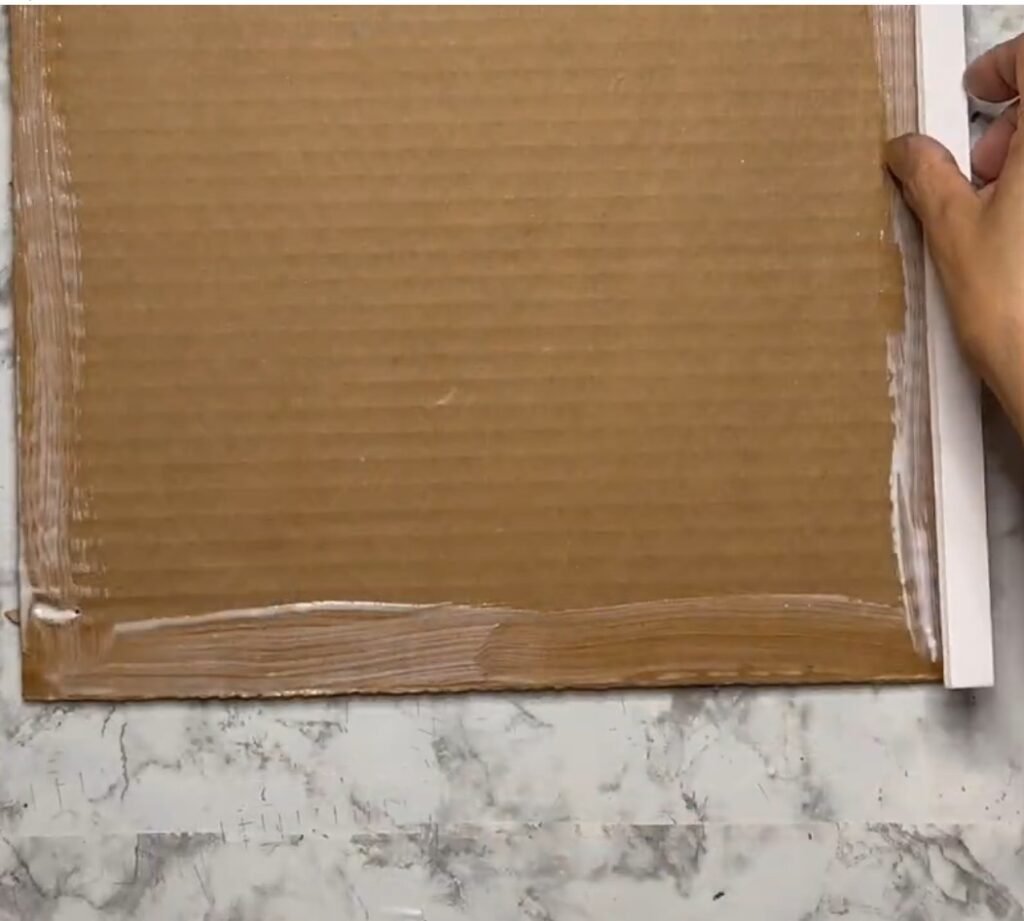
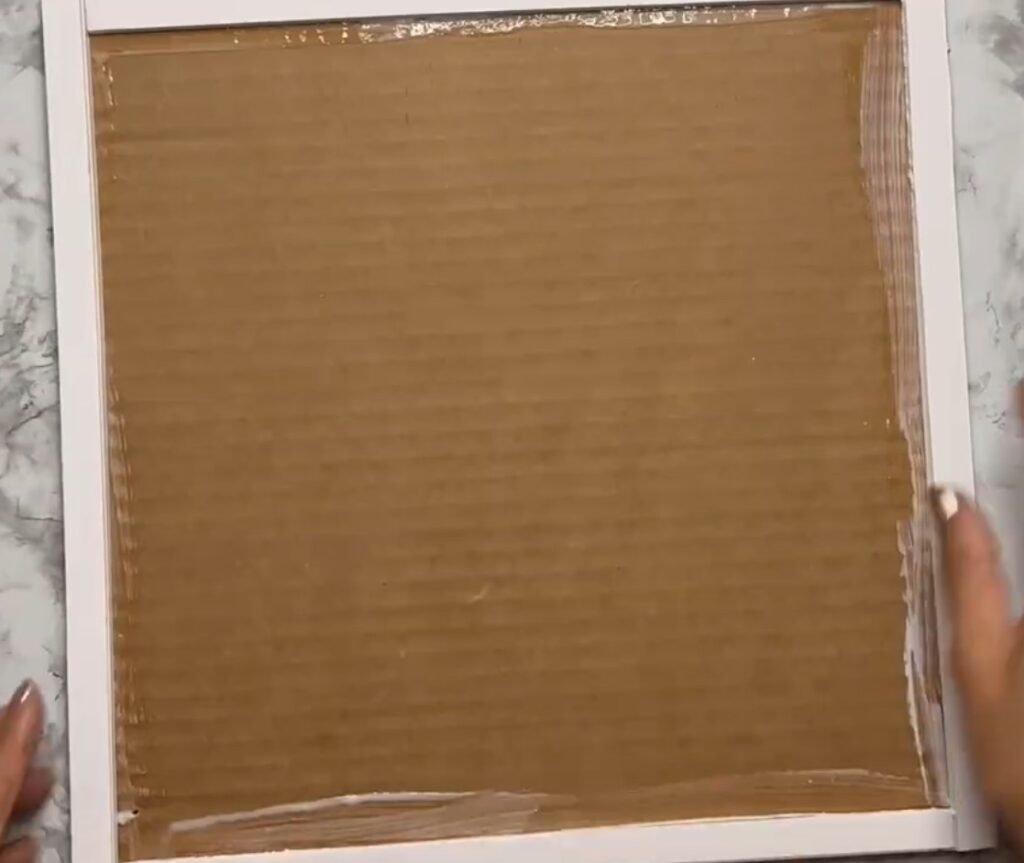
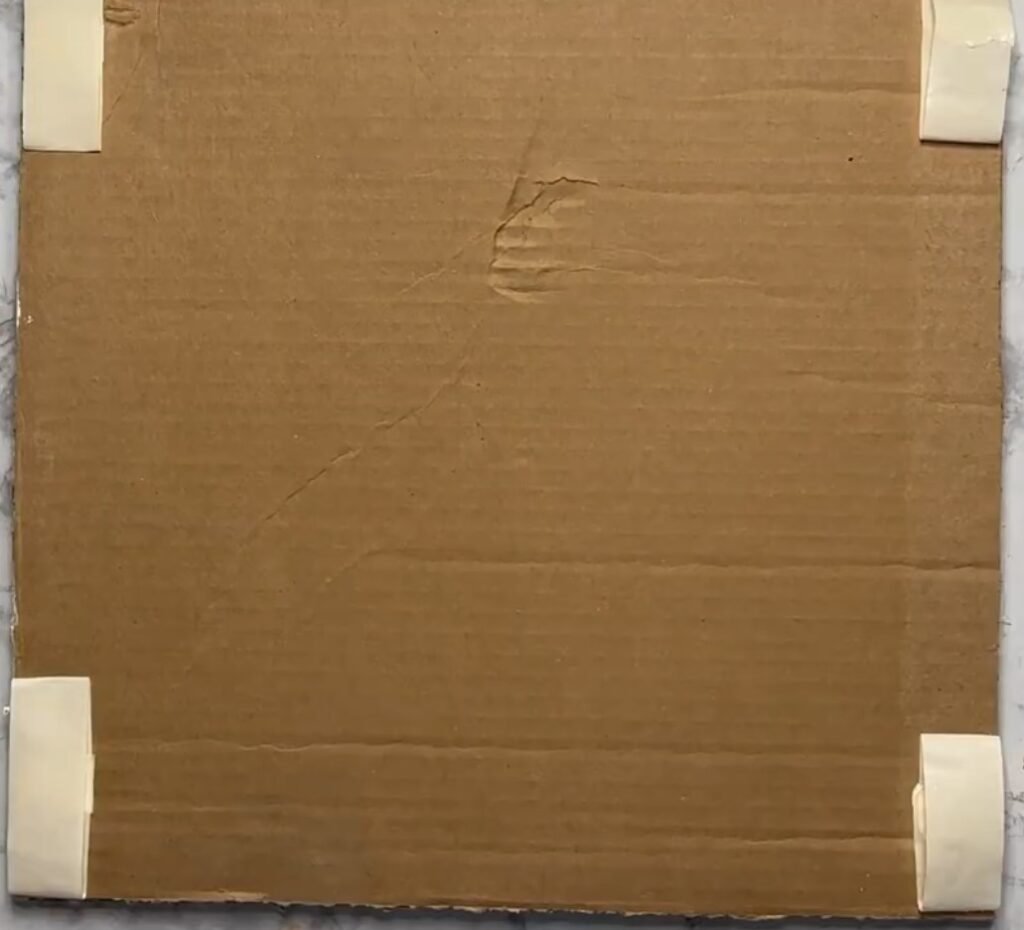
- Start with a 12″ cardboard square. Cut foam board strips that are 12″ by 1/2″. Using School Glue stick the strips on all four sides of the cardboard square, forming a frame.
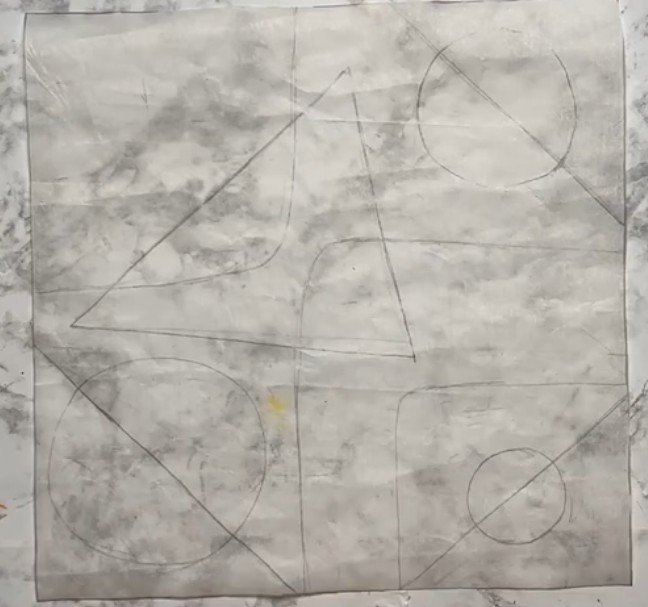
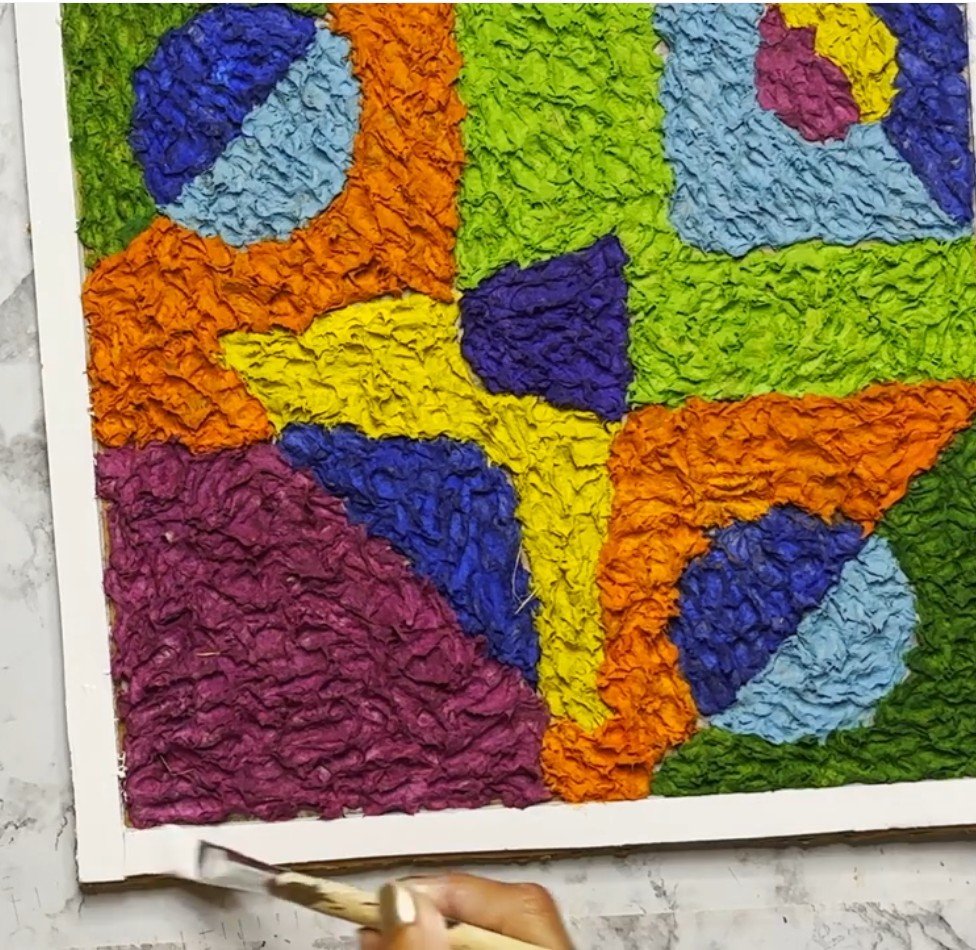
2. Next I drew an abstract design using simple shapes on a tracing paper square. Stuck that design on the cardboard square and set it aside for a little bit.

3. Next, I made paper mache pulp. To know how to make paper mache pulp please check out my post at https://ecobudgetcrafts.com/a-simple-paper-mache-clay-recipe/
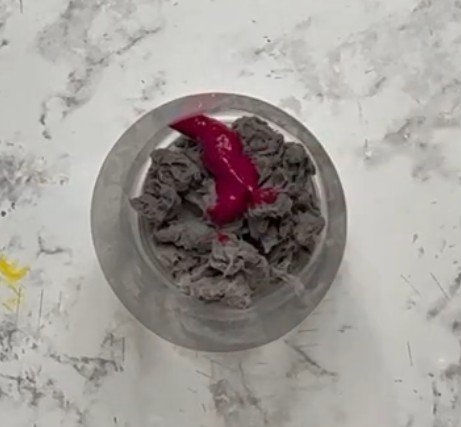
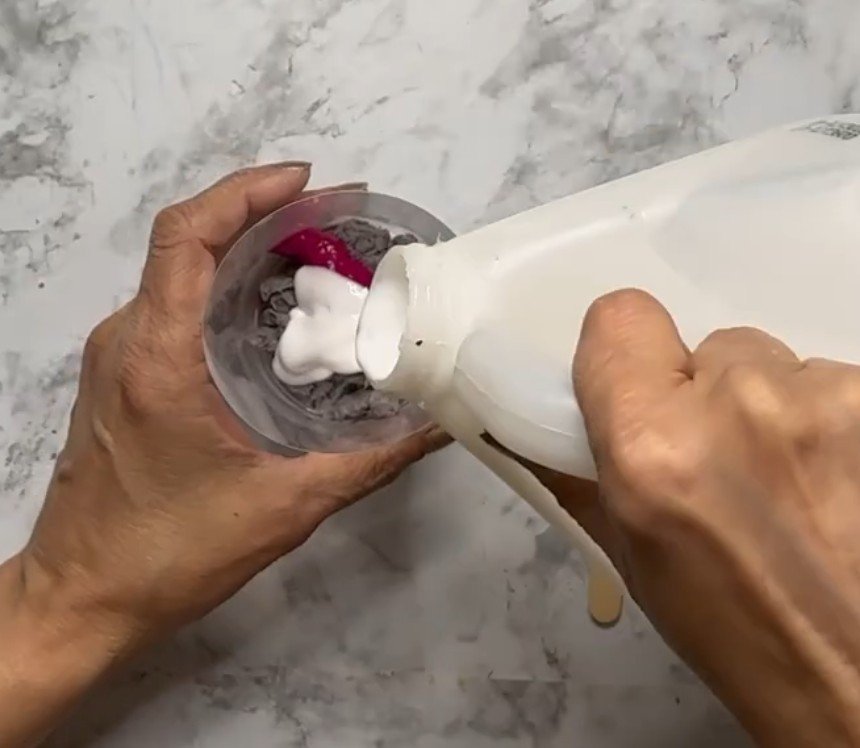
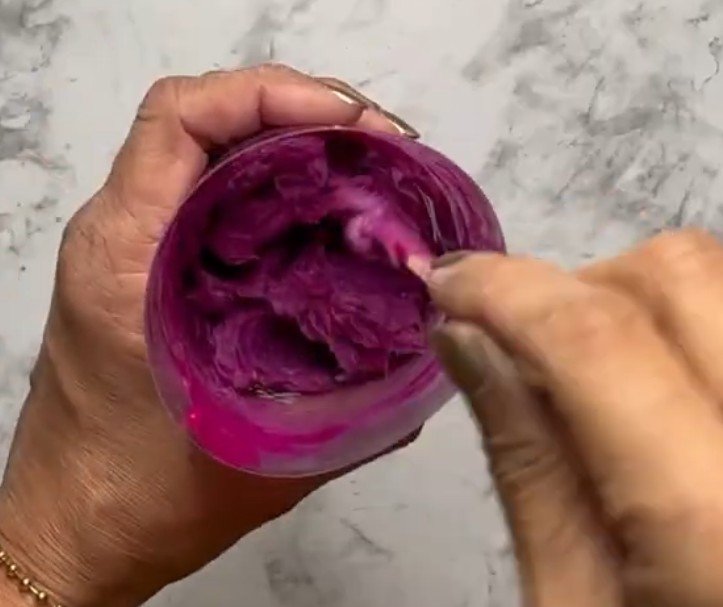
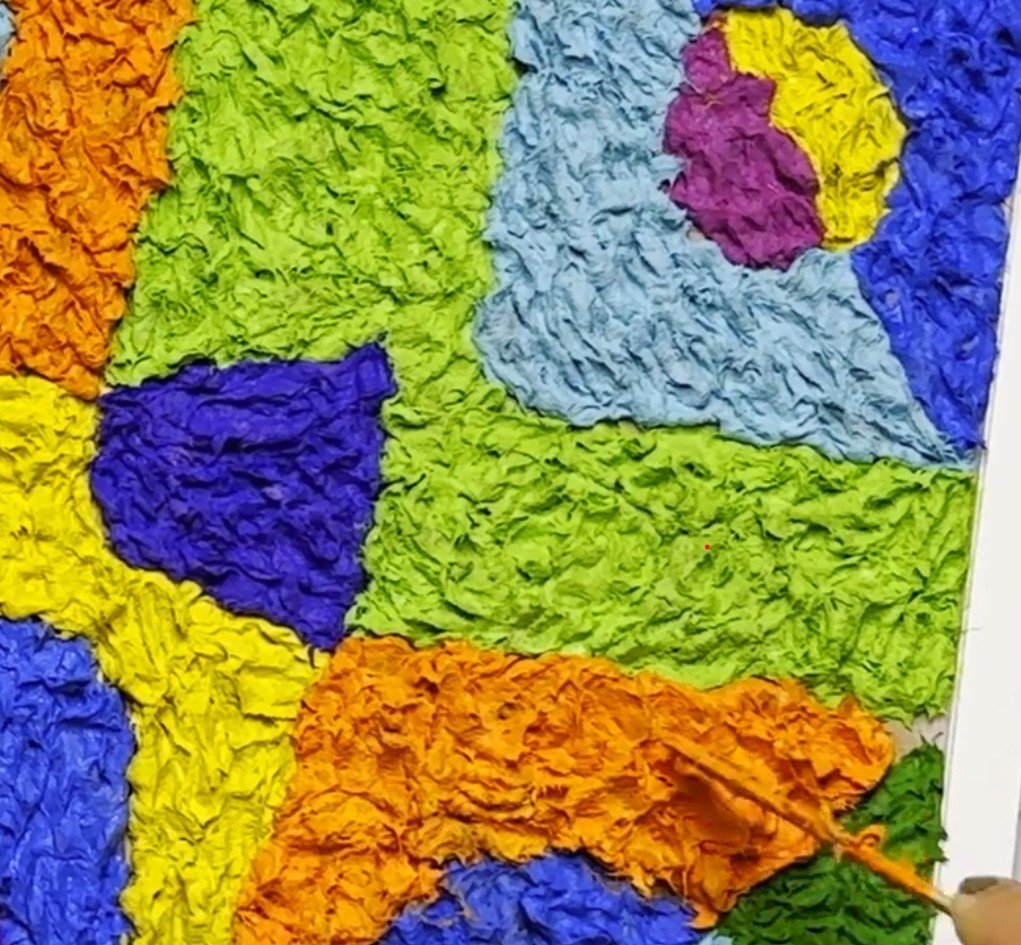
4. Take some pulp in a small cup. Add some paint in it. Next, add some school glue in it and then with the help of a craft stick, mix the ingredients until it forms papste as shown.

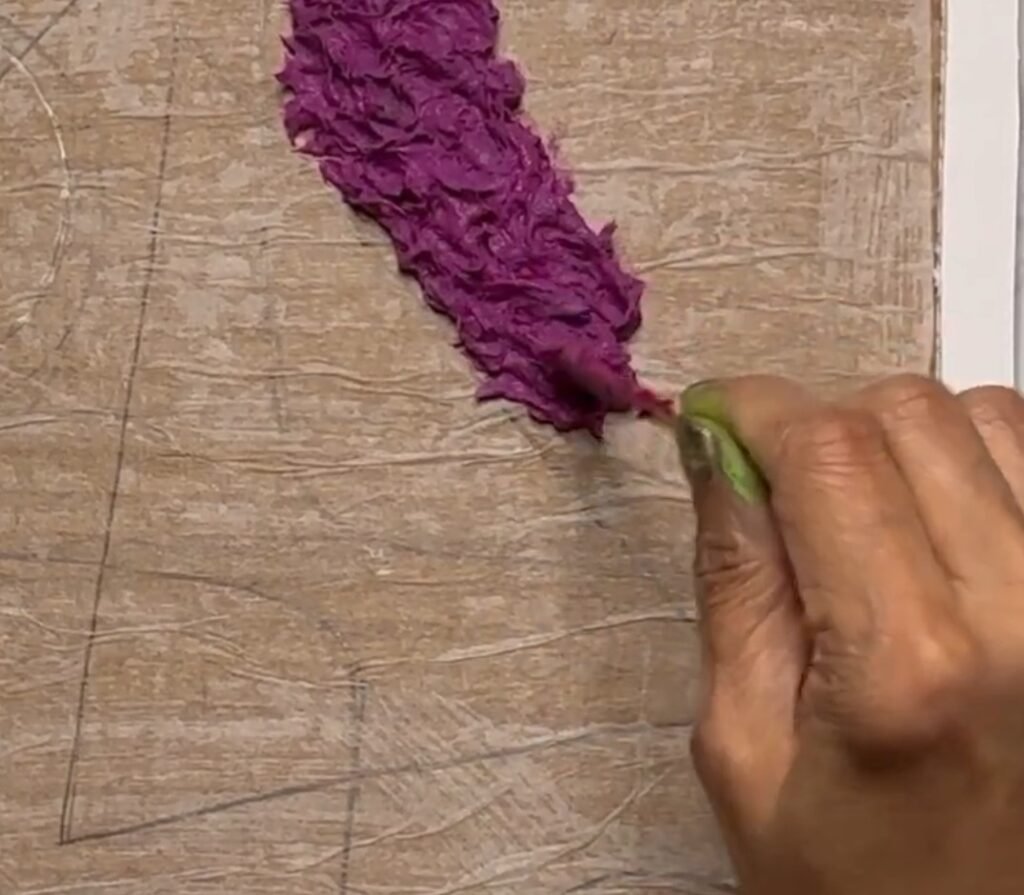
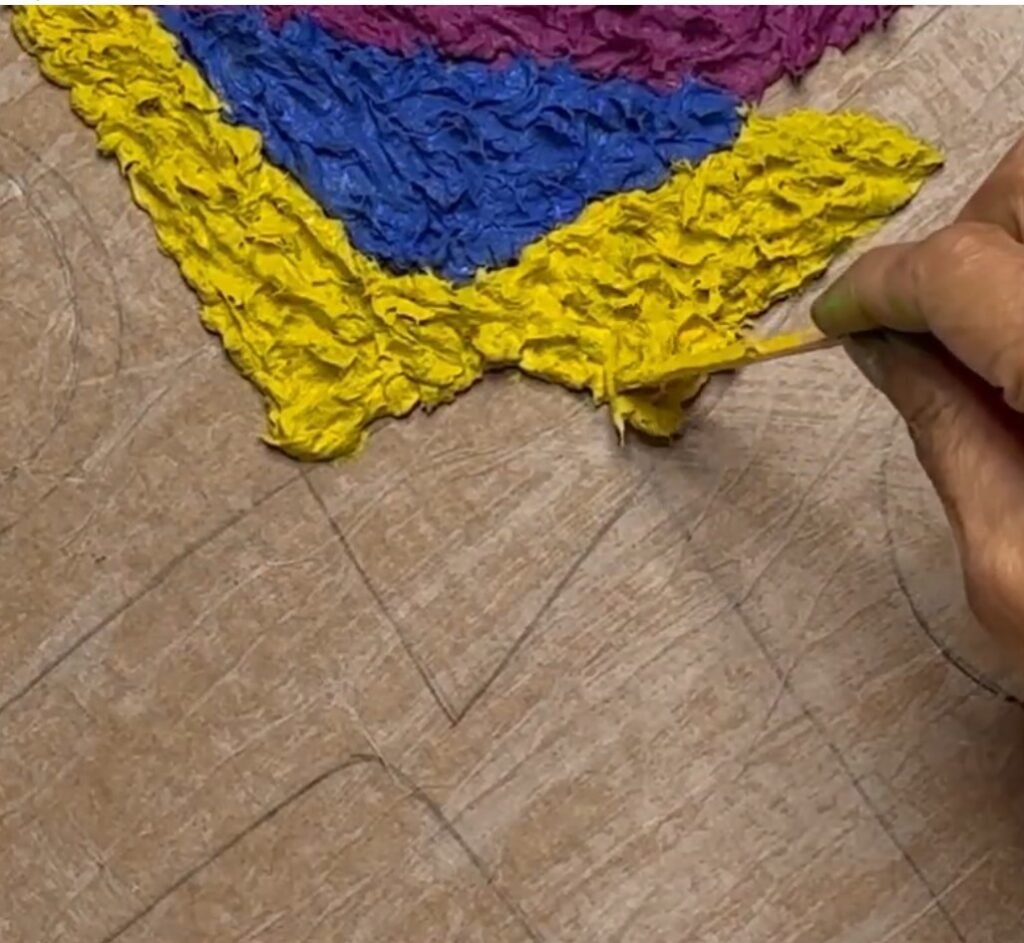
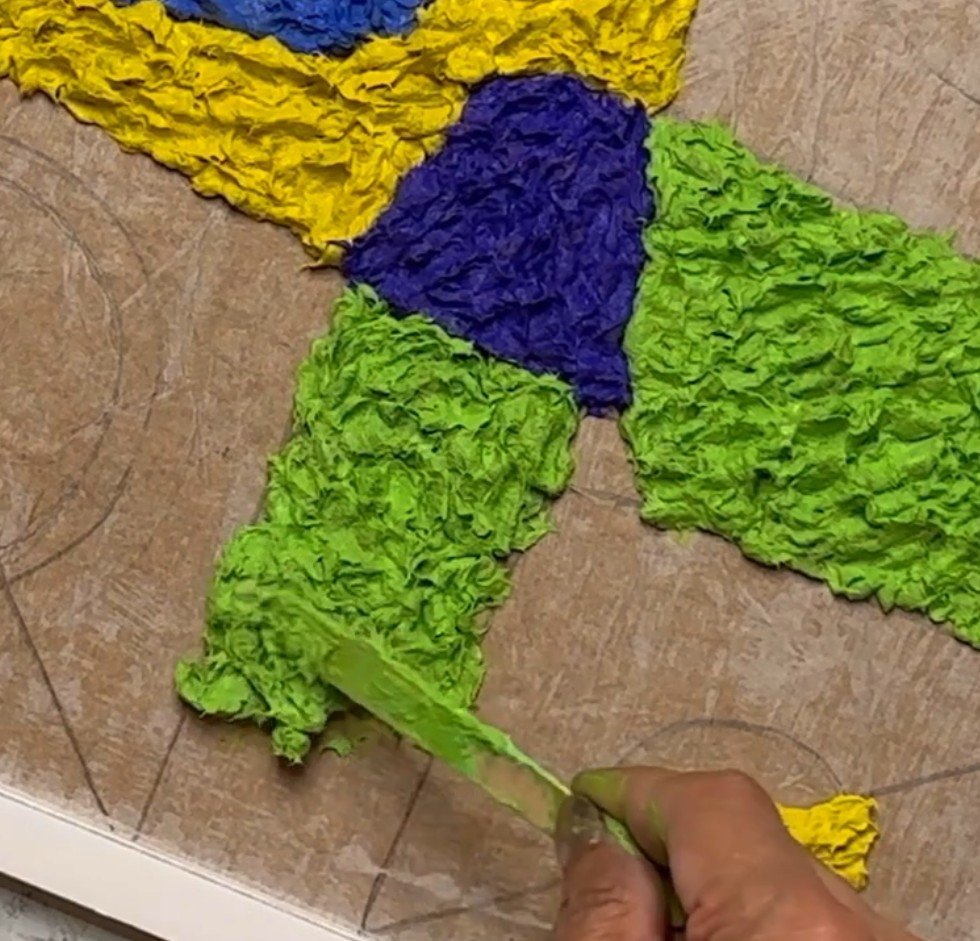
5. Next, with the help of craft stick, I started spreading the paste within the shapes.
6. After the tile was finished, I touched up the foam board strips with white acrylic paint to cover any areas where colored paint had gotten on them.
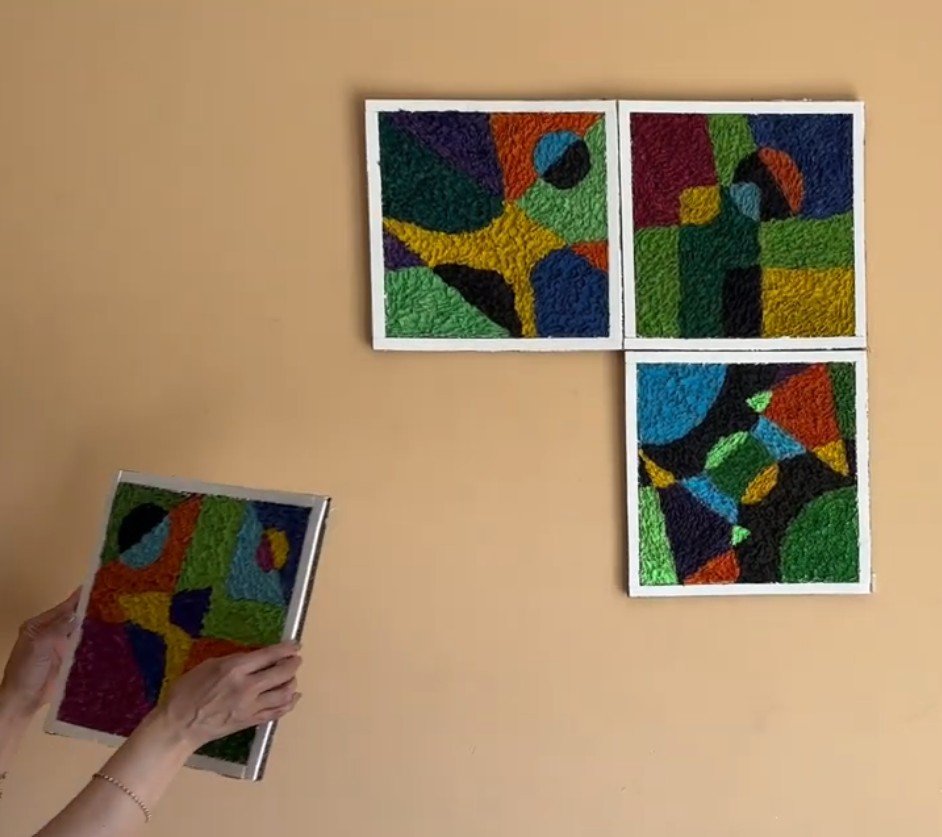
7. Finally I rolled pieces of masking tape and stuck them in the back of the tiles to display all four tiles I made.
8. Now I displayed the wall decor on the wall
Tips:
- Instead of cardboard, I recommend using MDF board or a wooden plaque, as cardboard tends to warp.
- I drew the picture on tracing paper because I wanted it to stick well and also act as a barrier for moisture. But unfortunately, that didn’t work! The cardboard still warped. Not too much, and not right away, but it did happen.
- That said, the project didn’t cost me anything extra to make, so I didn’t mind it! In fact, after every few days You can make different picture
- I used newspaper pulp, but feel free to experiment with different types of paper, you might get some interesting textures or effects in your art.
- You can make the paper pulp and store it in a Ziplock bag. This way you can use the pulp when you need it.
Final Word:
Many of you might already be familiar with this paper mache technique, but this was my first time trying it. I really enjoyed the process and hope you liked the result! It’s such a fun, low-cost way to create artistic-looking pieces, and the best part is, it’s super easy and doesn’t require any special skills.
Be sure to check out my other posts on the blog, and feel free to share your thoughts and suggestions in the comments below. I’d love to hear from you!
Thanks for stopping by!