
Description:
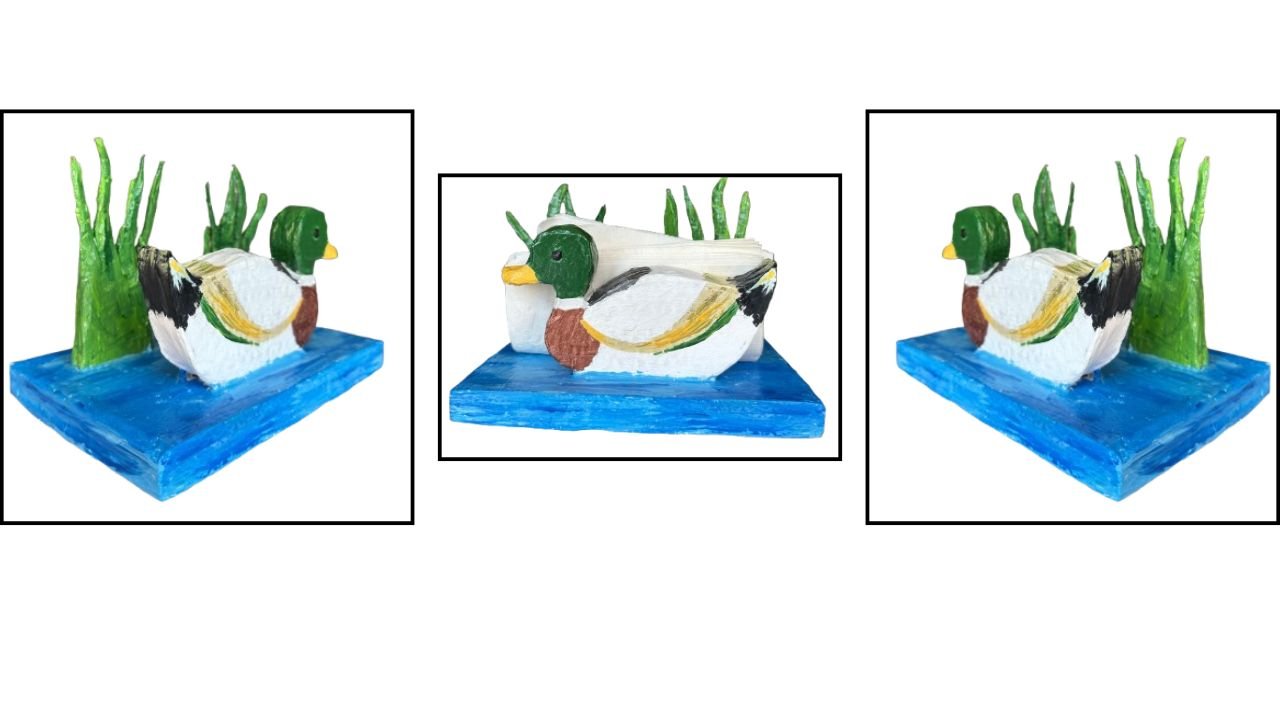
Can you believe this napkin holder is made completely out of cardboard? It’s a fun eco-friendly craft that also works great as home decor!
Materials Needed
1. Cardboard
2. Acrylic Paints
3. Gesso
4. Varnish
5. School Glue
6. Glue Gun
7. Waste Paper Strips
8. Paint Brushes
Below are my Amazon Affiliate links. If you buy any of the above materials through the following links I will earn a small commission for NO extra cost to you! Thanks for your support!
Apple Barrel Acrylic paints 2oz. Bottles
https://amzn.to/4mZV8JP
Decoart Metallic acrylic Paints
https://amzn.to/3HvNff3
Gesso
https://amzn.to/3HwJQwB
Paint Brushes (round)
https://amzn.to/3ZXMXUr
Paint Brushes Flat
https://amzn.to/4n0zLIu
Liquitex Varnish
https://amzn.to/4neBI4i
Backstory:
As usual, I was on the lookout for a new cardboard craft idea for my YouTube channel. While browsing online, I came across some decorative napkin holders and other wooden crafts that caught my eye. These are the types I love to recreate using cardboard. One design that really stood out was a wooden duck-shaped napkin holder. I absolutely loved it and knew I had to try making my own version with cardboard. If you prefer the wooden look, you can totally paint it that way, but I went for a realistic Mallard style instead!
My Inspiration:

https://www.ebay.com/itm/376269940833
For the video tutorial, click on the video below
Step-By-Step Written Instructions For The Napkin Holder DIY
- I drew a duck on the cardboard and cut it out. I cut out three ducks out of cardboard.


2. Stuck three pieces to get one sturdy piece.


3. Next I cut out six pieces for two plants. Then stuck three pieces together for each plant.


4. Next I made a rectangular base. I cut out three pieces. I divided the top rectangle in parts so Duck and plants can be placed at the same distance from all the sides and corners of the rectangle.


In the above photo the cardboard rectangle is 8″ by 5″. Lines are drawn 1.25″ from the long edge and 2.5″ from shorter edges. The center rectangle is 3″ by 2.5″
5. Next I made marks at 1/8th inch on 3″ side of the center rectangle and placed the duck between the marks.


6. The base of the duck measures 2.75″. After placing duck drew rectangle around the base of the duck.


7. Cut out the rectangle with x-acto knife.


8. Next I placed the plants behind the duck and drew rectangles by tracing around the base of plants and cut the rectangles out the same way as above.


9. Once the slits were cut, duck and plants were stuck in the slits.


10. Next Cover all the rough edges of cardboard with paper strips and glue. Used brown packaging paper I got with Amazon package. Strips cut out of brown lunch bags can also be used. After the edges were covered this is how it looks.


11. After the structure dries, apply two coats of Gesso.

12. After the Gesso dried, drew guide lines on the duck to make painting easier. It’s kind of like color by number figure.

13. Finally painted the structure with acrylic paints and when paints dried applied varnish on it. This is how it looks.
Final Note:
Want to Make an improved version of this craft?
I’ve got some extra tips that can really make a difference and I’m sharing them exclusively with my blog subscribers!
If you enjoyed this post, I’d love for you to subscribe to my blog. And don’t forget to check out my other DIY projects while you’re here—you might just find your next creative spark!
Thanks so much for stopping by!