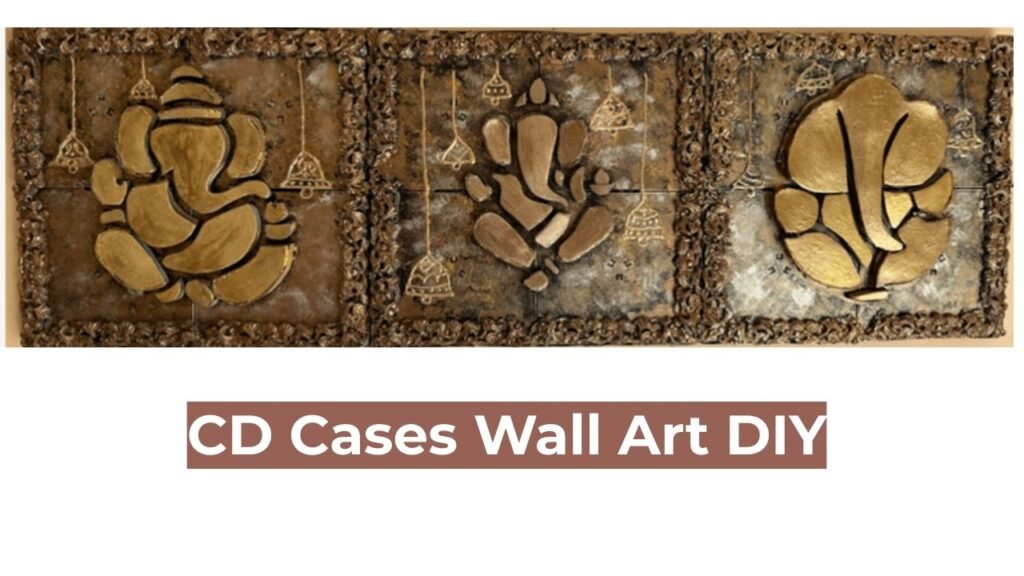
This stunning wall art is made using CD cases and cardboard as the base. The additional materials are inexpensive, making it a budget-friendly DIY that works beautifully year-round.
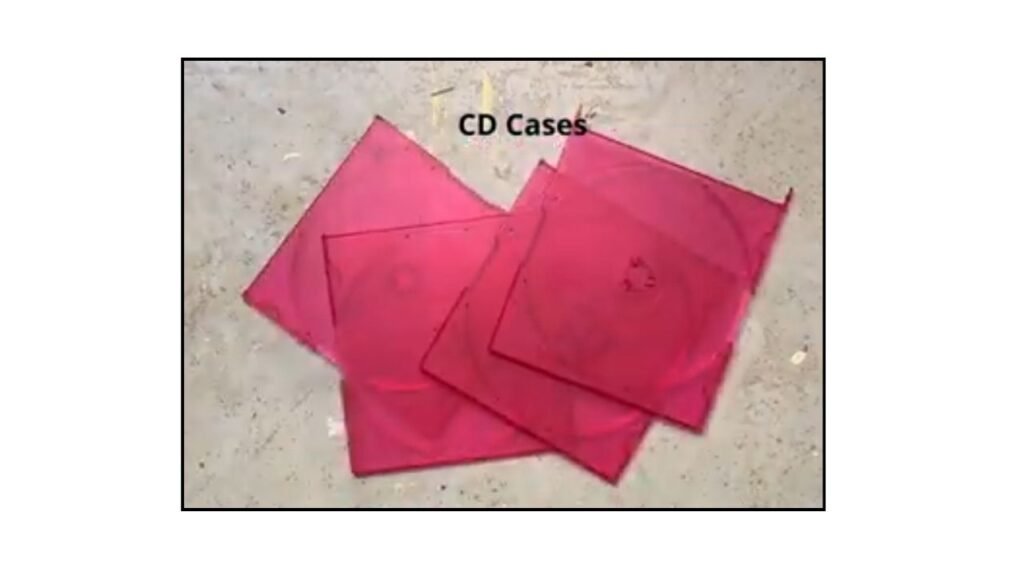
After making a CD cover lamp using the clear front pieces of the CD cases, I was left with the colored back panels and started thinking about how I could reuse them. That’s when the idea of creating a relief art piece came to mind.
I’ve made many relief artworks using clay in the past, but this time I wanted to try something different. Instead of clay, I decided to use foam sheets to create the raised details. I also wanted the finished piece to feel artistic and versatile, so it could be used as wall décor at any time of the year, not just for special occasions.
That’s how this unique and reusable wall décor came into existence.
Video Tutorial
This project is best understood by watching the step-by-step video tutorial below. I’ve included photos and written steps after the video for convenience.
Step-By-Step Written Instructions With Photos
- First I made the base for the decor. I used colored part (back) of the four CD covers.
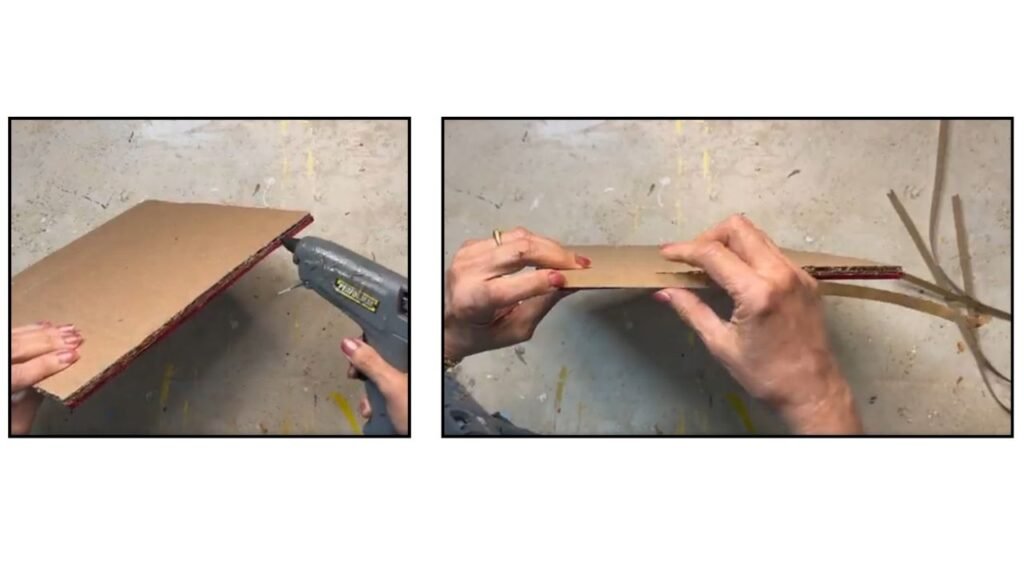
2. Next, I used a thick cardboard that was 9.75″ by 10.375″. I placed a CD case and drew around it on the cardboard to know exact placement for it. Then applied glue with glue gun on the lines drawn and stuck the CD case cover on it. Once the first CD case is placed, using it as a reference I could stick rest of the CD covers in place easily.

3. Next, I applied glue with Glue gun on the rough edges of the cardboard square and stuck brown paper strips on the rough edges of the cardboard to hide them. This gives the frame a neater look.
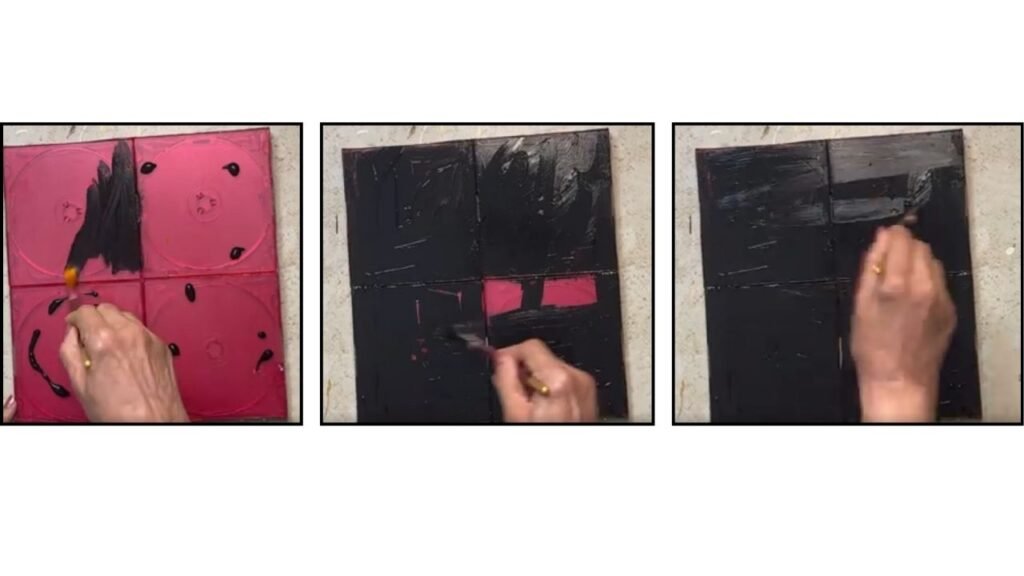
4. I painted the base using Black Acrylic paint.
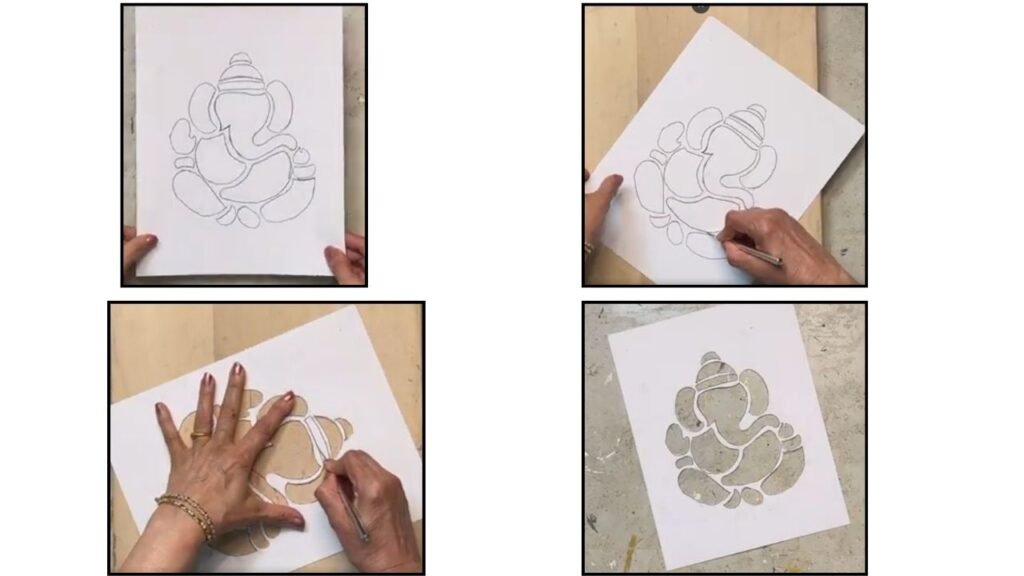
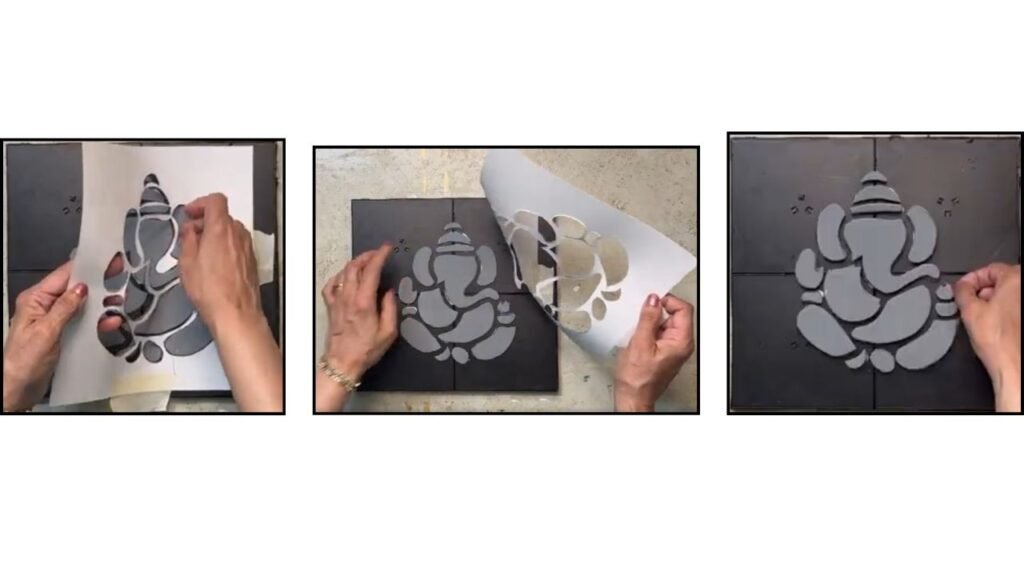
5. Next I transferred a Ganesh photo on a cardstock. Then using a sharp craft knife, I cut out the pieces and made a stencil out of the Ganesh photo.
6. Next, Place the newly formed stencil on a foam sheet (I used 2mm thick sheet). Trace through the stencil on the foam sheet. Make two copies of the drawing.
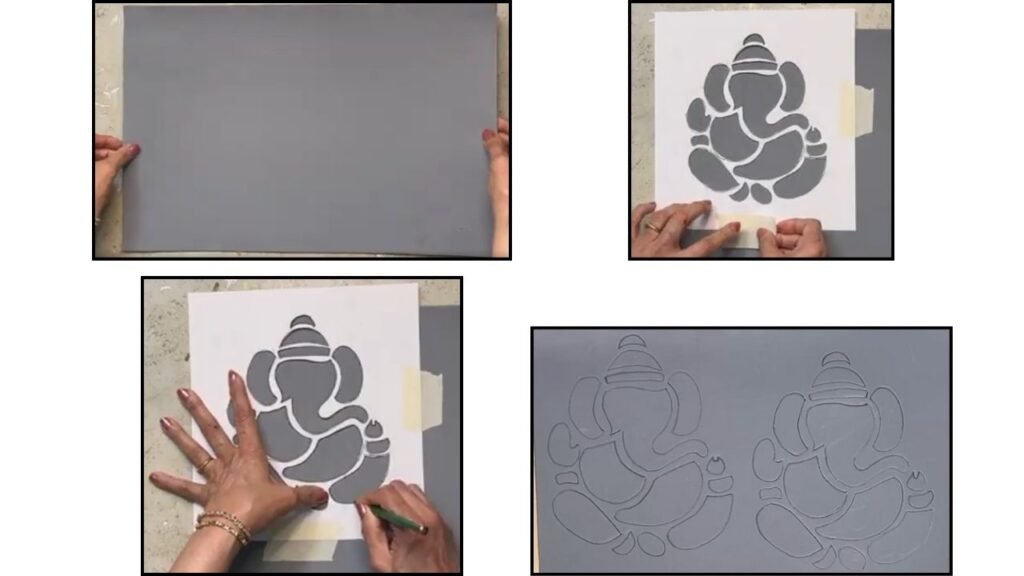
7. Next cut out the pieces by cutting along the lines on the drawing. I got two sets of identical pieces.
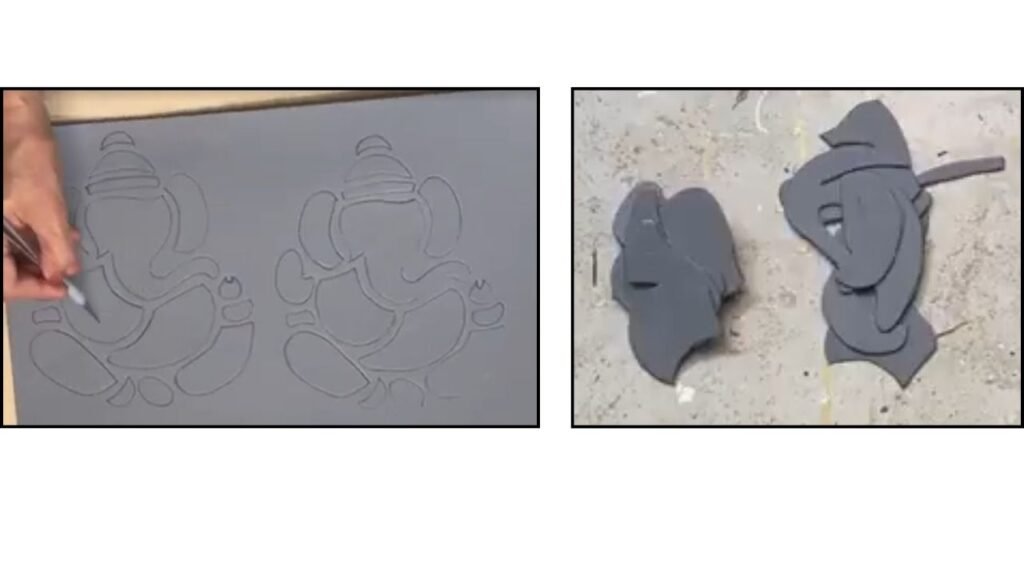
8. Now I attached the stencil I made earlier on theCD cases base. Then used the foam sheet pieces and glued them matching the shapes on the stencil as shown.
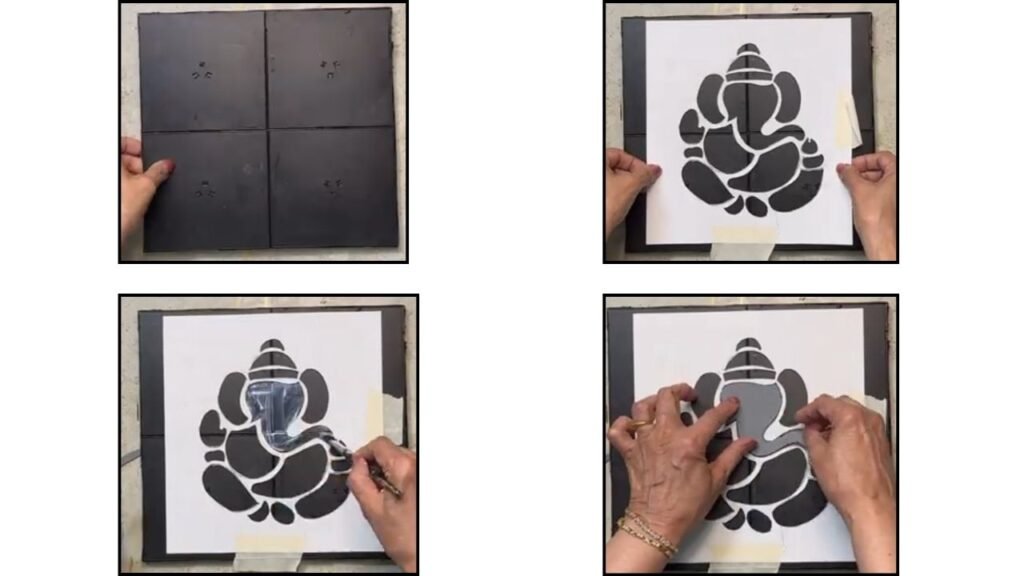
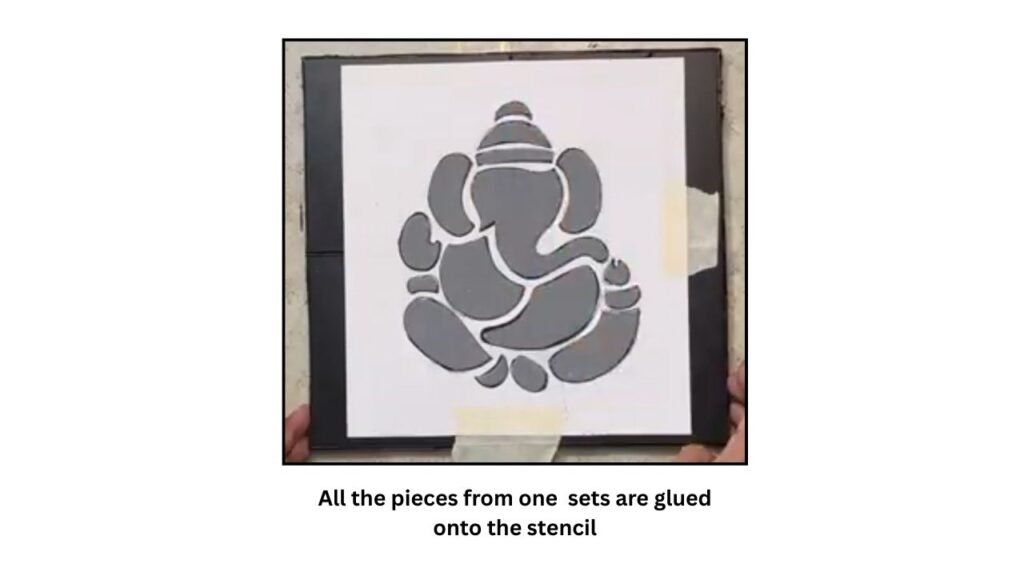
9. Next I peeled off the stencil making sure the glued pieces do not get disturbed.
10. Since I wanted to create a relief effect, I glued pieces of cardboard onto the foam pieces that were already attached on the base using the stencil.
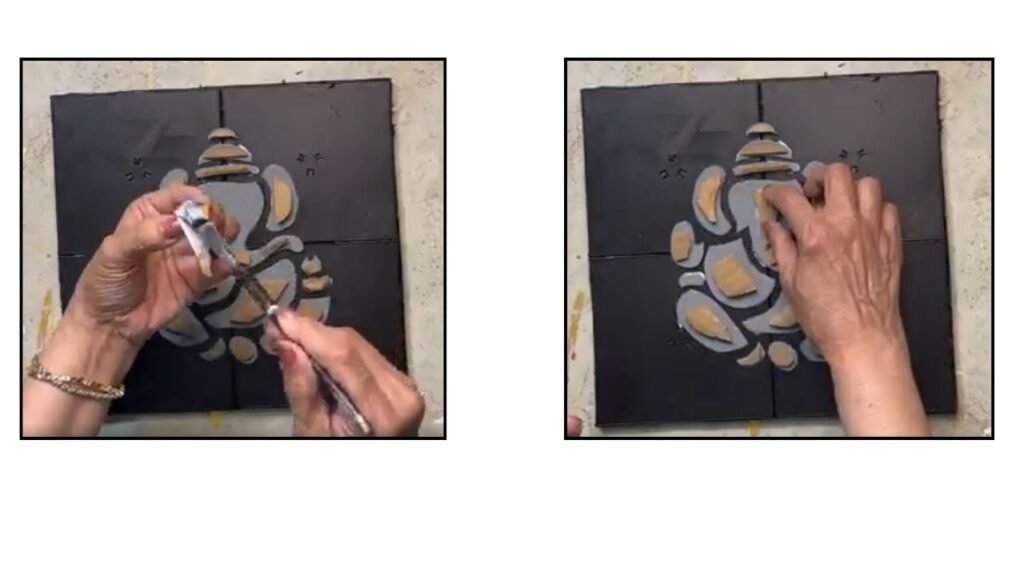
11. Once the cardboard pieces were in place, I glued the second set of foam pieces on top, aligning them with the foam pieces beneath the cardboard.
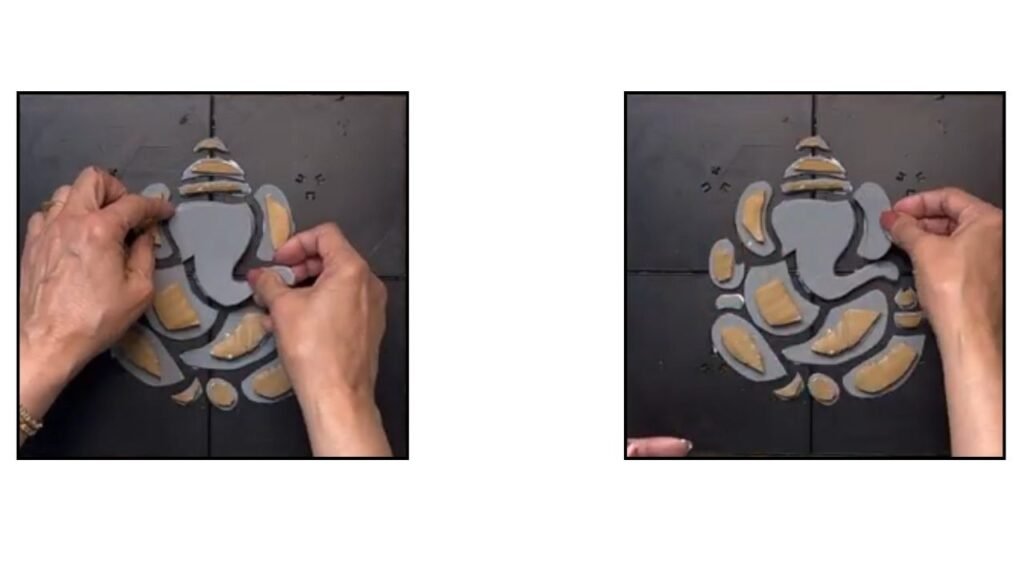
12. After securing all the foam pieces, I covered the exposed edges with brown paper strips to conceal the cardboard underneath.
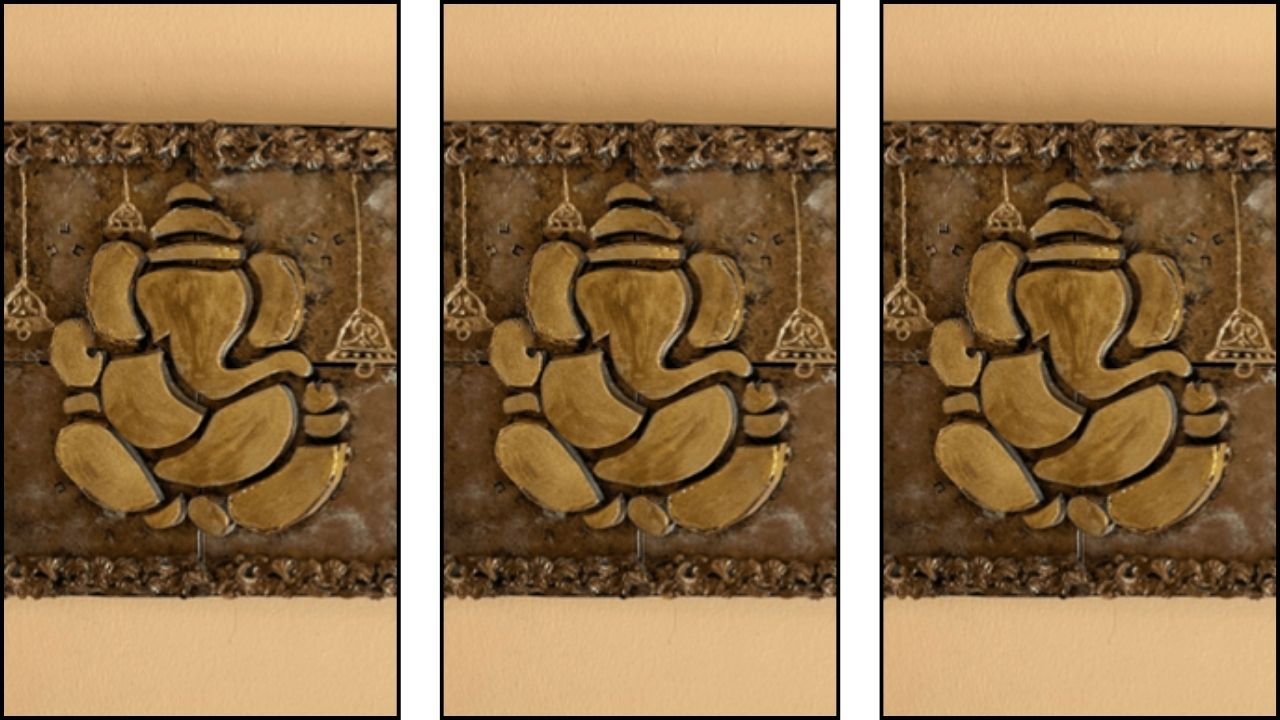
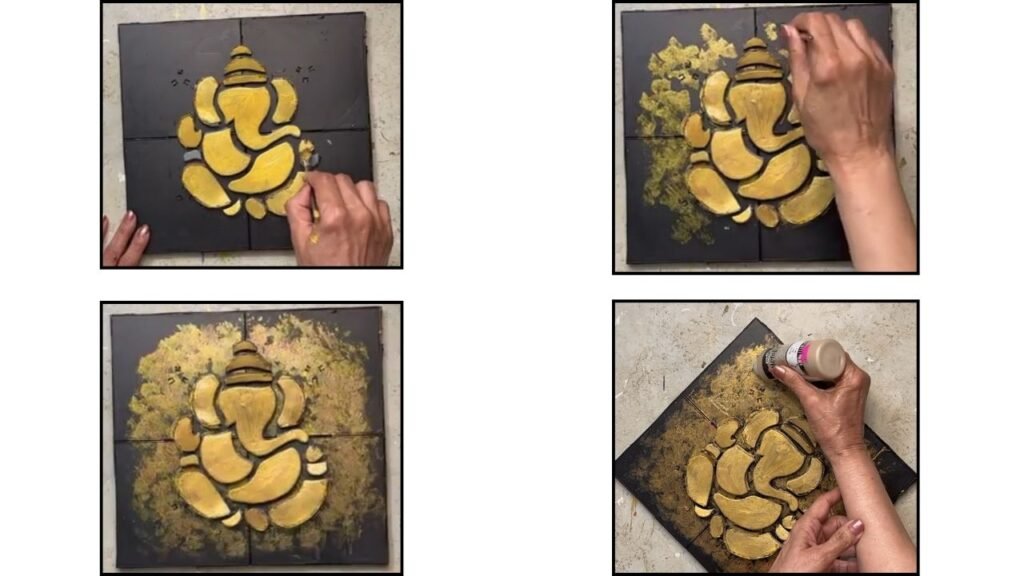
13. Next I Painted the relief figure of Ganesh with Metallic Gold acrylic paint. Painted the background with Gold, white, and metallic copper and silver paints. i also made bells using Dimentional tulip Gold paint.
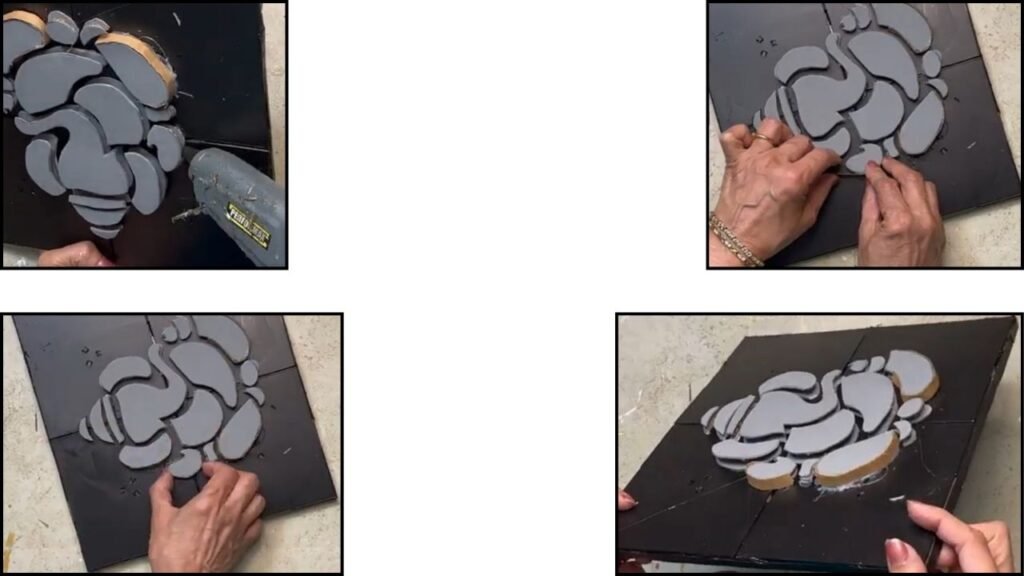
14. Next, I made a decorative border using glue gun and silicon mold. Glued the border on the sides of the base. Painted the border using metallic Black paint. When Black paint dried I painted it with mixture of metallic copper and Bronze.
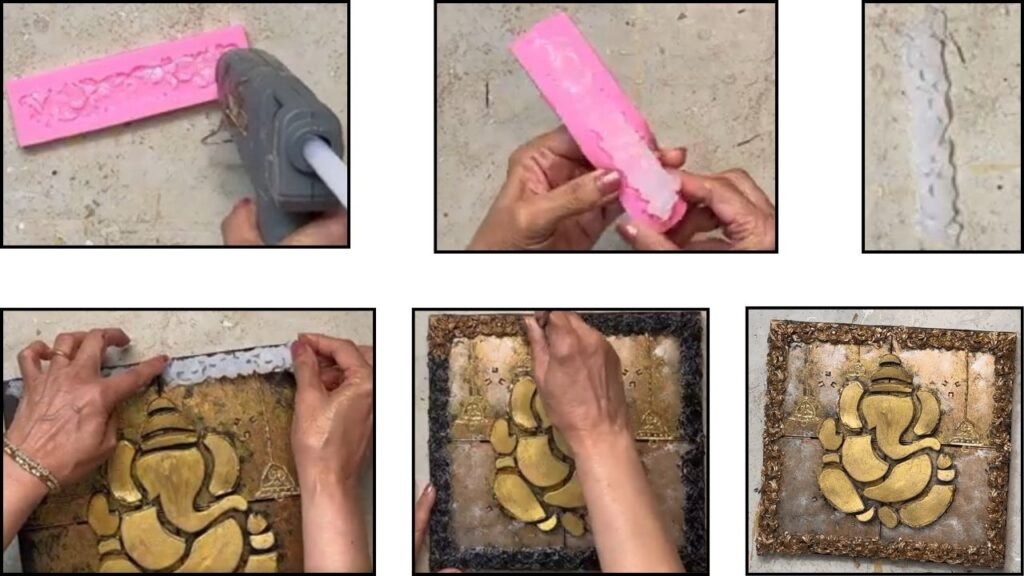
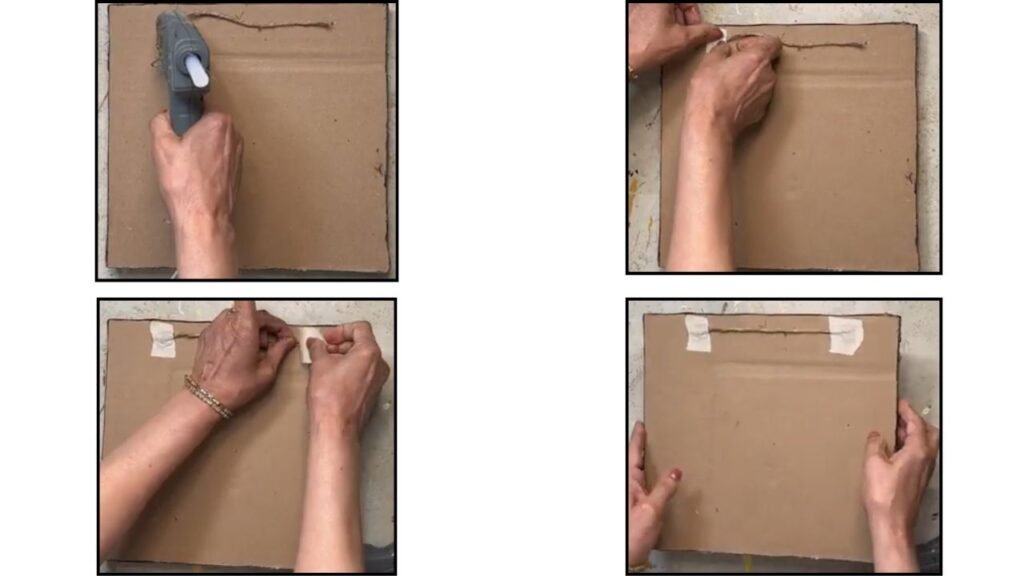
15. Once the paint on the border had dried, I attached a hanger to the back of the base. I used a jute rope and glued it in place with a glue gun, then secured it with masking tape on both sides of the rope.
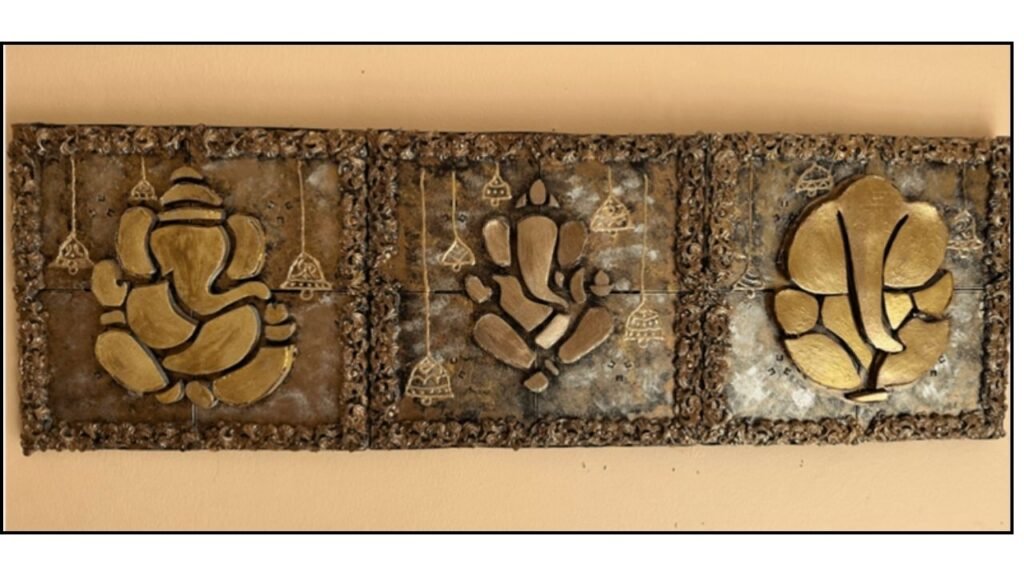
16. I made three reliefs like this one using CD cases. I joined them together using glue gun to form a panel. For extra support I glued wooden plaques on the back between the two relief frames. And hung the panel on the wall. The finished panel became a stunning wall decor piece that can be used year-round!
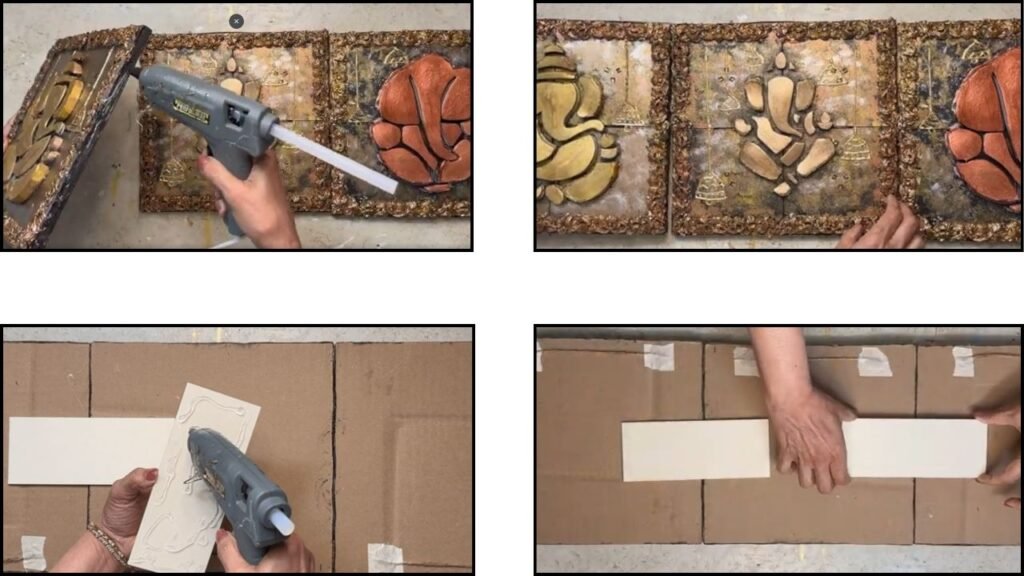
17. Later I changed the color of copper Ganesh and this is how the art looked.
Tips And Tricks
- Caution with glue gun:
Instead of applying hot glue directly on the CD case, apply it on the base (cardboard) first, this makes it much easier and safer to position the case without burning your fingers.
Be careful not to burn your fingers when gluing items with thin or no edges (like CD cases).
- Tip for Cutting Foam Pieces:
When working with stencils, it’s better to trace the shapes using the stencil itself rather than the cut-out pieces. If you trace around the cut pieces, the outlines become slightly larger, and the foam shapes won’t fit properly back into the stencil design. Also, using the stencil helps you avoid shifting or disturbing the pieces you’ve already glued in place. - Hanging Tip:
Instead of attaching one large hanger for all three frames, I made separate hangers for each frame. This helps distribute the weight evenly and reduces pressure on any single point when the frames are hung. - Picture Selection Tip:
When choosing a picture for your stencil, make sure there’s enough clear space around the details. This gives you room to cut it out in stencil form without losing important parts of the design.
Final Note
I hope you enjoyed this method of creating relief art. You can choose any design you like and make your own relief artwork using this process. If you’re not comfortable working with clay, this is a great alternative and it’s much more affordable too!
I’d love to hear from you, so please leave your thoughts in the comment box below. Be sure to check out my other posts on the blog, and consider subscribing to receive more craft ideas through my monthly newsletter.
Happy crafting, and thanks so much for stopping by!