Description:
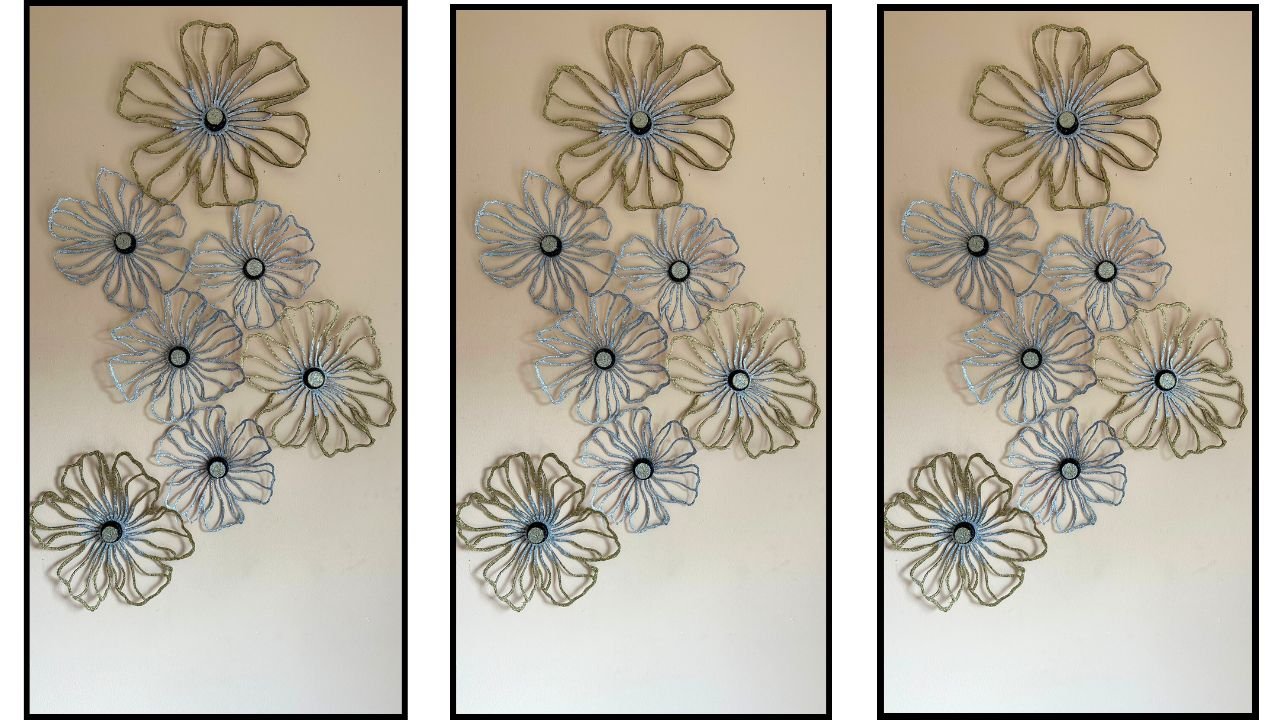
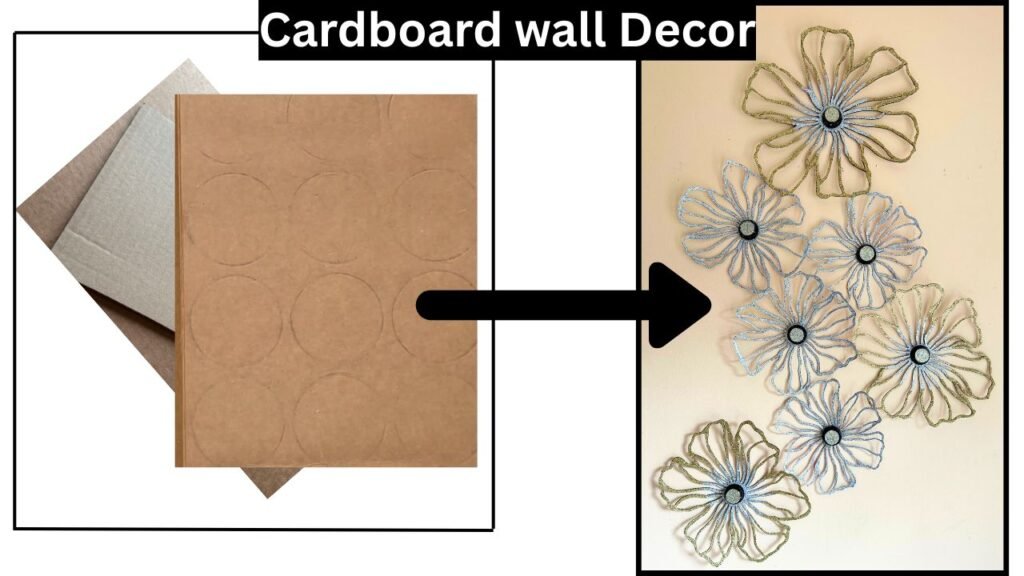
I gathered recyclable cardboard from around the house and carved it into flower shapes to create unique wall decor. This DIY project is not only eco-friendly and budget-friendly, but also a fun way to transform everyday materials into beautiful handmade art for your home.
Materials Used
- Cardboard
- Pill Bottle Lids
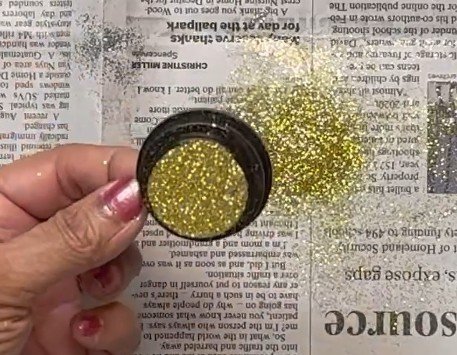
- Gold and Silver Glitter
- School Glue
- Glue Gun
- Metallic Gold Acrylic Paint
- Metallic Silver Acrylic paint
- Masking Tape
- Craft Knife
Below are my Affiliated Amazon Links. if you buy above material through these links I get a small commission for NO extra cost to you! Thanks For Helping!!
Glue Gun
https://amzn.to/446dgdz
School Glue (1 gal)
https://amzn.to/43VEceT
Decoart Metallic acrylic Paints
https://amzn.to/3HvNff3
Paint Brushes (round)
https://amzn.to/3ZXMXUr
Paint Brushes Flat
https://amzn.to/4n0zLIu
Gold Glitter Fine
https://amzn.to/4mNjGVX
Silver Glitter
https://amzn.to/4m7lHvh
Craft Knife
https://amzn.to/3Fu5dOA
Backstory:
I first spotted a wall decor piece like this made out of metal, and it instantly caught my eye. As usual, the wheels in my head started turning, and I thought, why not recreate it using cardboard? So I carved out these flowers, added a little jazz to them using glitter, and turned them into a beautiful piece of wall art. My goal was to make something versatile that could brighten up the home year-round, whether there’s a festive season or not.
For video overview of this DIY, click on the video below.
Step-By-step Written Instructions:
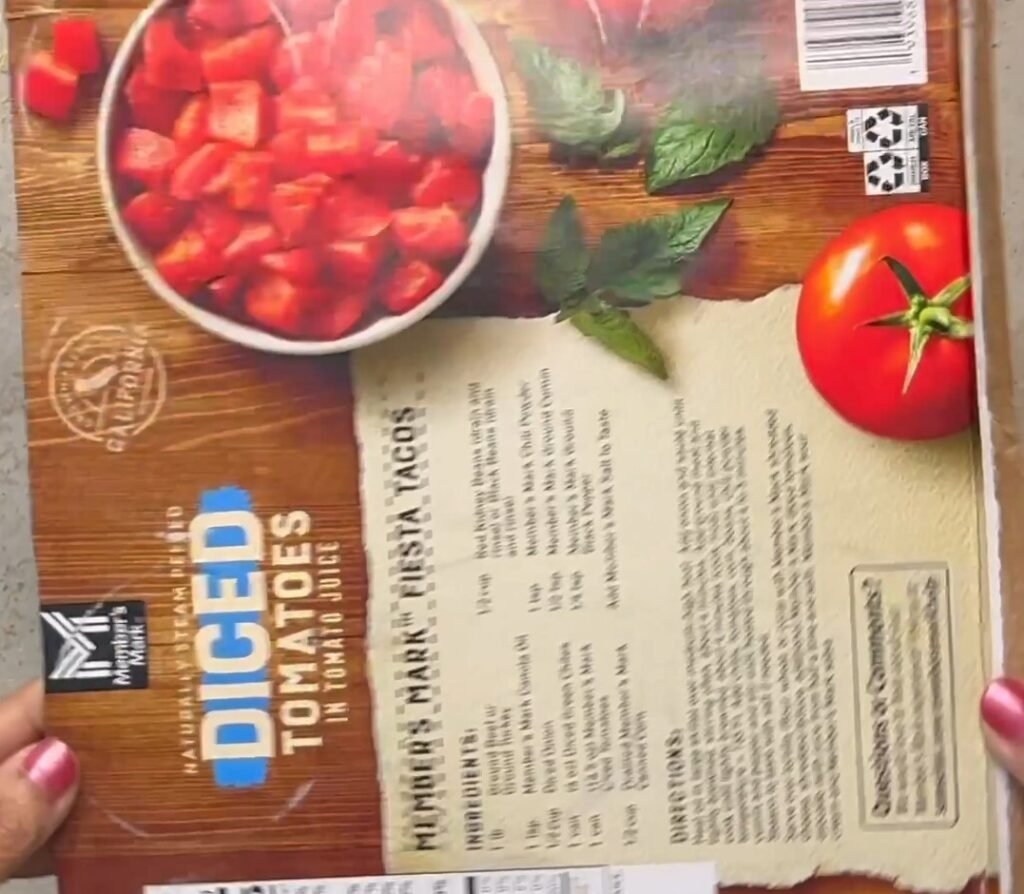
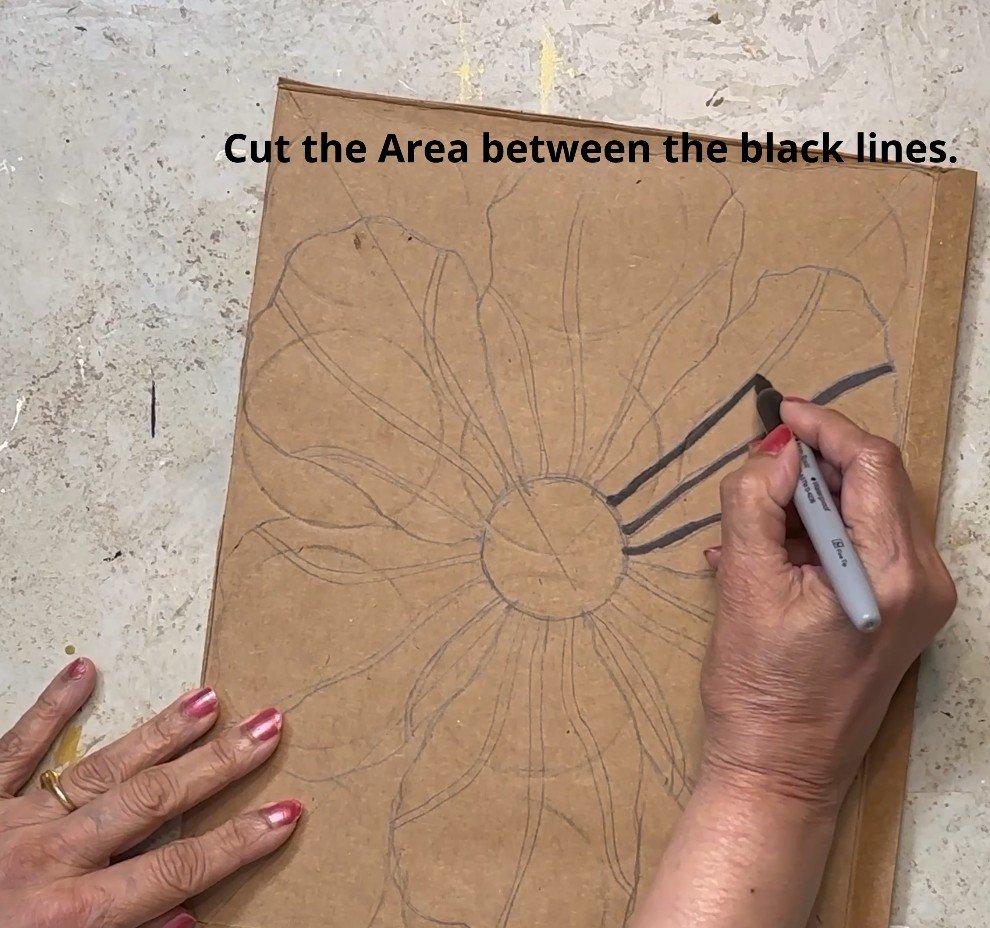
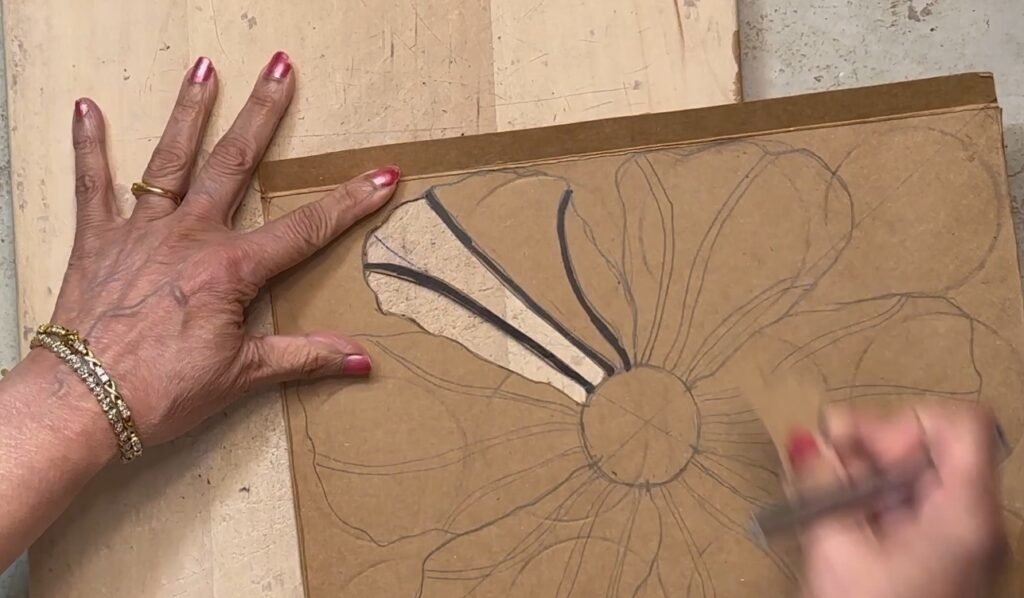
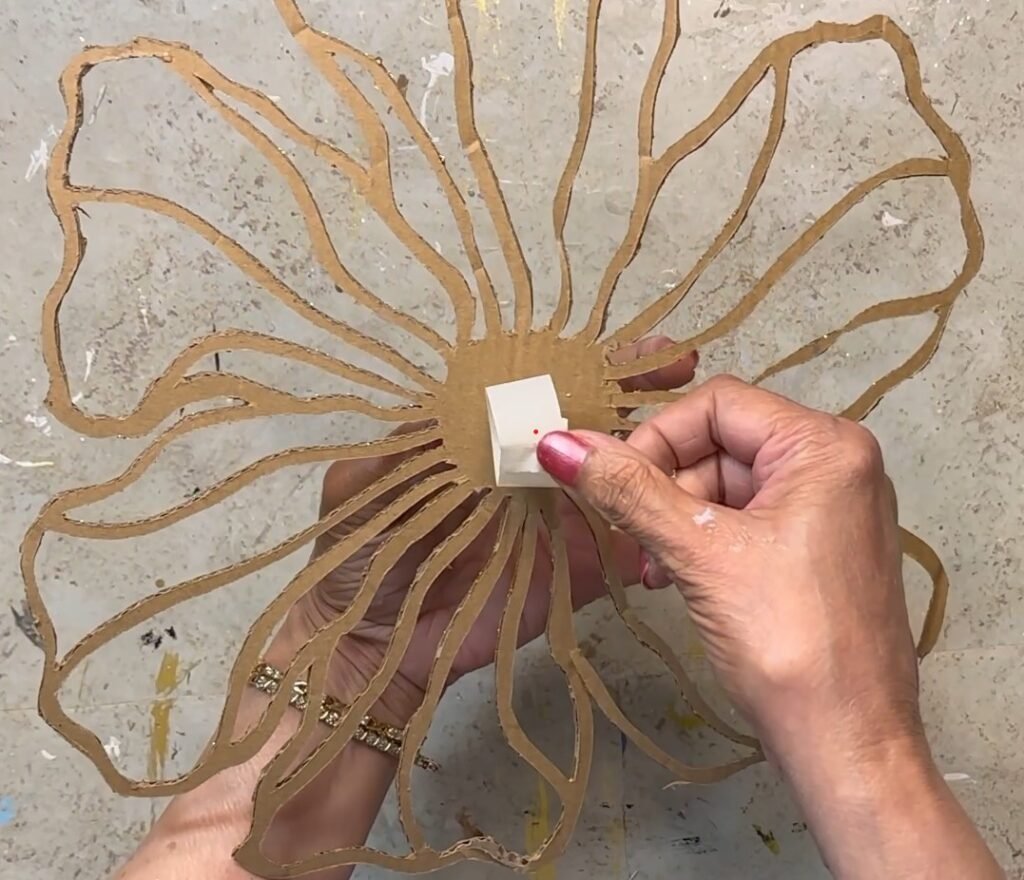
I started with a cardboard box from diced tomato cans. Below, I’ve shown both the front and back of the box. I drew a flower on it, as shown in the picture.
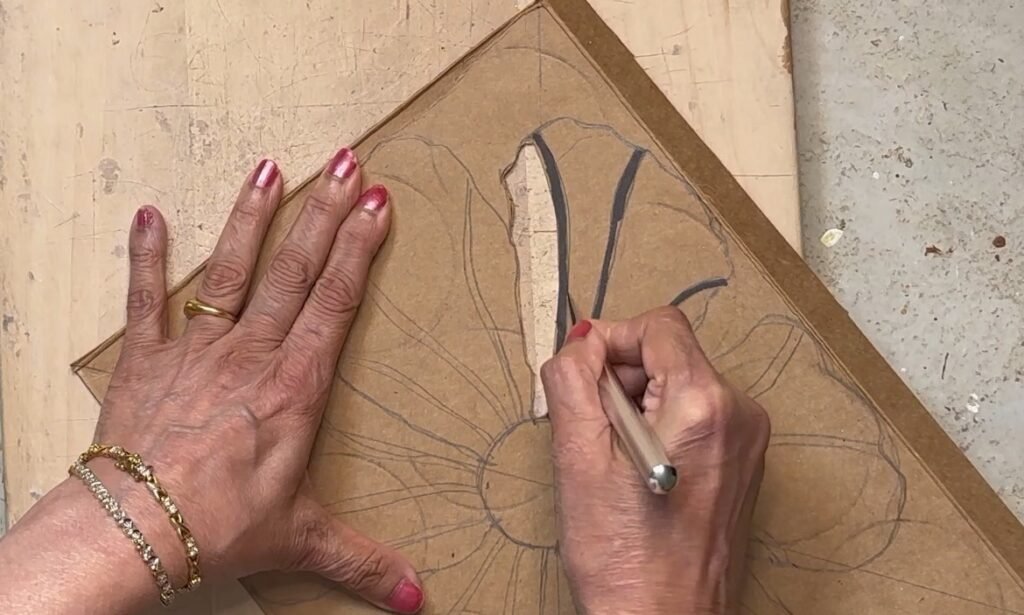
You can also use cardboard from cracker boxes, cereal boxes, popcorn boxes, or any thin corrugated cardboard. Avoid using thick cardboard, as it can be difficult to carve.
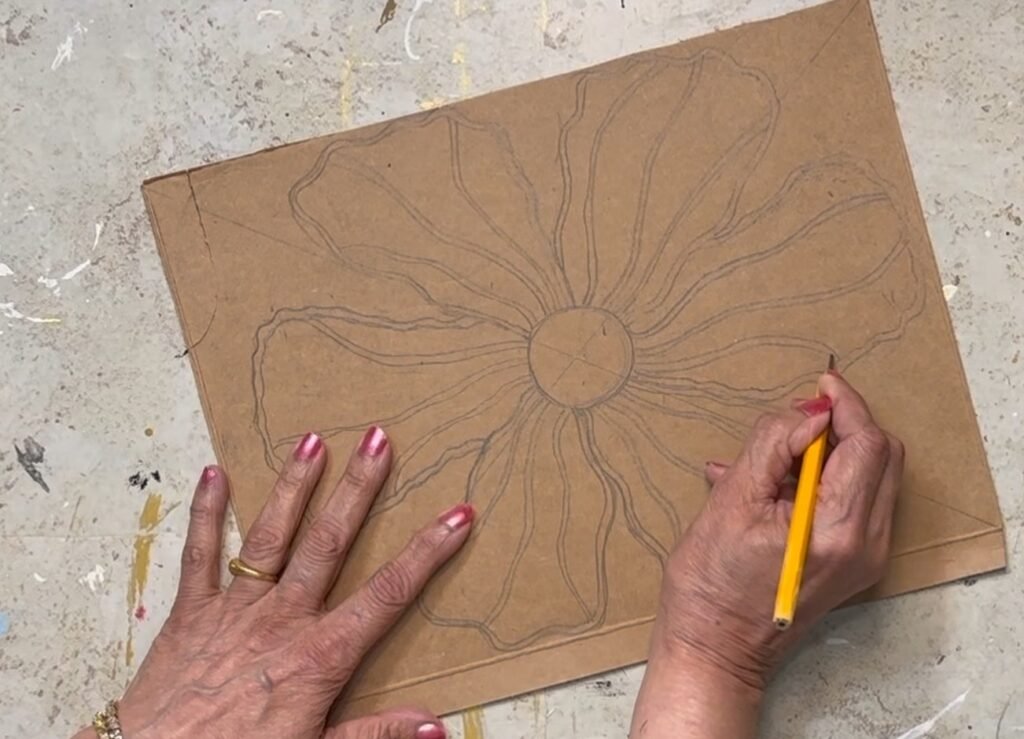
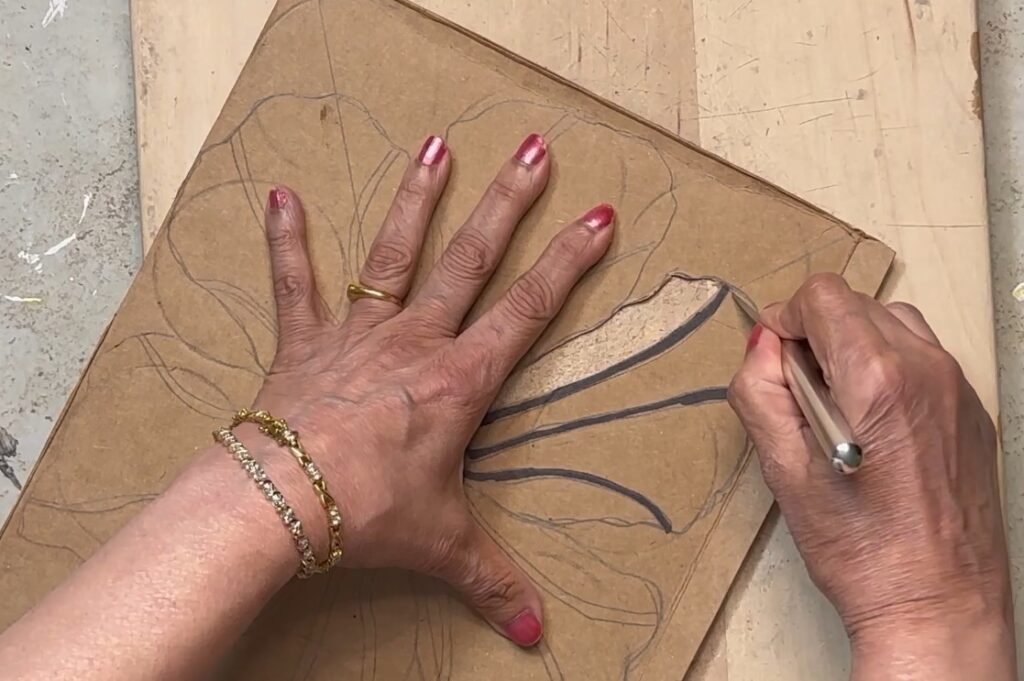
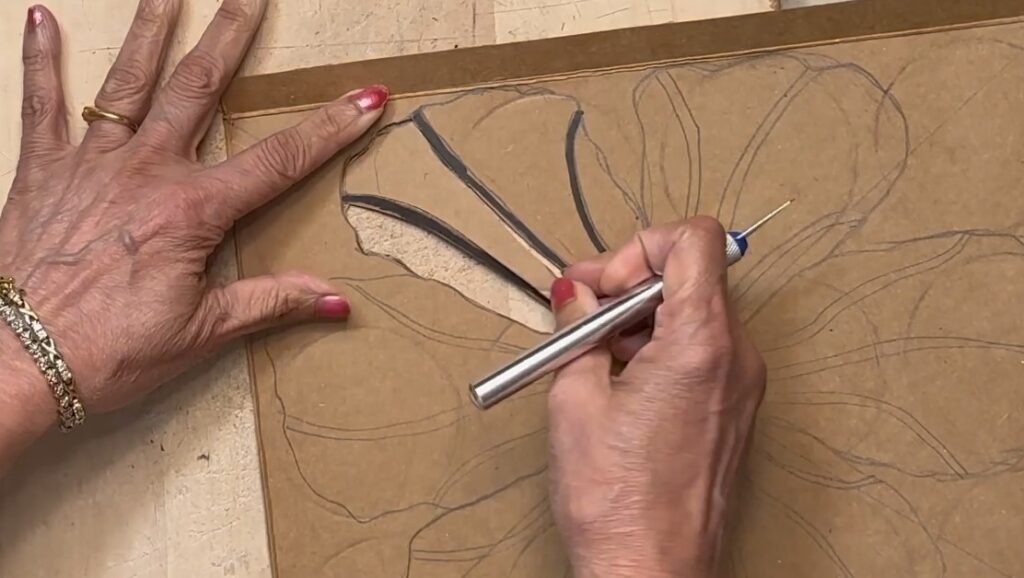
2. Next I outlines areas on the petal with Sharpie Marker. And carefully cutout the areas within the lines. The marked lines guided me to avoid mistakes.
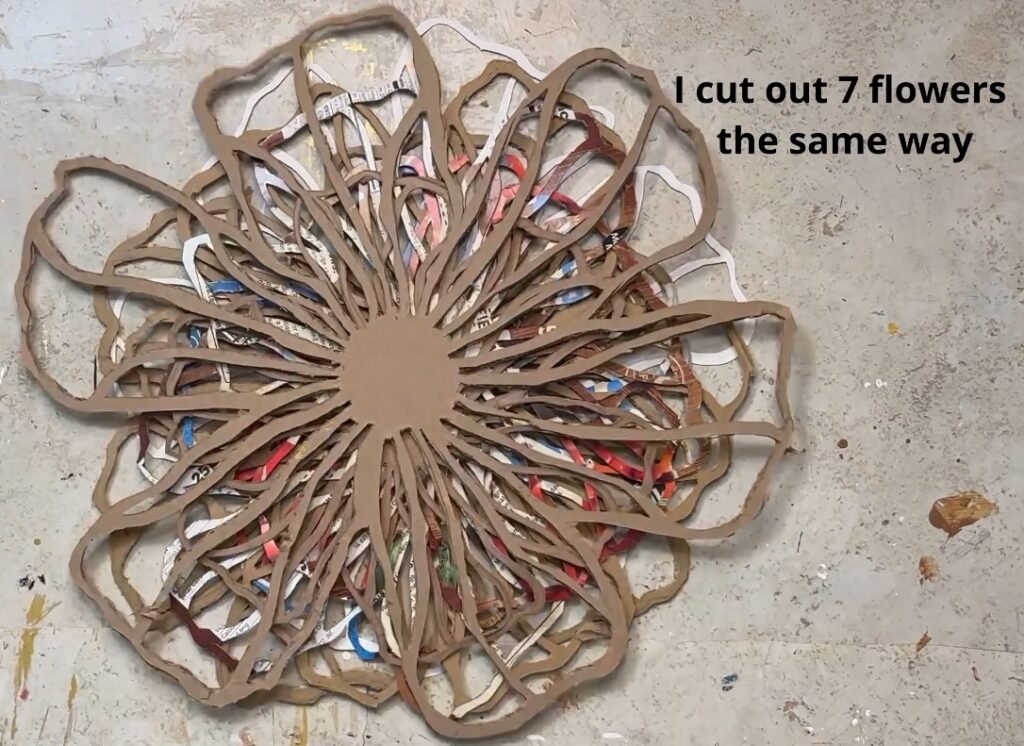
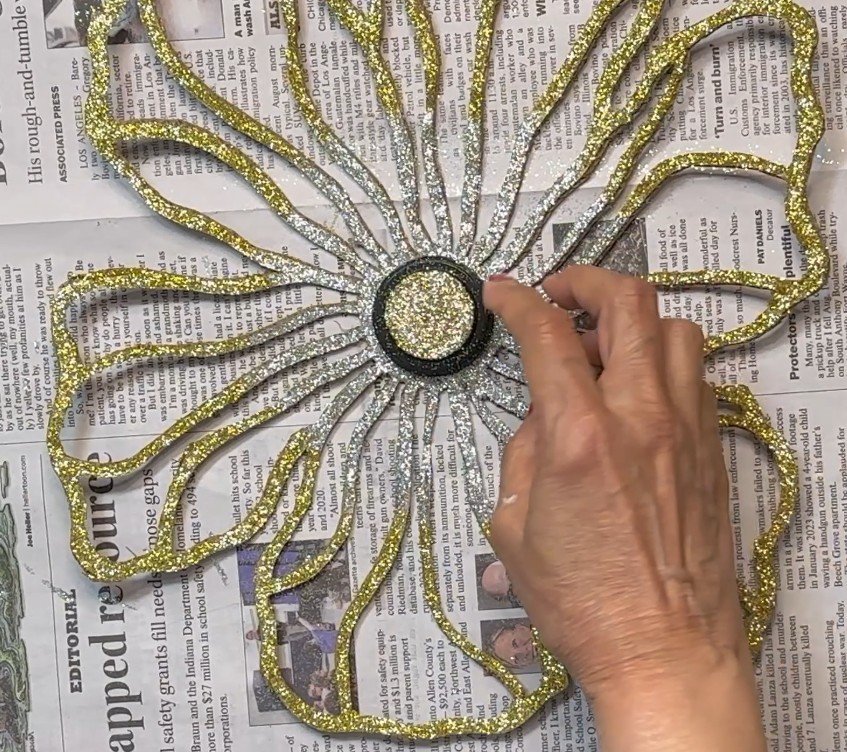
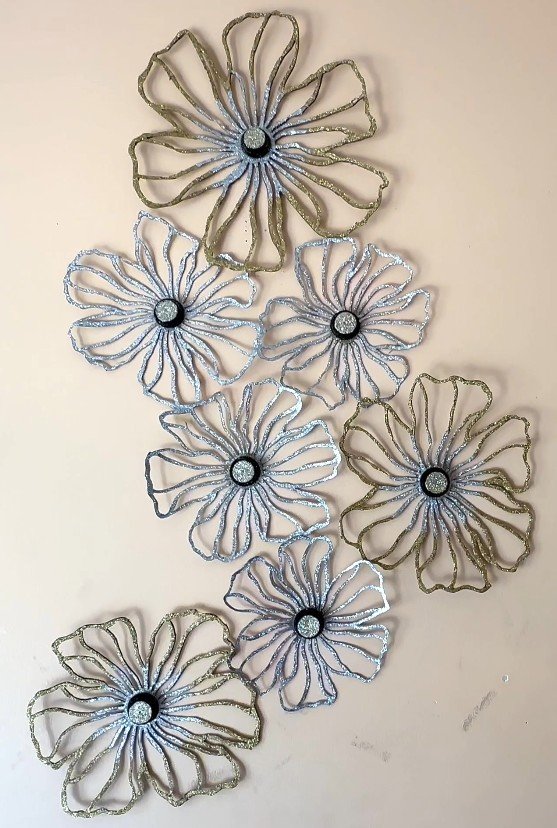
3. I made altogether 7 flowers in two different sizes.
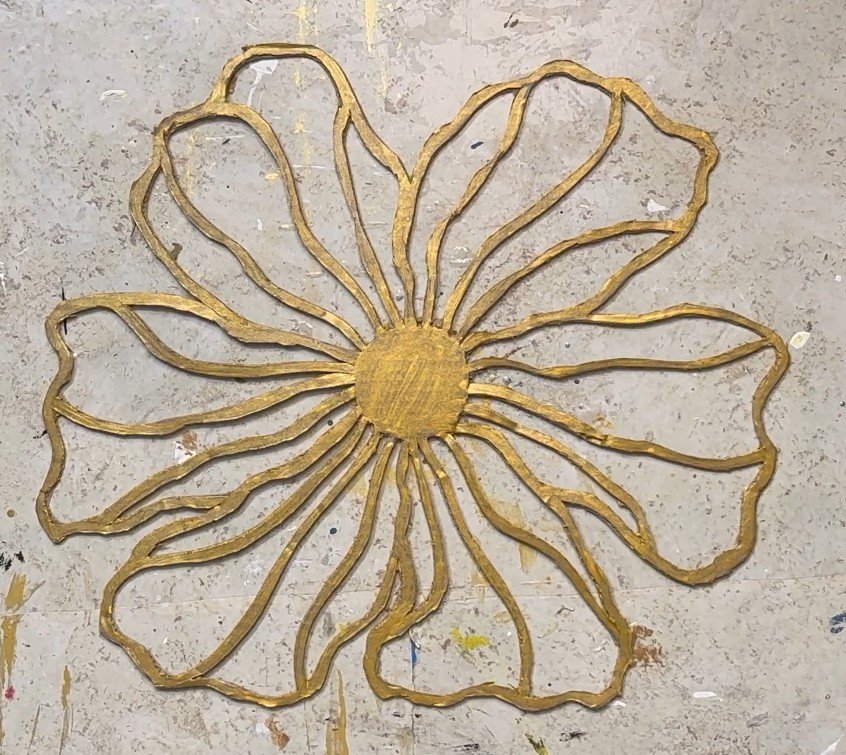
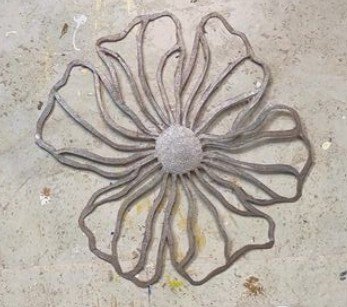
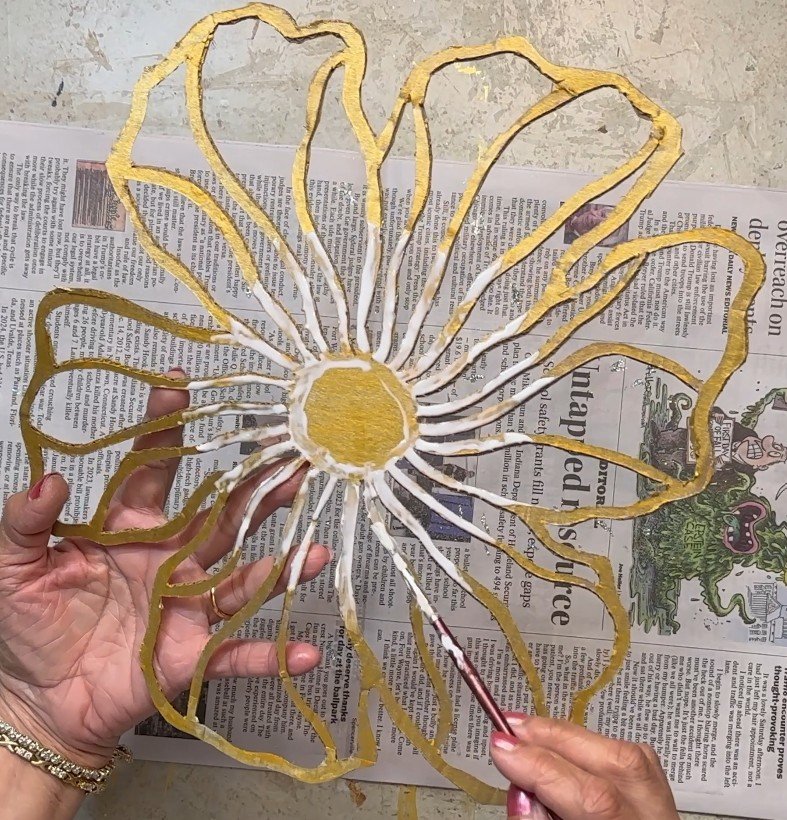
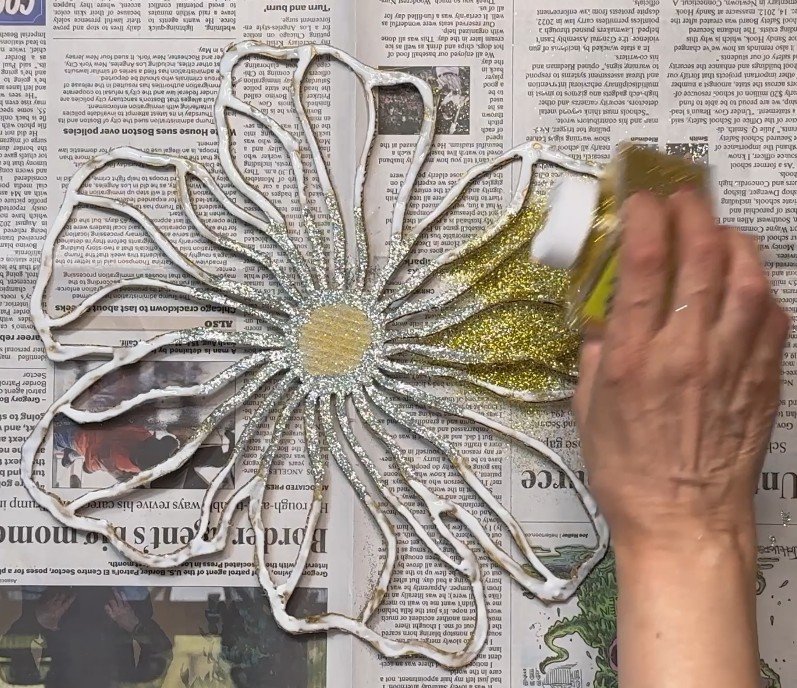
4. Painted 3 larger flowers with Metallic Gold and 4 smaller flowers with Metallic Silver acrylic paint.
5. Next, I applied a layer of school glue on the flowers. For the smaller flowers, I sprinkled only silver glitter for a simple, elegant look. For the larger flowers, I added silver glitter near the center and blended it outward with gold glitter, giving the petals a radiant, two-toned effect.
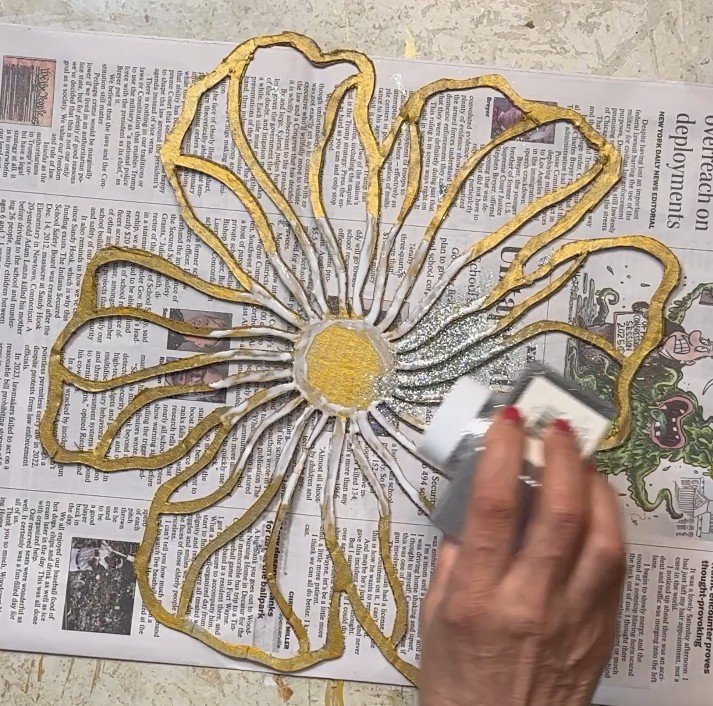
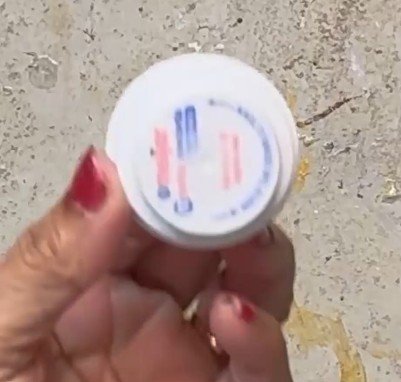
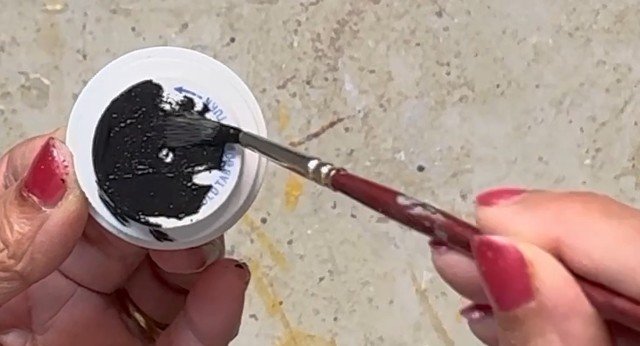
6. For the center of the flower I Painted a pill bottle lid with black acrylic paint. Then applied glue on top of the lid and sprinkled glitter on it.
7. Using glue gun, stuck the lid in the center of the flower.

8. Next I stuck a rolled piece of masking tape in the back of the center of the flowers and arranged the flowers on the wall as shown.
Final Words:
I hope you enjoyed this short and sweet DIY that you can make using recyclable cardboard from around your home. I’ve shown just one way to create these flowers, but feel free to let your imagination run wild and make them even more unique!
This DIY tutorial will be a success for me if it inspires even one of you to create something of your own.
If you have any questions or thoughts, please leave them in the comments below. Don’t forget to subscribe to my blog newsletter for more craft ideas and inspiration.
Thanks so much for stopping by!