Description
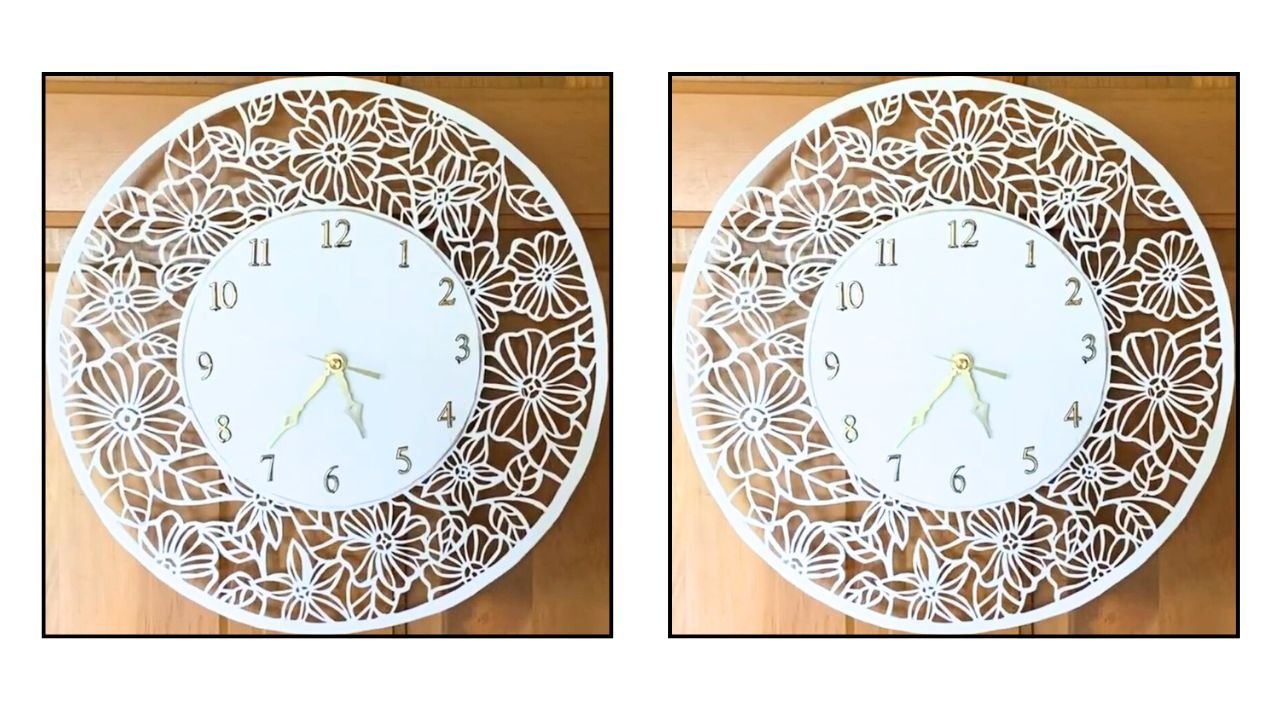
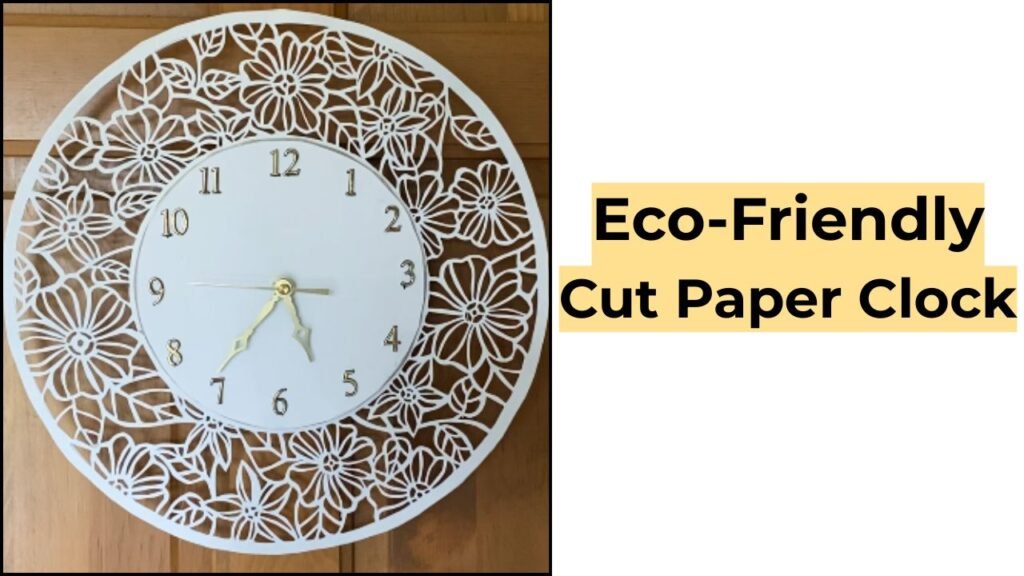
This handmade clock features a carved floral design on a white poster-board circle, finished with a clock-making kit to bring it to life. It’s an easy, budget-friendly wall decor/ home decor project that instantly enhances any room. A true trash-to-treasure makeover, simple materials, beautiful results!
Material Used
- Poster Board
- Clock Making kit
- Craft knife
- School or White Glue
- Cardboard
- scissors
Backstory
I tend to move through different crafting phases. Sometimes I enjoy working with cardboard, cloth, clay, or something entirely new. During my paper-cutting phase, I stumbled upon a stunning carved wooden clock and was completely mesmerized by it. That discovery sparked an idea, and I decided to create my own version using recycled Bristol paper and my own original design. I chose Bristol Recycled paper because it’s sturdy and thick, exactly what I needed for this project.
Video Tutorial
Step By Step Written Instructions
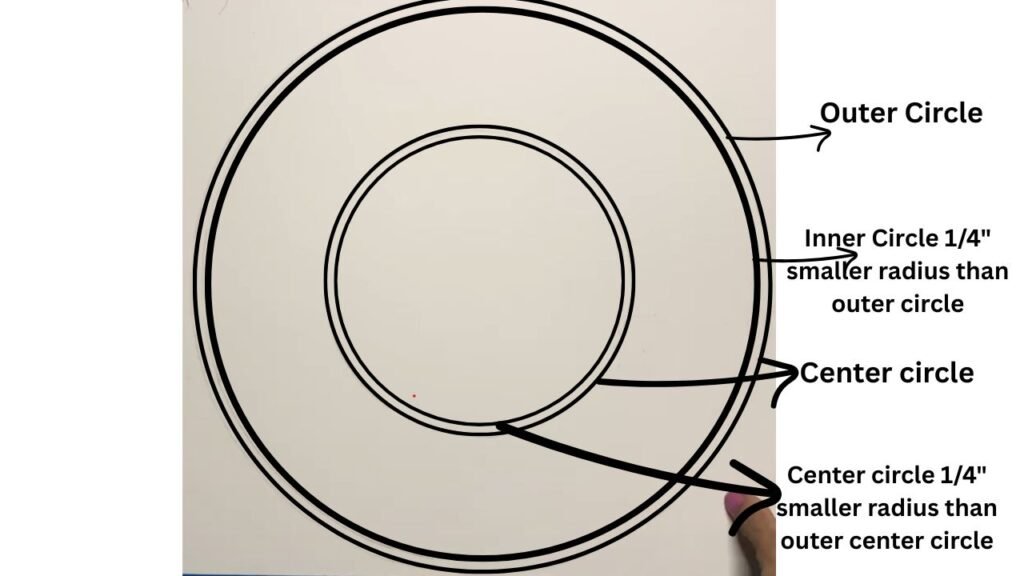
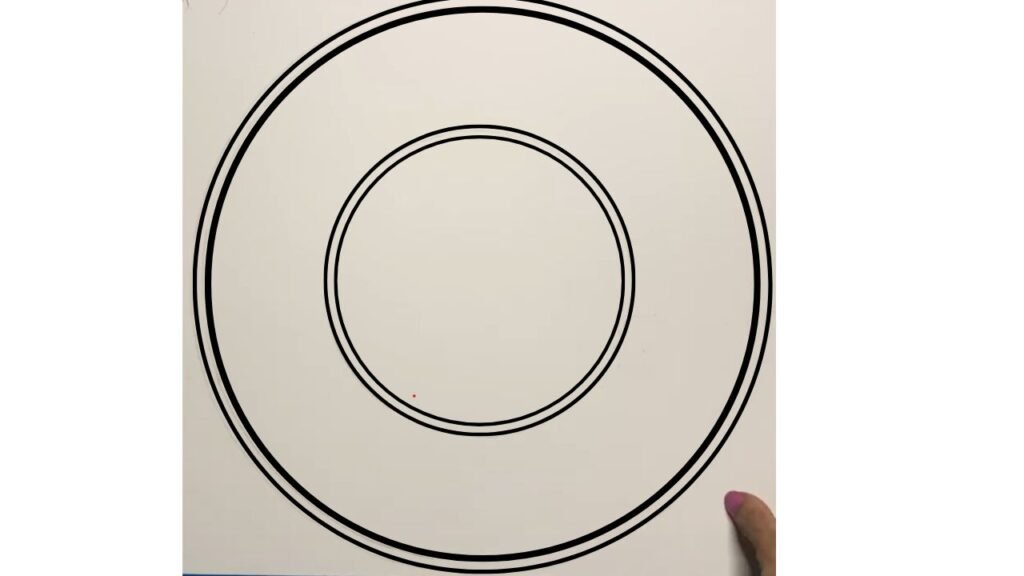
- Start by drawing two circles — one large outer circle and a smaller center circle inside it. Next, draw another circle inside the center circle, making it 1/4 inch smaller in radius. Finally, draw one more circle inside the large outer circle, also 1/4 inch smaller in radius.
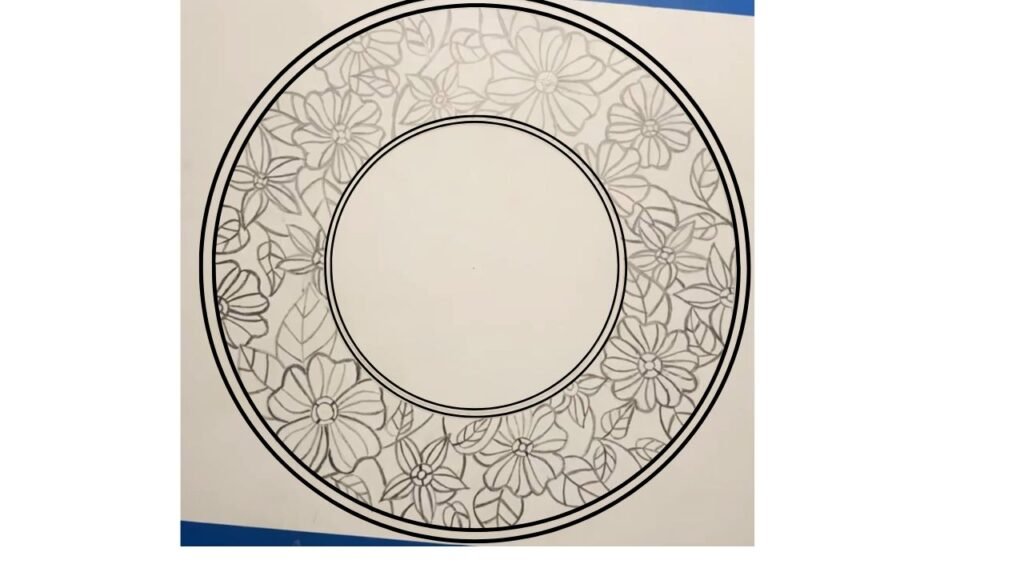
2. Draw the floral design: Draw a floral design that touches both the middle circle and the inner circle. Make sure all parts of the design are connected wherever necessary so it can be cut as a single piece. The outlines are made quite thick to make the paper cutting easier.
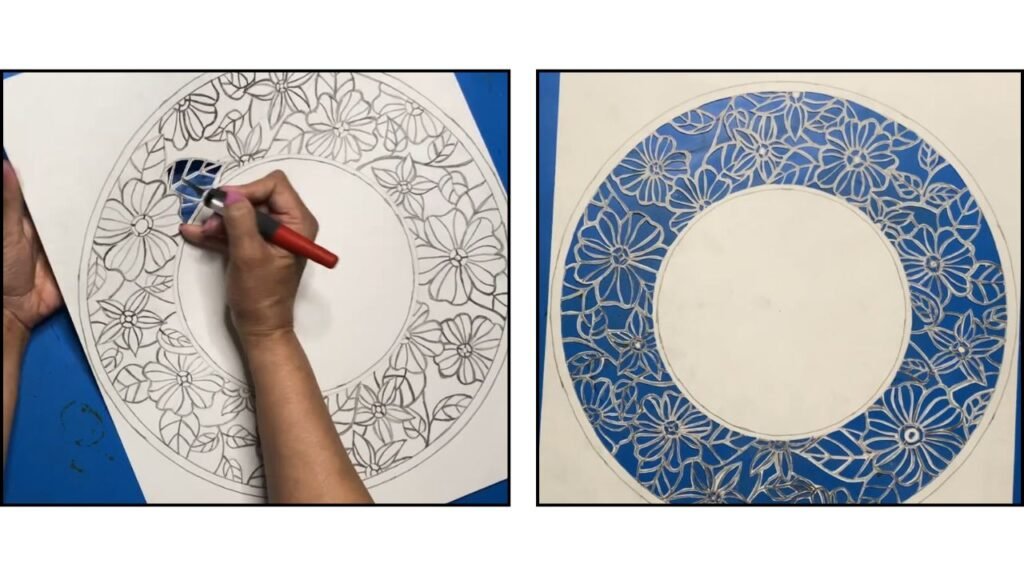
3. Carve the paper design: Carefully carve out the design using a sharp craft knife. Remove all the white areas between the lines, leaving only the outlined design intact.
4. Craete the support ring: On another sheet of recycled Bristol paper, draw the same three circles as before: the large outer circle, a second circle inside it that is 1/4 inch smaller in radius, and a small circle in the center of the larger circle.
5. Cut the ring and center circle: Cut out the center circle and the inner circle as shown, so you are left with a ring that is about 1/4 inch thick, along with a separate middle circle.
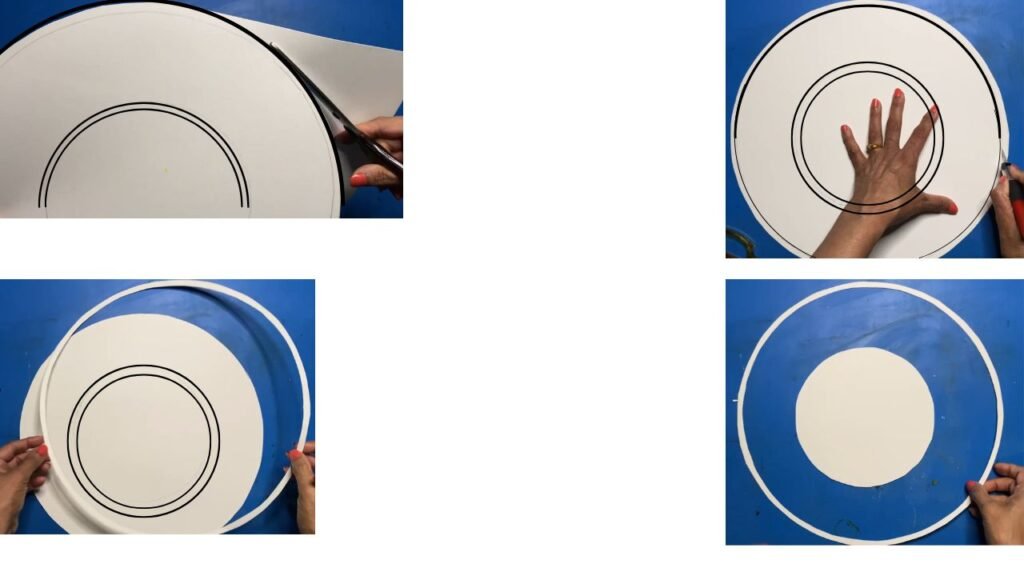
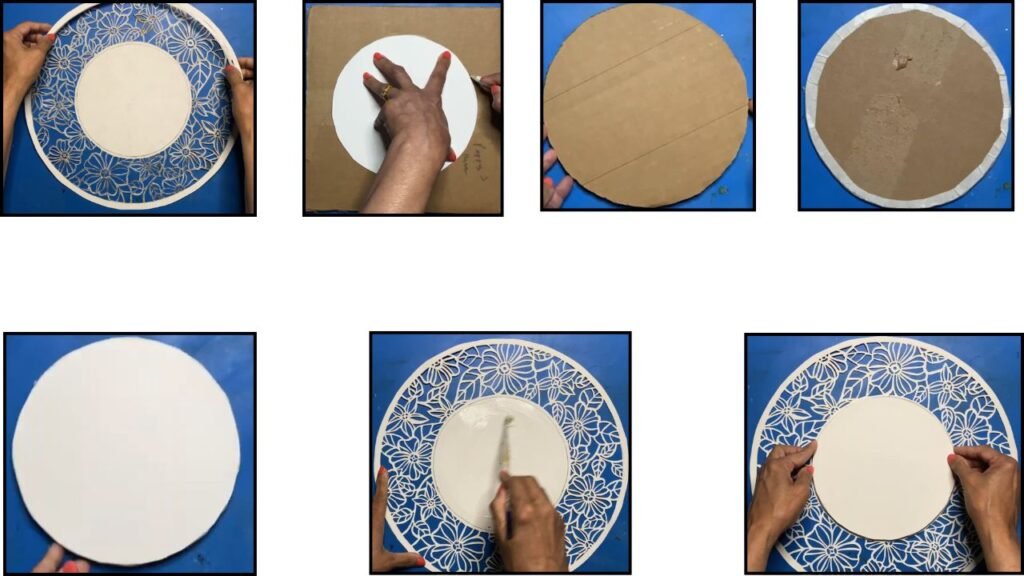
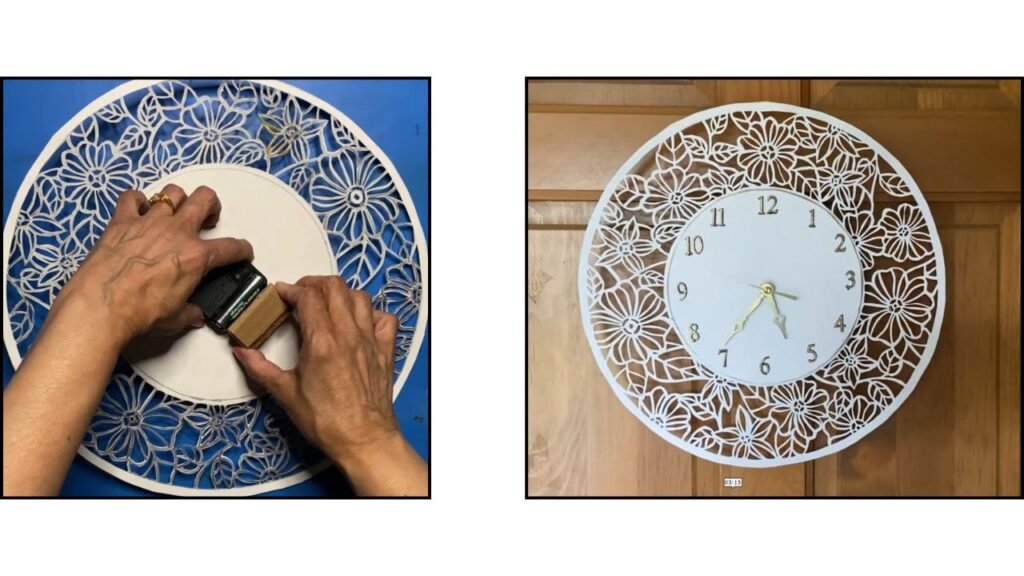
6. Assemble the clock base: Using white glue or a school glue,, attach the ring to the rim of the original carved circle.
Using the cut center circle, cut out a cardboard circle. Cover the circle edge with masking tape. Cover the cut cardboard center circle with white paper, then glue it to the center of the carved circle using white or school glue.
7. Add the clock mechanism: Make a hole in the center circle using a drill (or simply use a pointed object if you don’t have one). Next, attach the numbers from the clock-making kit and then insert threaded shaft of the clock movement through the center hole. Fix the clock hands on the shaft using the screws.
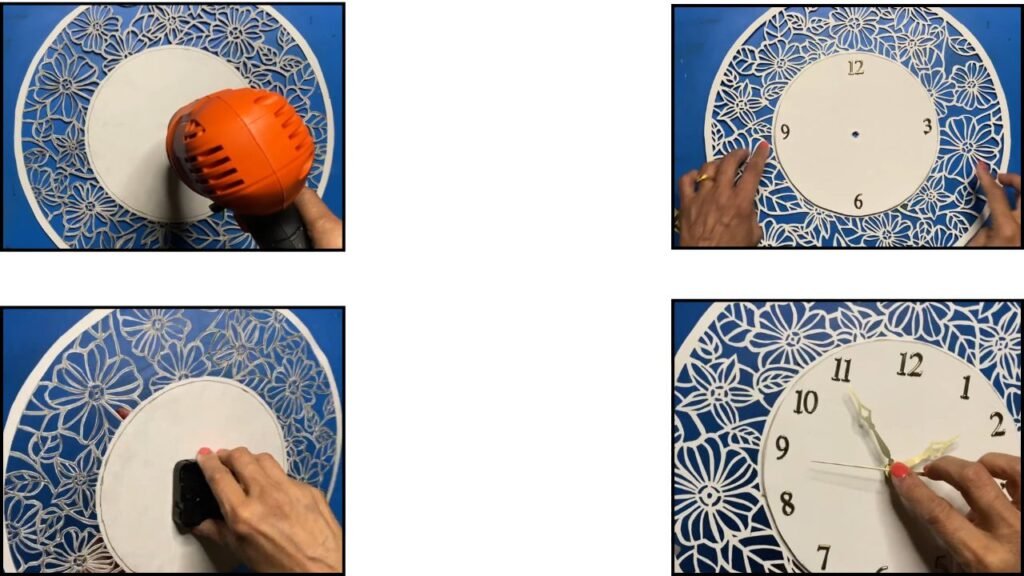
8. Finish and level the clock: Insert an AA battery into the clock mechanism and check that the second hand is moving. Next, roll a piece of cardboard into a small rectangular box and glue it under the clock mechanism so the clock sits level against the wall. The Clock mechanism has hanger to hang it.
Tips And tricks
- Instead of Bristol Recycled paper, you can also try using watercolor paper.
If you don’t have Bristol or watercolor paper, you can glue two poster boards together to create a sturdy base.
- You can use any clock-making kit you like. I used gold, but feel free to choose any color that matches your style.
The size of the clock and the design are fully customizable.
You can also make this clock out of cardboard. Just choose a design that’s easier to cut and won’t strain your fingers.
Final Word
I hope you enjoyed this unique paper-cut wall clock. Creating this project was so much fun, and the best part is that it’s completely customizable from the size and shape to the design and color. I hope it inspires you to create your own version of this clock.
Please also check out my carved cardboard furniture projects here on the blog. You might find something that inspires your next masterpiece! If you enjoy my tutorials, consider subscribing to my monthly newsletter, where I share one or two new craft ideas. I’d love to hear your thoughts in the comments. Thanks for stopping by and happy crafting!