Description
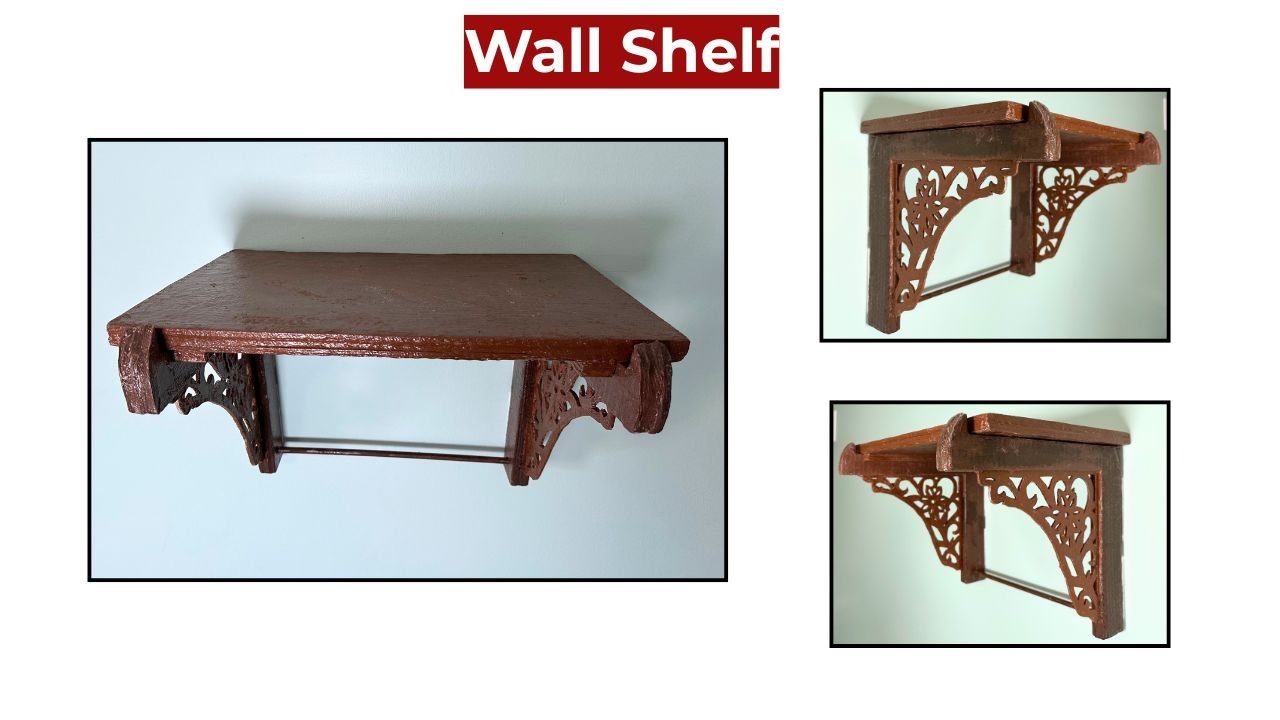
Although this decorative wall-shelf is made completely out of cardboard it is fully functional and is quite sturdy.
Backstory
I’ve always loved decorative brackets. But whenever I hear the word “brackets,” my mind immediately goes to metal brackets.
After making side tables, stools, and a couple of shelves back to back, I wanted to make something a little different. So, even though I usually associate brackets with metal, I decided to make a wall shelf with decorative brackets entirely out of cardboard and make it look like wooden furniture.
As I’ve mentioned before, I love carved furniture, so I wanted the decorative brackets to be the stars of this project. And here I am, I did just that!
Watch How It Is Made
Note: Watch this video with timestamped step-by-step process overview for clarity
Materials List
- 1-Ply and 2-Ply cardboard sheets
- X-Acto Knife
- White/School Glue
- Acrylic Paints
- Gesso
- Paint Brush
- Kitchen towels, Paper Napkis or any paper
- Scissors
Step-By-Step Overview
1. Making the Decorative Brackets (0:19-4:30)
I transferred the decorative design onto 1-ply cardboard and carefully carved it out using an X-Acto knife. I then combined the carved piece with layers of 2-ply cardboard to build the structure of the brackets. The rough edges were covered with strips of kitchen towel and white glue for a smoother finish.
2. Building the Shelf (4:31-5:48)
I glued three layers of 2-ply cardboard together to create a sturdy shelf. I covered the exposed edges with paper strips and added a reinforced cardboard support strip between the brackets.
3. Reinforcing the Brackets and Shelf (5:49-6:56)
I strengthened the support strip connections with additional paper strips. I also added a wooden dowel between the ends of the brackets to prevent them from pushing inward. Stoppers were added to the back of the shelf to keep it from sliding sideways.
4. Finishing the Piece (6:57-7:24)
Once the construction was complete, I applied gesso over the shelf and brackets. I then painted the piece to give it the appearance of wooden furniture and finished it with varnish for a polished look.
5. The Finished Shelf (7:24-7:42)
The result is a decorative wall shelf made entirely from cardboard, with carved brackets as the stars of the project. The finished piece combines the look of carved wooden furniture with the unexpected material of cardboard.
How Strong and useful Is This Shelf?
I’ve noticed that while people generally like the furniture I make, they are often skeptical about the functionality and strength of carved cardboard furniture. So, I decided to demonstrate just how strong this shelf really is.
Here is the stress test video.
Tips And tricks
- Transfer Mirror-Image Designs:
After transferring the design for one bracket, remember to transfer a mirror image of the design onto another sheet of cardboard for the second bracket. - Sandwiching Decorative Part of brackets:
While sandwiching decorative bracket between non-decorative brackets make sure the right side of carved design is showing from outside. That way you will sandwich the decorative bracket part after one non-decorative part and then two non- decorative parts are glued next. - Use Kitchen Towels to Cover Rough Edges:
This time, I used kitchen towels to cover the rough cardboard edges. I found them more effective than paper napkins, which are too thin to conceal the rough edges well.
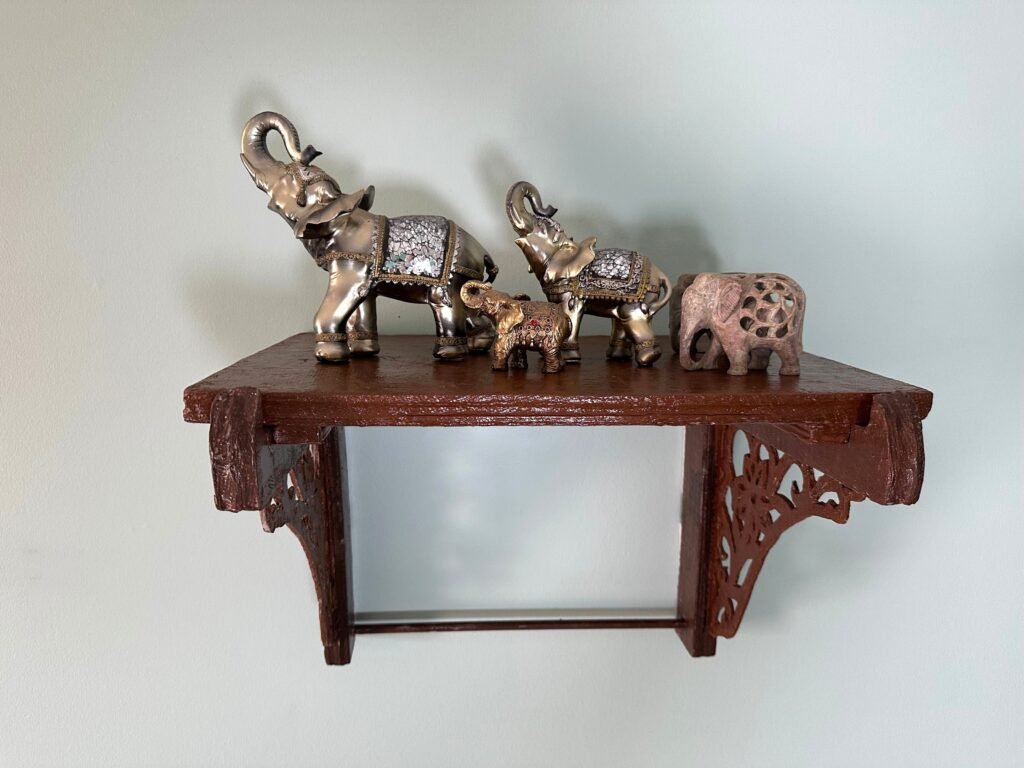
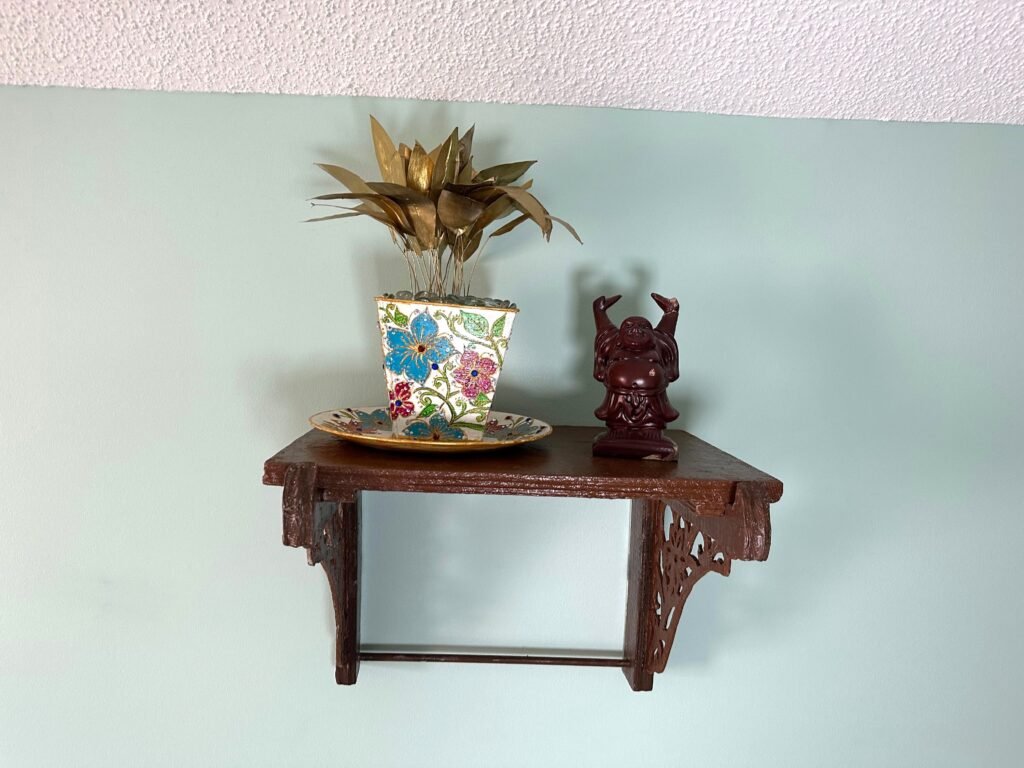
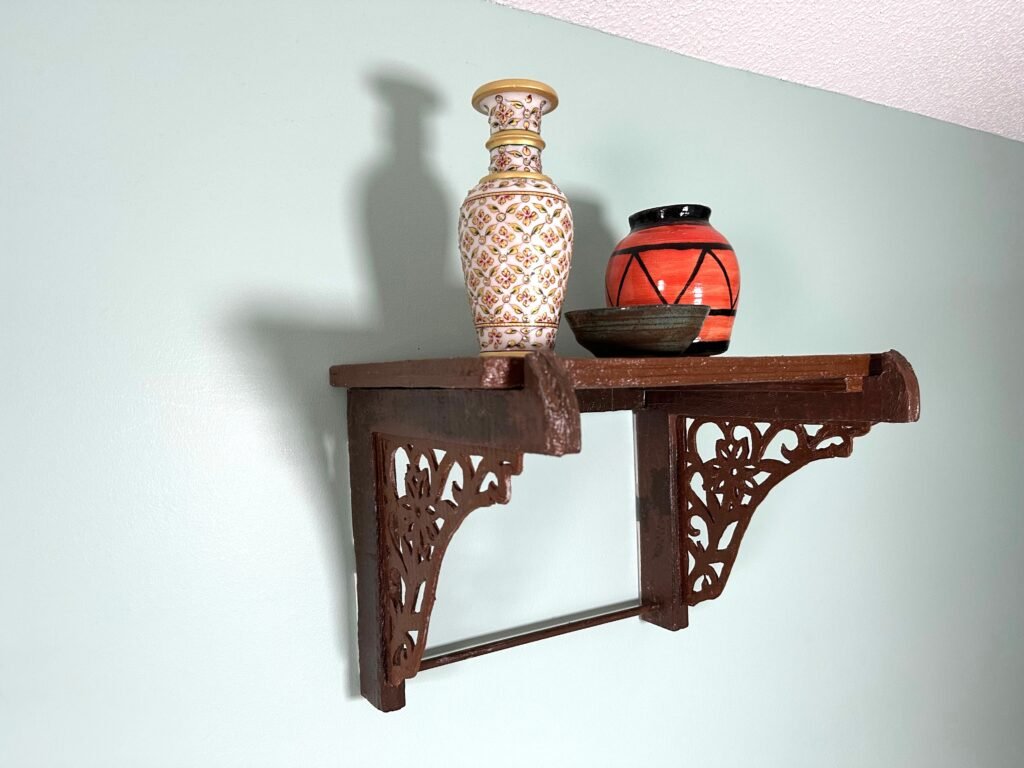
This Is How I Styled This Shelf In My Bedroom
Note: Since the shelf is mounted using Command Strips, I can’t move it around, so all the photos were taken in the same location.
Shop The Look
Explore more of my creations:
Final Word
This project was created using simple cardboard and recycled materials, as part of my ongoing experiments in building functional furniture from waste materials.
Each build helps me explore new techniques, improve structure, and find better ways to turn cardboard into usable furniture pieces.
If you enjoyed this project, feel free to share your thoughts in the comments. I’d love to know what stood out to you in this design.
Thank you for reading and watching.