Description
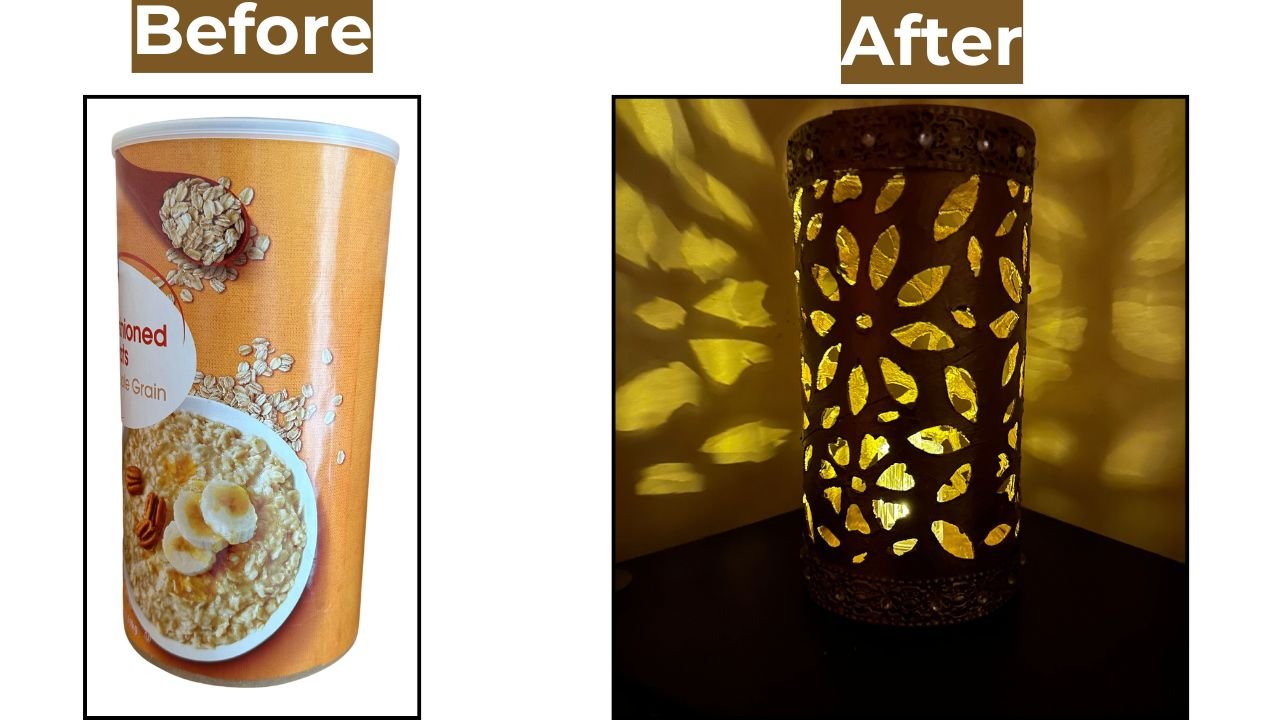
As the title suggests, this luxurious-looking home decor lamp is made from an empty oatmeal container. I painted it with metallic acrylic paints and embellished it with metallic lace to create a metal-like finish. At first glance, no one would guess that it’s actually made from cardboard.
Materials Used
- A cardboard container
- Craft knife
- Metallic lace (or any other lace of your choice)
- metallic Acrylic paints
- Paint brush
- Rhinestones (optional)
Video Tutorial
I recommend following the video tutorial below along with the written instructions for better clarity. The video shows each step in real time, making the process easier to understand.
Step-By-step Written Instructions
- Remove the shiney outer label on the oatmeal container. After removing the label, cardboard shows up.
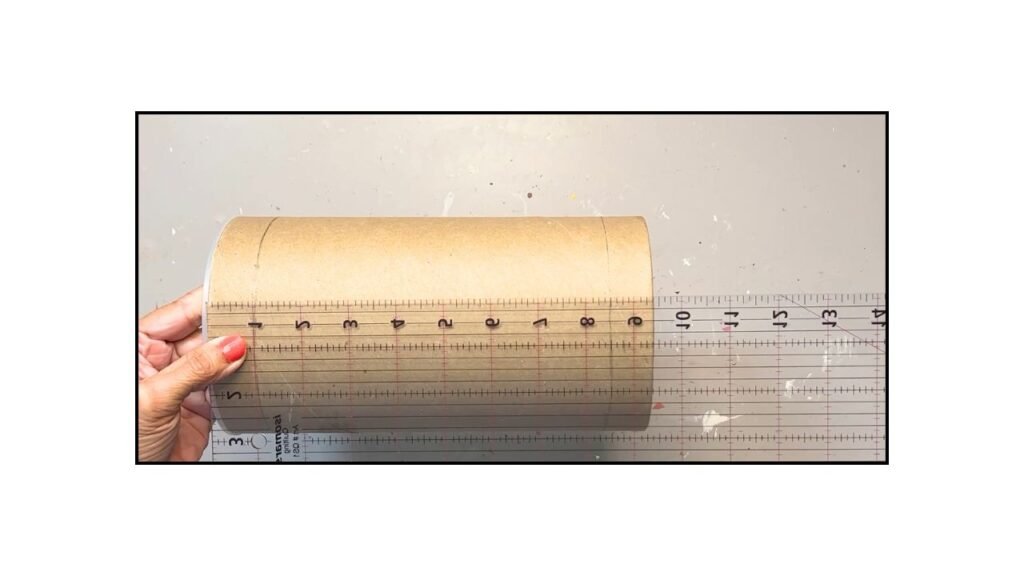
2. Next, I took a 3/4″ wide paper strip and wrapped it around both ends of the container to mark the margins for my decorative cuts and metallic lace. After removing the strips, the marked margins were visible on both ends of the container.
3. Next, I measured the distance between the two margins and found it to be 7.5 inches.
Watch steps 1-3 on the video from 0:02 to 0:40
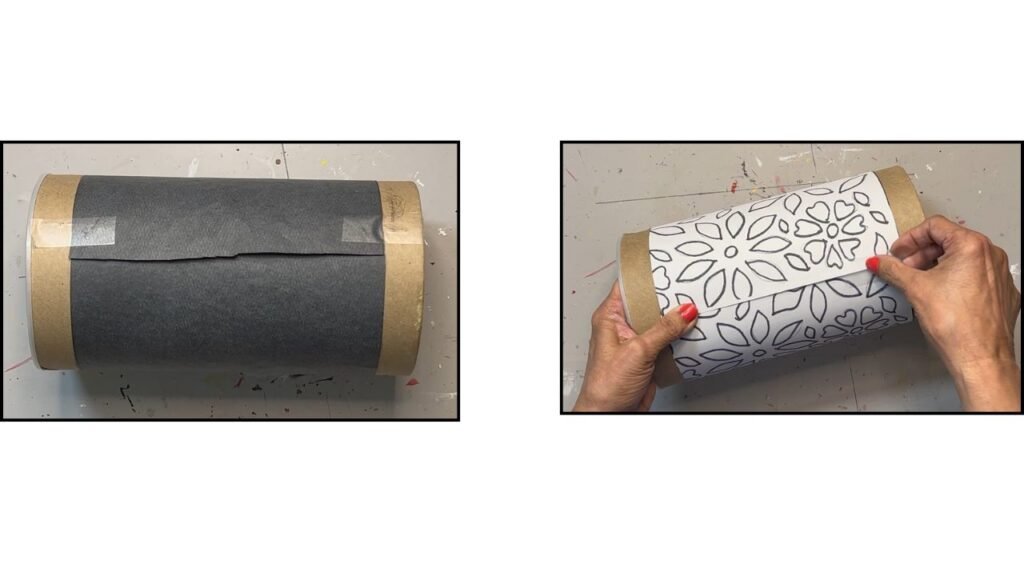
4. Transferring the design onto the container:
I took two sheets of carbon paper, each cut to 7.5″ wide, and joined them together with Scotch tape to make one long sheet. I then wrapped the carbon paper around the container, keeping the edges aligned with the marked margins, and secured it in place using Scotch tape.
5. Next, I took two sheets of the floral design, each 7.5″ wide, and joined them with Scotch tape to create one long sheet. I then wrapped this sheet over the carbon paper in the same way, aligning it with the marked margins.
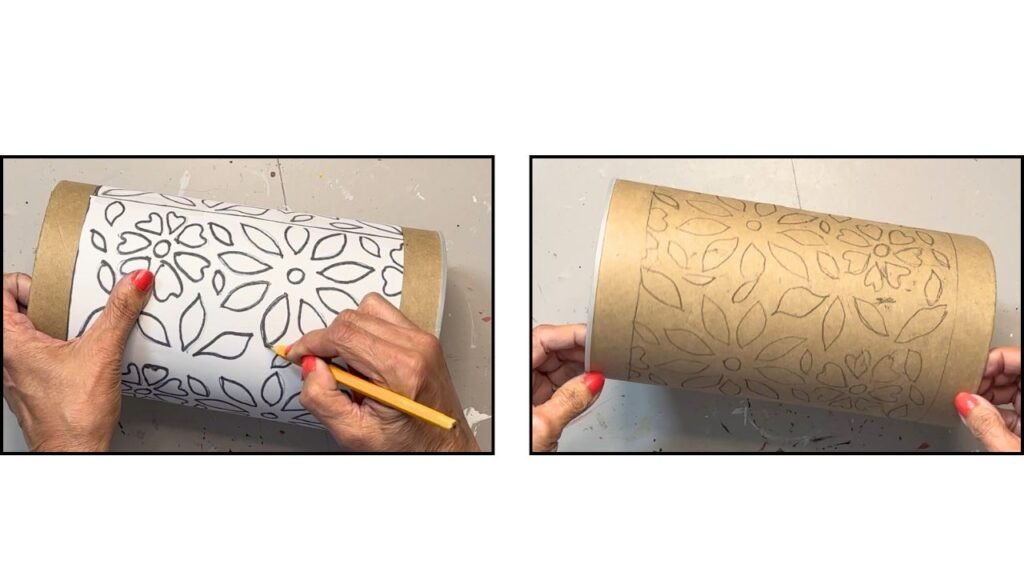
6. Now that the floral design and carbon paper were secured on the container, I transferred the floral design onto the cardboard container using a pencil.
Watch steps 4-6 on video at 0:41 to 1:52
7. Carving the cardboard container:
Using a sharp craft knife, I carefully carved out the floral design that had been transferred onto the cardboard container. Watch carving on the video from 1:53 to 3:15

8. Priming the container:
I painted the carved container inside and outside with white acrylic paint. The white paint acted as a primer, preparing the cardboard for further crafting.

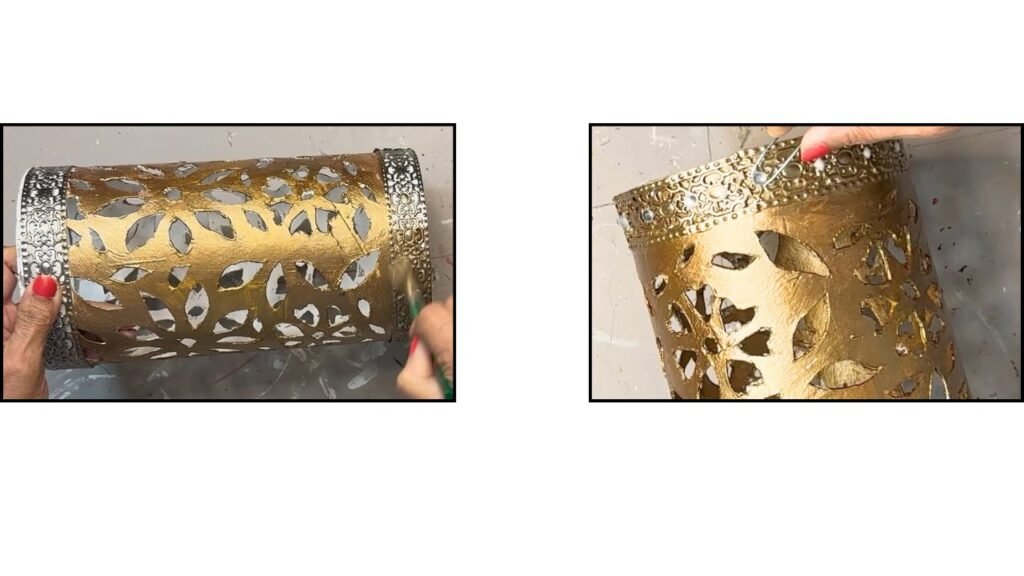
9. Adding decorative lace:
After the paint dried, I used a glue gun to stick decorative metal lace along the margins at both ends of the container.
10. Painting for a metallic finish:
Next, I painted the carved container with a mix of Espresso and gold metallic paints to give it a rich metallic finish. Once the paint dried, I painted the decorative lace with champagne gold paint to enhance its shine. And embellished the lamp further by sticking rhinestones on it. Rhinestones surely add sparkle to the lamp. For clarity of steps, watch step 8-10 on video from 3:17 to 4:50.
11. To see how the lamp looks during the day, evening and night in the real time watch video From 4:51 to 5:01
Tips And Tricks
Tips for Carving Your Cardboard Lamp
1. Choose a simple design:
Select a design with larger areas to cut and enough spacing between elements. This will make the carving process more manageable and less frustrating.
2. Watch your fingers:
As you carve, lots of holes start to form in the container, leaving your fingers exposed to the knife. Always be mindful of where you’re holding the container and protect your fingers from cuts.
3. Use a sharp knife:
For paper or cardboard carving, a sharp knife gives clean cuts and makes the process smoother and less frustrating.
4. Avoid corrugated cardboard boxes:
Regular corrugated cardboard is much harder to cut. If you’re using corrugated cardboard sheets, it can work, but avoid trying this on a full corrugated box.
Backstory
I had an empty oatmeal container lying around at home, saved for one of those “just in case” moments. One day, when I looked at it again, the idea of turning it into a carved lamp came to me out of nowhere. It felt like the idea had been quietly forming in my subconscious, and seeing the container was all it took to bring it to life.
Final Word
I hope you enjoyed this upcycling idea! The oatmeal container lamp turned out to be a minimalist craft, using minimal materials to create a luxurious-looking home décor piece. Be sure to check out my other eco-friendly DIY projects on this blog. You might especially like my CD cover faux stained glass lamp (link below).
Please don’t forget to subscribe to my blog for a monthly newsletter with even more creative craft ideas.
Happy crafting and Thanks for stopping by!