
Description:
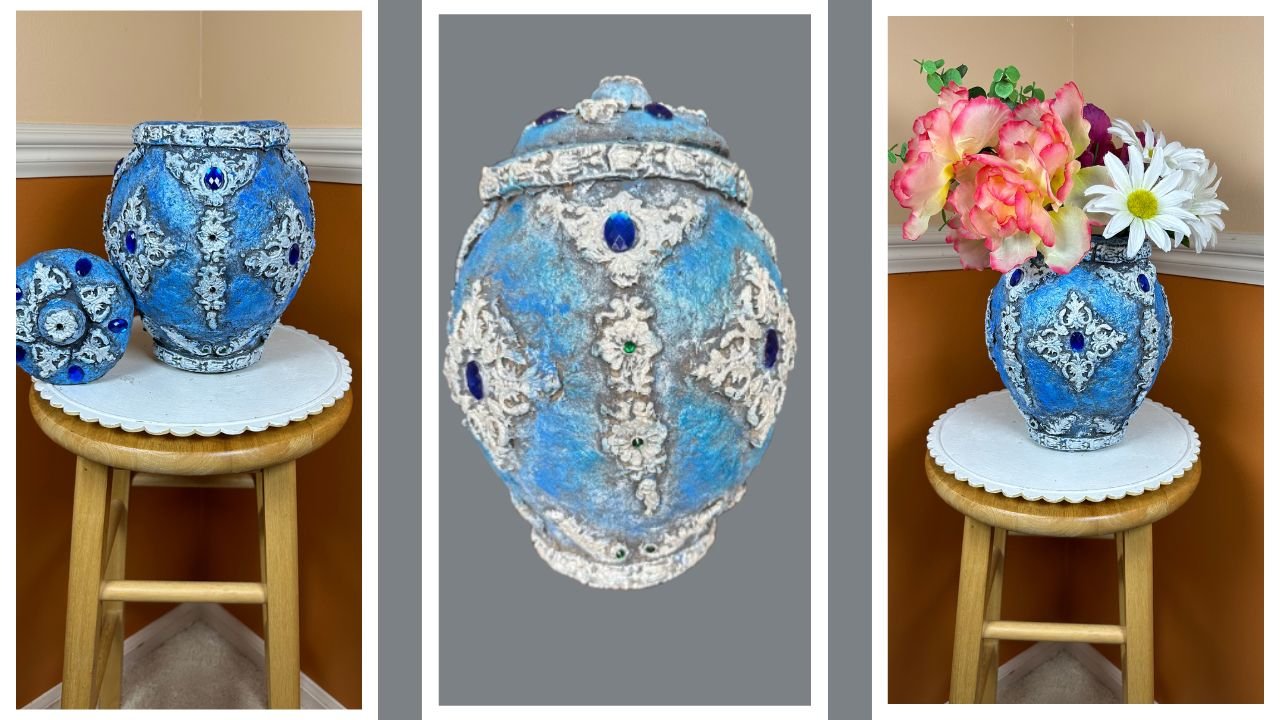
This elegant vase (or pot) is crafted using a balloon base and homemade paper Mache clay, giving it a beautiful stone-like texture. Embellished with decorative rhinestones, it has a unique, royal appearance that adds character to any space.
It works wonderfully as a standalone home decor piece or a flower vase. When lid is placed on it, it gets transformed into a beautiful storage container for craft supplies like beads, pearls, or rhinestones.
Other than rhinestones, this functional vase/pot is made out of recycled material.
Materials Used
- Newspaper or used printer paper, cardboard
- School Glue or White Glue
- Silicon Molds
- Rhinestones
- Acrylic Paints
- Metallic Paints
- Balloon
- Cardboard Strips
- Masking Tape
Backstory:
During the summer, I kept noticing beautiful stone-look planters everywhere. And I absolutely fell in love with that textured finish. I really wanted to recreate that look myself, but without using wall putty, air-dry clay, or cement.
Then one day, while browsing Google Images, I stumbled upon some beautiful paper mache clay pots—and I instantly knew I had found my answer!
Excited, I jumped right into the project. Making paper mache clay turned out to be easier than I expected (although I’ll admit, it does get messy!). But it was totally worth it. Not only did I achieve the stone-like texture I was after, but the vase turned out lightweight and quite sturdy.
I had so much fun embellishing it with silicone mold decorations and rhinestones. This was truly one of the most satisfying DIYs I’ve ever made!
For Video tutorial click on the link HERE
Step-By-Step Written Instructions for paper mache vase DIY
- Blow a 7″ Balloon and tie it. Next make two circles, one larger than the other using cardboard strips Stick larger circle on the top of the balloon and a smaller circle on the bottom of the balloon.


2. I cut brown paper into pieces. You can use newspaper or printer paper too. Using school glue I started sticking brown paper pieces on the balloon. After the first layer dried I stuck another layer of paper on the balloon. You can have more layers too but minimum of two layers are recommended.


3. After both the layers dried I burst the balloon and took it out.

4. Tied up the top and the bottom of the vase. Cut out the extra paper and pushed it down.


5. Next To close the bottom of the vase I stuck the vase on the cardboard and cut out around the bottom of the pot.


6. I started applying Paper Mache clay on the pot. For the Paper Mache Clay Recipe click on paper Mache Clay


When the clay dries this is how it looks,

7. Next using silicon molds I made designs and using school stuck the motifs on the vase to embellish it.


Now I’m sure you got the idea.
8. After the motifs dried I painted the vase with gray, blue, metallic blue, silver and white paints.


9. After the paint dried I stuck rhinestones on the vase using glue gun.


10. This is how it looks.

I have made a lid for this vase transforming it to be a pot. You can store rhinestones, pearls, beads, silicon molds or any other crafting supplies.
To know how to make the lid click on lid
If you liked this Pot/vase, please checkout my other vases on this blog. The links are below.
https://ajcraftchannel.wordpress.com/2025/07/22/luxury-inca-inspired-vase-made-from-cardboard/
Tips:
- Remove Excess Water: Always squeeze out as much water as possible from the paper pulp. Excess moisture can make the clay too soft and difficult to shape.
- Experiment with Paper Types: You can use newspaper, cardboard, printer paper, or any scrap paper you have on hand. Just note that the texture and color of the clay may vary depending on the type of paper used.
- Glue Alternatives: If you don’t have white glue, you can use homemade wheat flour glue. It works well, but may slightly alter the texture and feel of the clay.
- Clay Substitutes: You can also use homemade clays like wall putty clay, but they aren’t ideal for silicone molds. In my experience, no other homemade clay gives the same stone-like finish as paper mache clay. Cement can be used if you’re aiming for a true stone look.
- Better Crafting Practices: Apologies for the messy hands while applying glue. Sometimes I get carried away in the process and don’t realize how messy things are getting! To keep things tidier, you can use a paintbrush to apply the glue. It helps avoid sticky hands and keeps your workspace (and clothes!) a bit cleaner.
Final Note:
I hope this post inspired you to try this craft, or at the very least, that you enjoyed reading about it!
If you liked it, please consider sharing it and exploring my other blog posts. You might just find your next favorite project.
Thanks for stopping by!