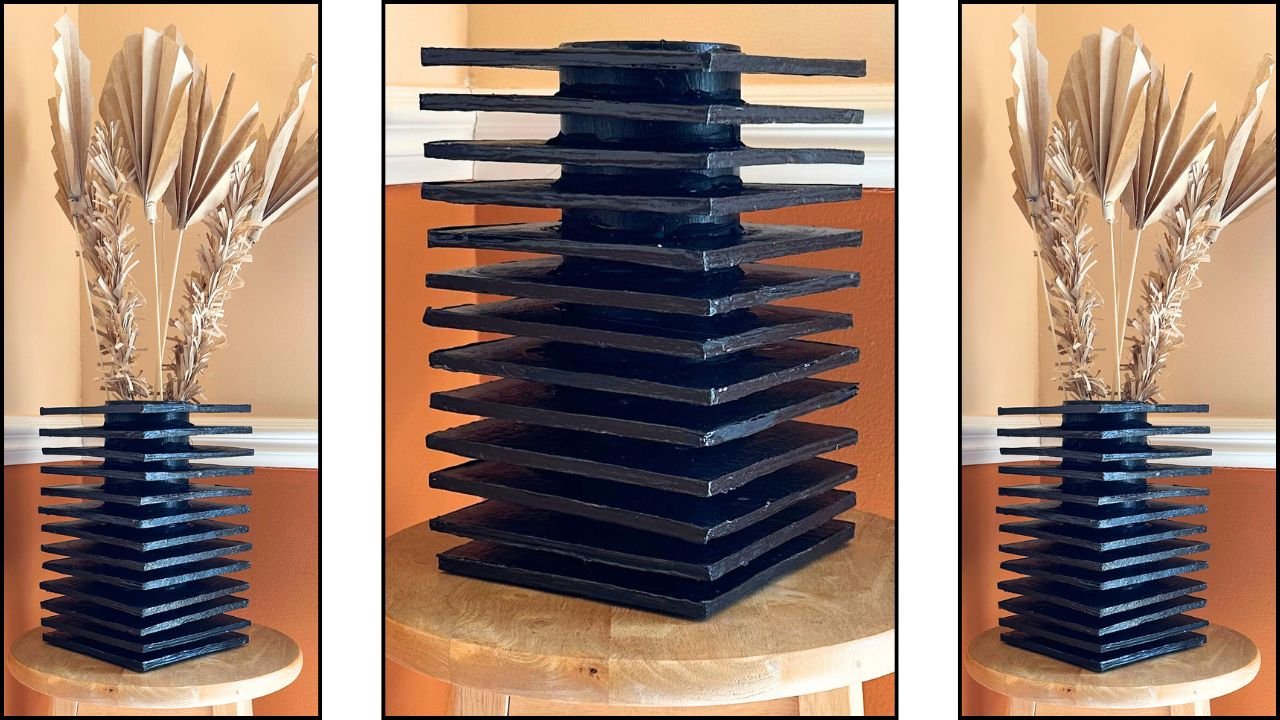
This vase DIY made of mainly recyclable items found around the house. I used cardboard and an empty chocolate canister. Instead of canister you can use a cardboard cylinder. You can bend cardboard into a cylinder. This vase is suitable for a modern home. Stacked cardboard squares create a mesmerizing shadow play effect. It’s a through and through trash to treasure DIY.
Backstory.
I made this vase as a part of Trash to Treasure vases series on youtube.
While looking for ideas I came across this kind of vase, which was made of plastic. Its 3D look was very attractive and I instantly decided to recreate this vase with some changes in shape and material.
Materials used
- Cardboard squares
- Brown Paper
- School Glue
- Cylindrical canister or cardboard Cylindrical tube or can.
- Cracker box cardboard strip
- Glue Gun
why would you like this vase?
This vase is eco friendly, easy on your pocket, unique, easy to make and modern look.
To watch a video tutorial click on the video below.
Written Step by Step Instructions.
- This is a 6″ cardboard square. I drew diagonal crossing lines on the cardboard to find the center of the square.


2. Next I used the canister to draw a circle.


3. I folded the circle in a quarter to find the center of the circle. That way I found out the radius measurement of the circle.


4. Using radius measurement I drew the circle on the center of the cardboard square. Now you can see why I determined the center of cardboard. This way the circle I drew will always be in center of cardboard.


5. Next I cut out the circle on cardboard so I can string this cardboard on the canister.

6. I sanded the circle rim so it will slide smoothly on the canister.


7. I stuck brown paper strips on the edges of the cardboard square for a neater look.


8. Next apply Gesso on the cardboard square as a primer.

9. After Gesso dries paint the cardboard square with black acrylic paint.

10. Apply varnish when black paint dries.

11. Now I started getting the canister ready. So first I applied Gesso on it, followed by black paint and when paint dried I applied Liquitex Gloss Varnish on it as shown in the photos below.


12. Now its time to put it all together. I made altogether 15 cardboard tiles. Then strung them on the canister. I used a strip of soft cardboard( cracker box cardboard) as a spacer. After stringing the first cardboard square or tile on the canister, I wrapped the half inch wide strip around the canister. Then strung the second cardboard tile. The spacer keeps the tiles half an inch away from each other. After stringing the second tile I stick the tile to the canister using glue gun. After the glue dries I took out the spacer and repeated the process for the next cardboard tiles. You can see this process in photos below.


In the above photo you can see the 1/2″ wide spacer strip and a strung cardboard square.


In the above photo I am taking out the spacer once the second cardboard square is fixed in place.

Above you can see that the spacer strip helps keep the spacing between the cardboard squares even.

Above photo shows all the 15 cardboard squares are placed on the canister.

Above photo shows how dried glue looks. After the glue dried I painted it black so it will look nicer. I did this only for the top square.

If you like this project please make sure to checkout my other vase. Link is below.
https://ajcraftchannel.wordpress.com/2025/07/22/luxury-inca-inspired-vase-made-from-cardboard/
Final Note:
In this project, I used cardboard squares, but feel free to get creative! Try experimenting with rectangles, ovals, or circles. Each shape creates a different shadow play and 3D effect. It’s fascinating how the same basic idea can take on a whole new look just by changing the shape.
I hope you enjoyed this post! If you did, please consider giving it a thumbs up and sharing it with others who love creative DIYs.
I’d love to hear your thoughts on this project or any of my others feel free to leave a comment in the box below.
And if you watched the video tutorial, thank you! Please don’t forget to like the video and share it with friends and family who might enjoy it too.
Thanks so much for visiting my blog.
See you in the next project!