Description
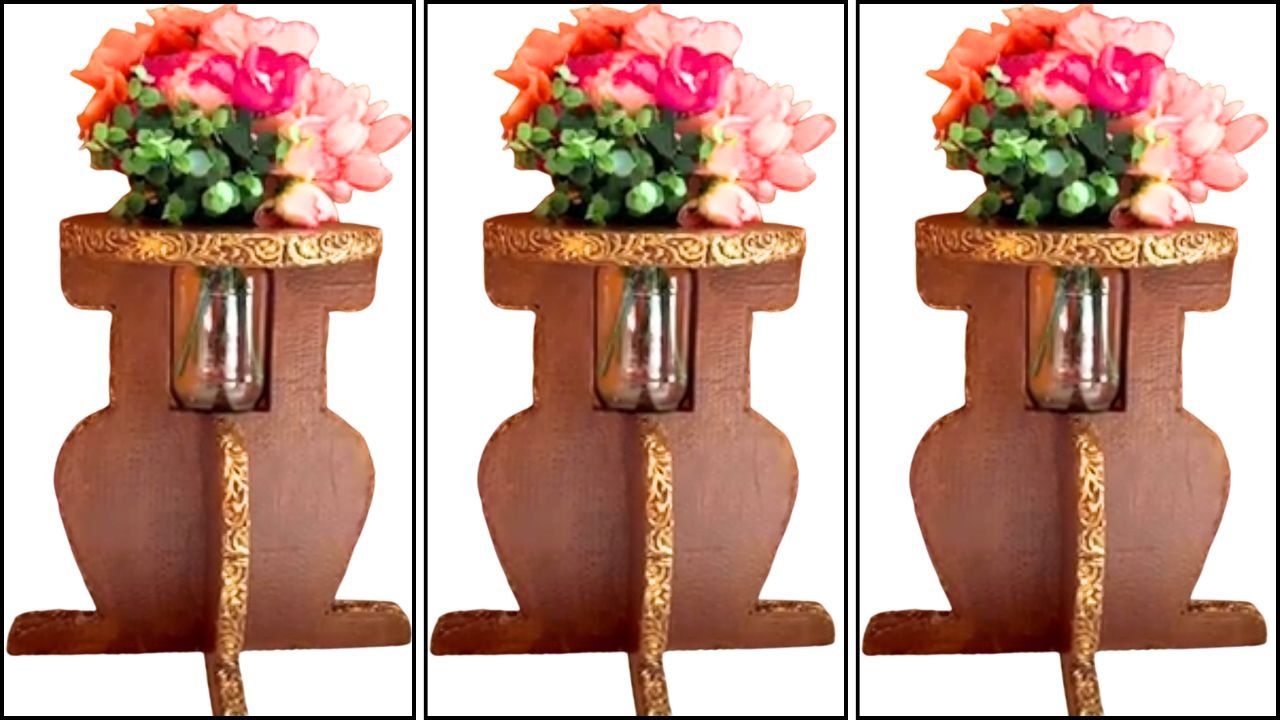
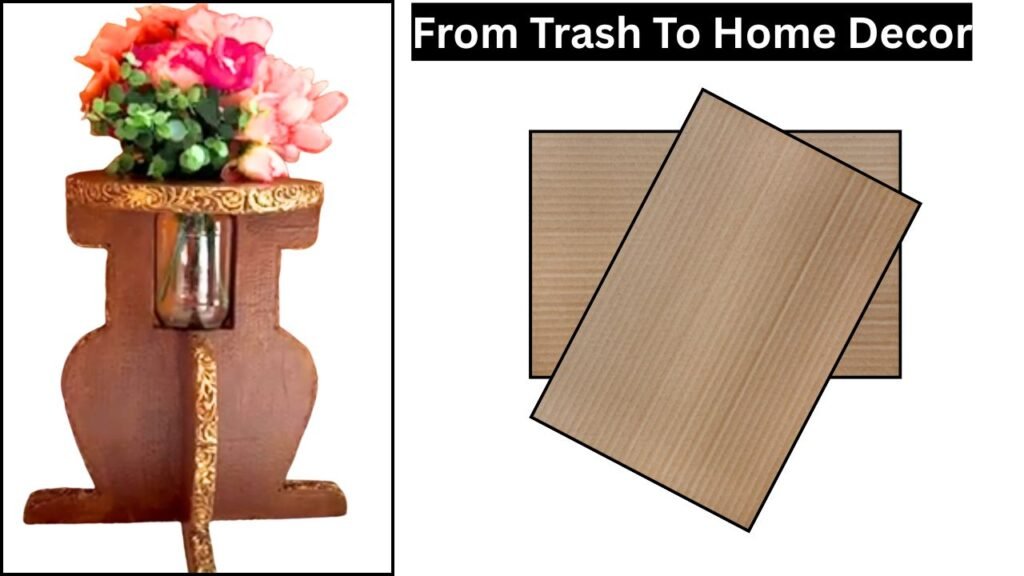
I made a vase stand using cardboard, and to give it a carved look, I decorated the edges with decorative clay borders. It features an inbuilt glass jar that serves as the vase. This project turned out to be a truly unique piece of home decor!
Material List
- Cardboard
- Empty Pickle Jar
- Air Dry Clay
- Silicon mold
- Acrylic Paint
- Paint Brush
- Glue Gun
- Flowers Artificial Or real
Backstory
I first came across a wooden vase stand like this online, and I absolutely loved the idea, a piece of furniture with an inbuilt vase! It looked modern, versatile, and truly out of the box. As always, my first thought was how I could recreate the concept using cardboard instead of wood.
To give it a carved look, I used decorative clay borders, and to make it resemble real furniture, I painted it with a wood-like finish. I was so happy with the result! I took the original idea, but re-imagined it in my own style!
Video Tutorial
Step-By-Step Written Instructions
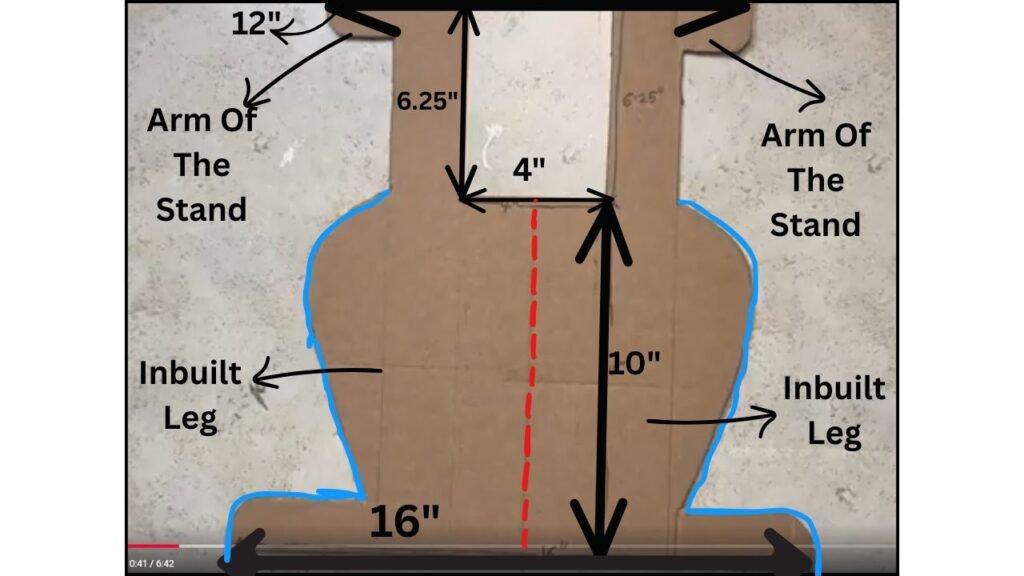
- Begin by measuring your glass jar. Use these measurements to decide the dimensions of the vase stand, so the jar fits snugly inside it. The measurements are provided below.
2. using these measurements, I made a template.
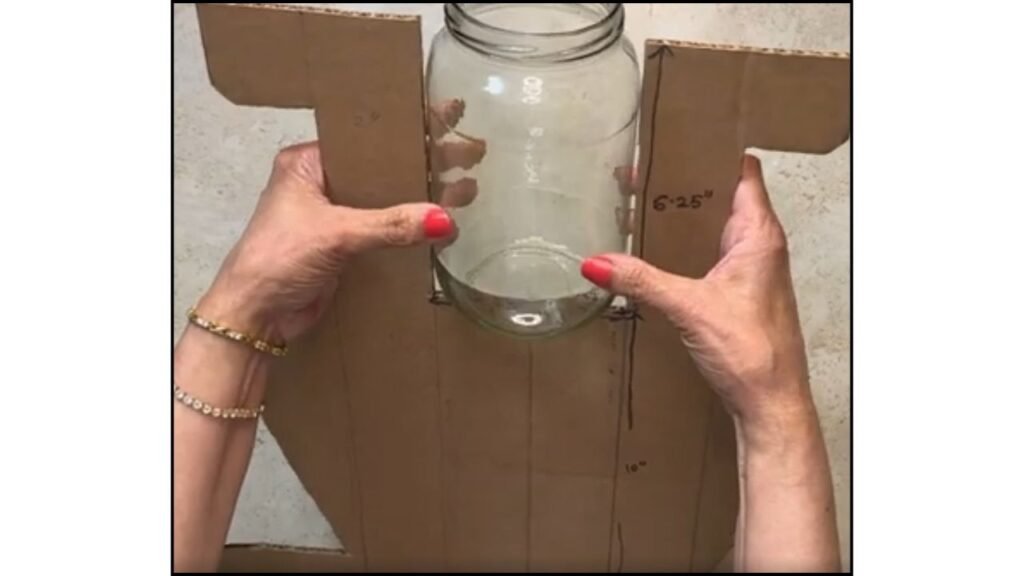
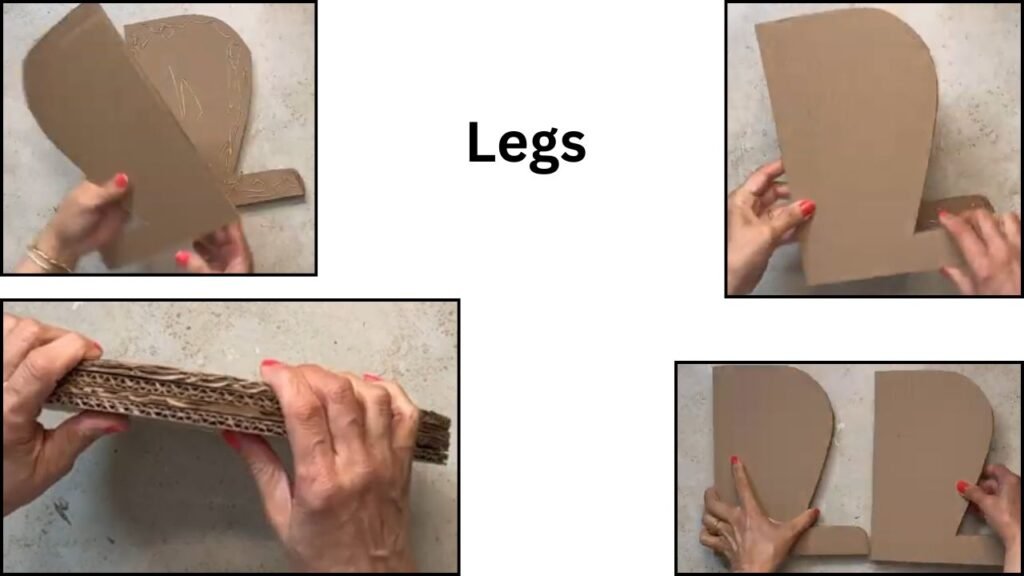
First I drew 6.25″ by 4″ rectangle on a cardboard. Around the rectangle I drew the shape of the stand. The shape can be drawn as per your choice. The measurements of the templates are shown below. I cut out four identical pieces using the template. As you can see this template has two inbuilt legs. This is going to be the base of the vase stand.
3. Check if the jar sits in therectangular space perfectly.
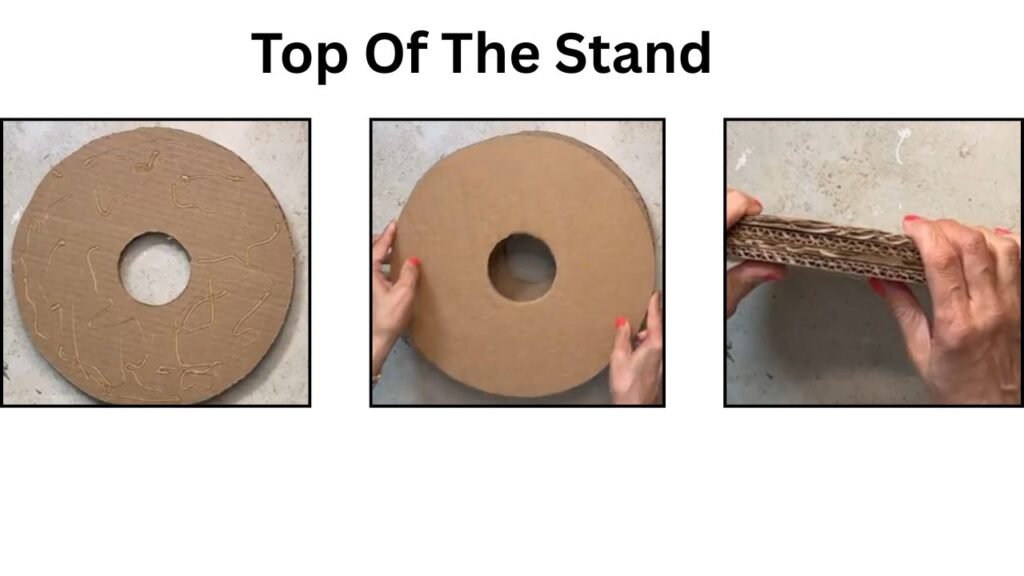
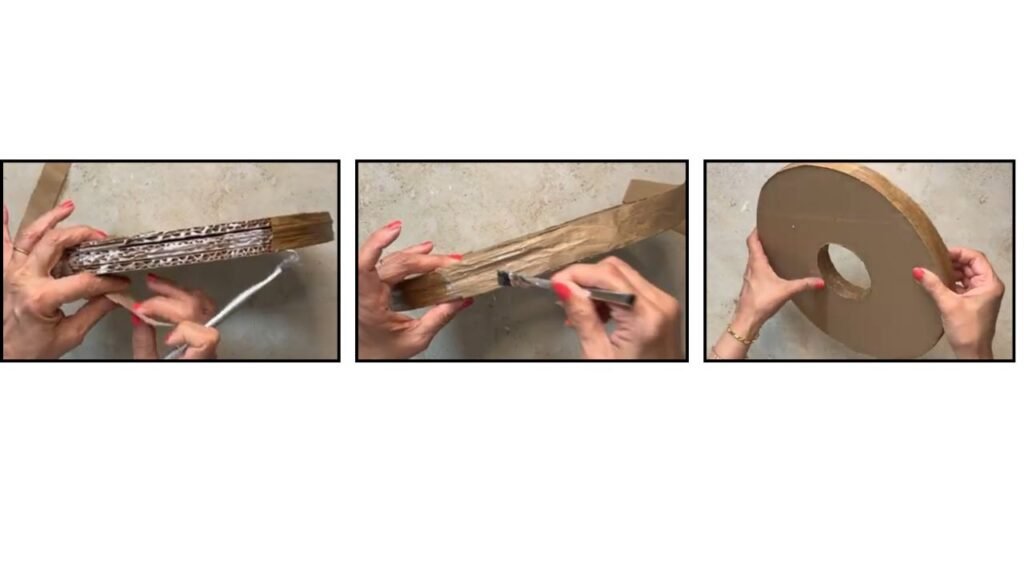
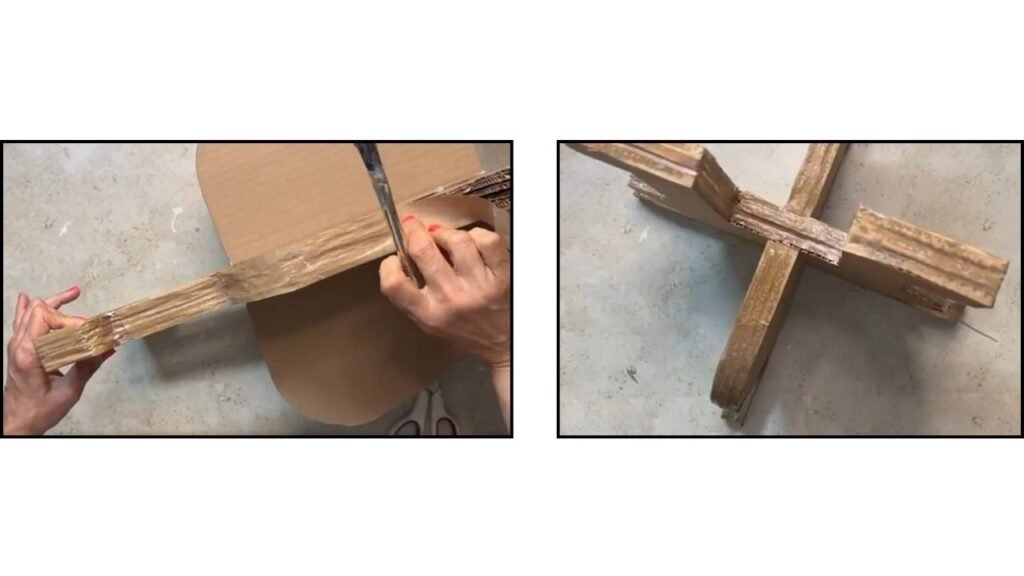
4. Next I made two more legs of the vase stand using the same template. To make the legs, I traced the line around the leg as shown. Later completed the leg by joining the dots where tracing could not be done
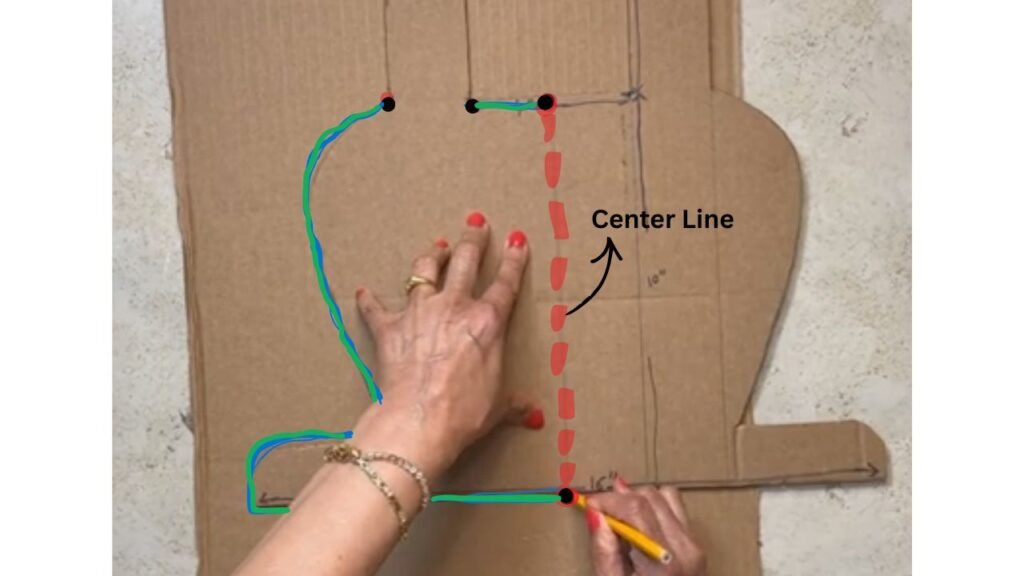
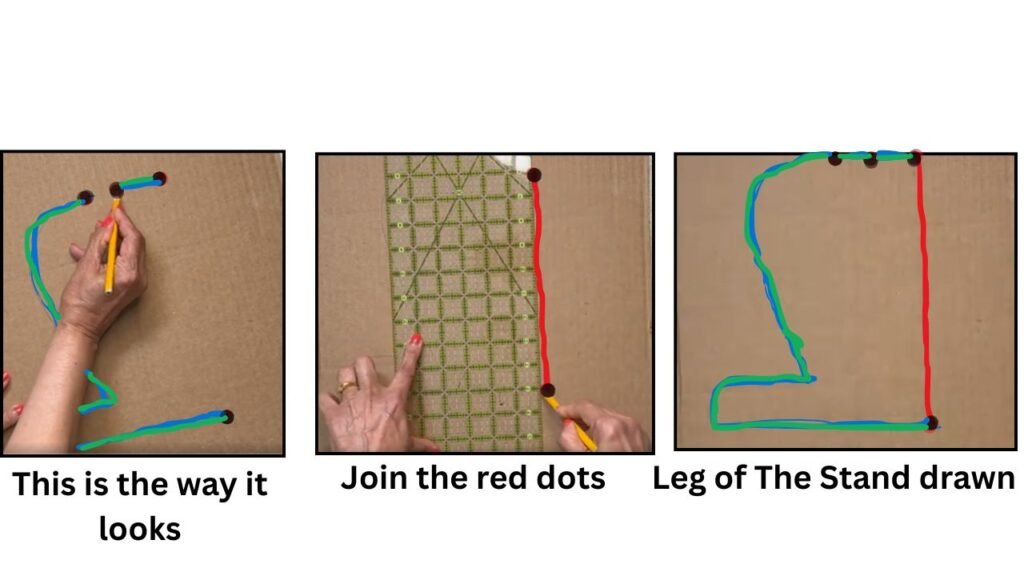
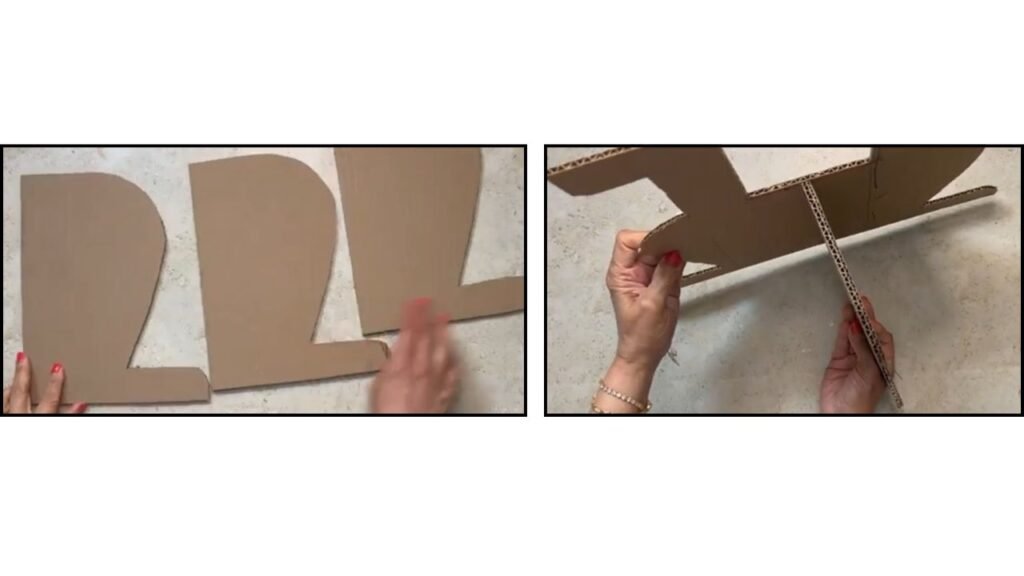
5. Next, I cut out the legs drawn. I cutout three pieces for each of the two legs.
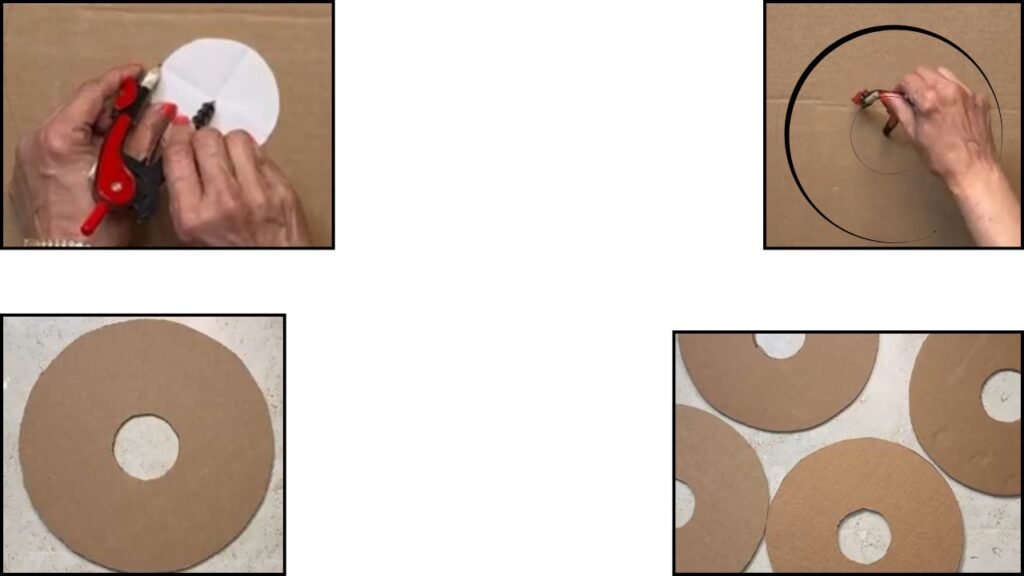
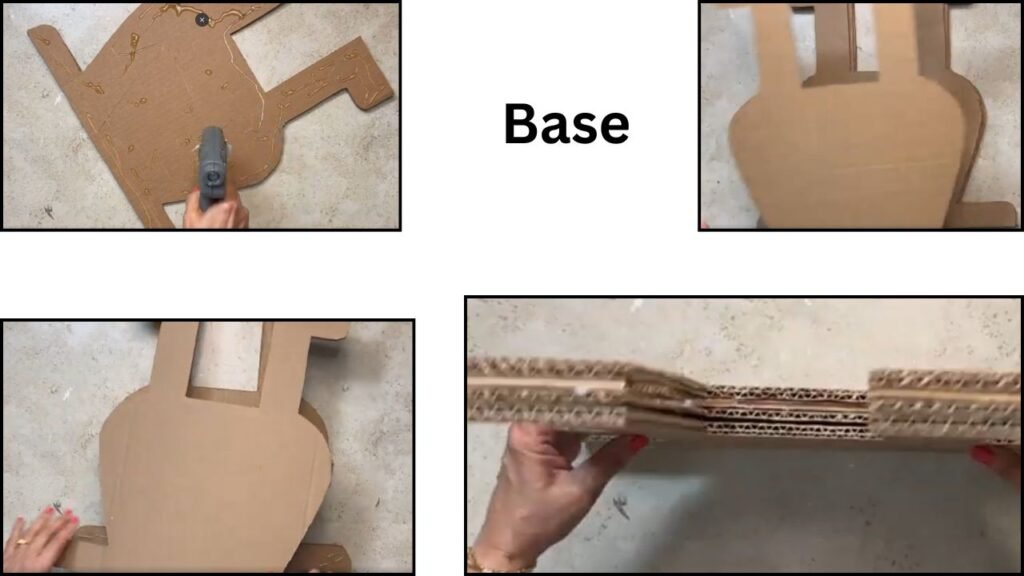
6. Next I drew a 12″ diameter circle since the distance between the arms of the stand is 12″ as shown in the stand template.
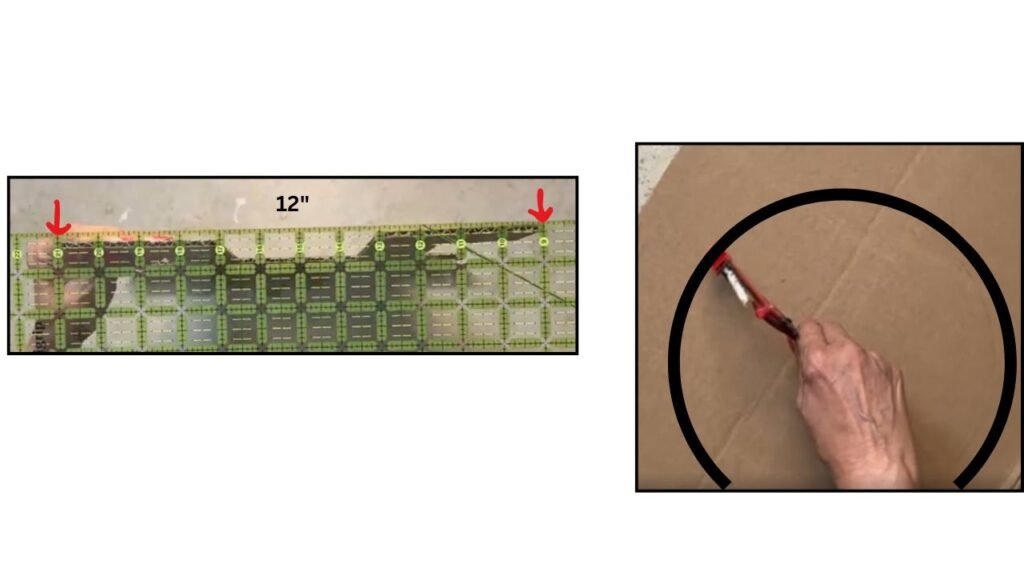
7. Next, on the cardboard, using the same center of 12″ circle, I drew a 3-inch diameter circle, which matches the measurement of both the mouth and the bottom of the jar, as shown in the diagram above, in the step 1.
Next I cut the smaller circle out.. The middle hole will fit snuggly on the mouth of the jar.
I made all together four circles.
8. Now that I have four template pieces which is the base with two inbuilt legs, six leg pieces, three for each of the two remaining legs and four circles for the top of the vase stand.
9. Placed the circle on the jar mouth to make sure it fits snuggly. This circle will hold the jar in place.
10. For Smooth and finished look, covered the rough edges of circle using paper strips.
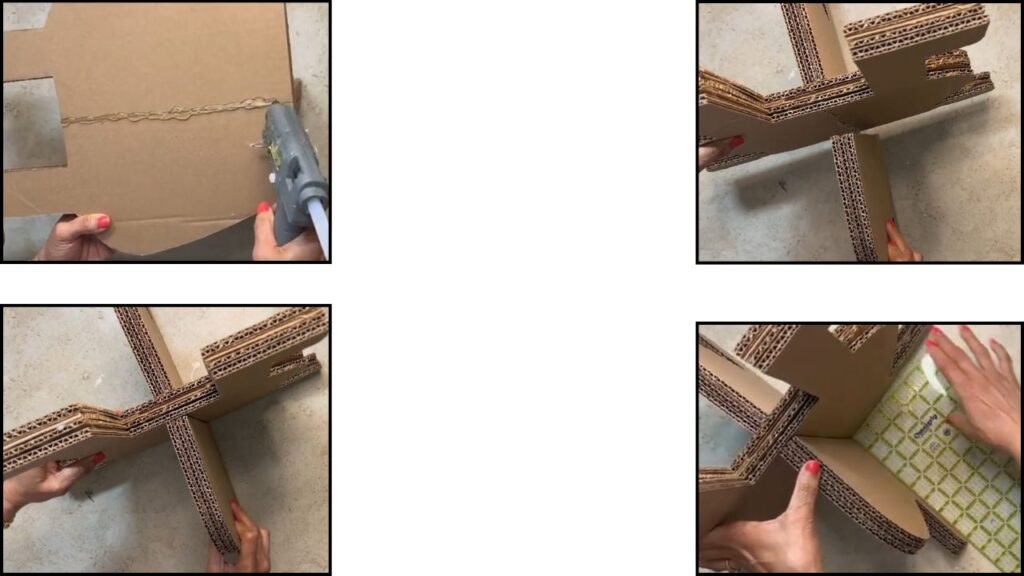
11. To put the stand together, glued two legs to the prepared base. Using the ruler made sure the leg is glued in 90 degrees angle as shown below.
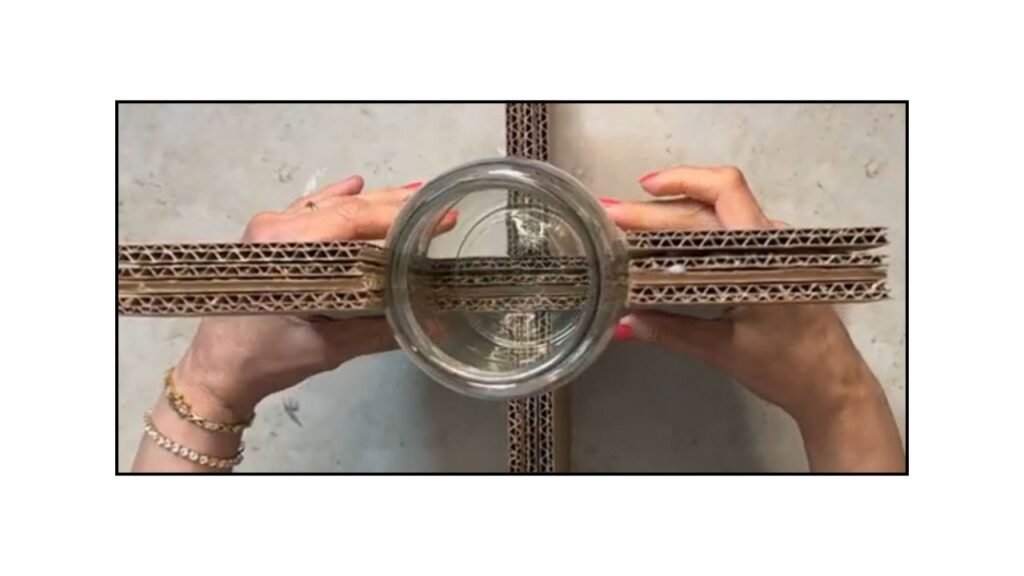
12. Place the pickle jar inside the rectangular frame to ensure it sits securely and remains stable.
13. I covered rough edges of the stand with brown paper strips for smooth and finished look.
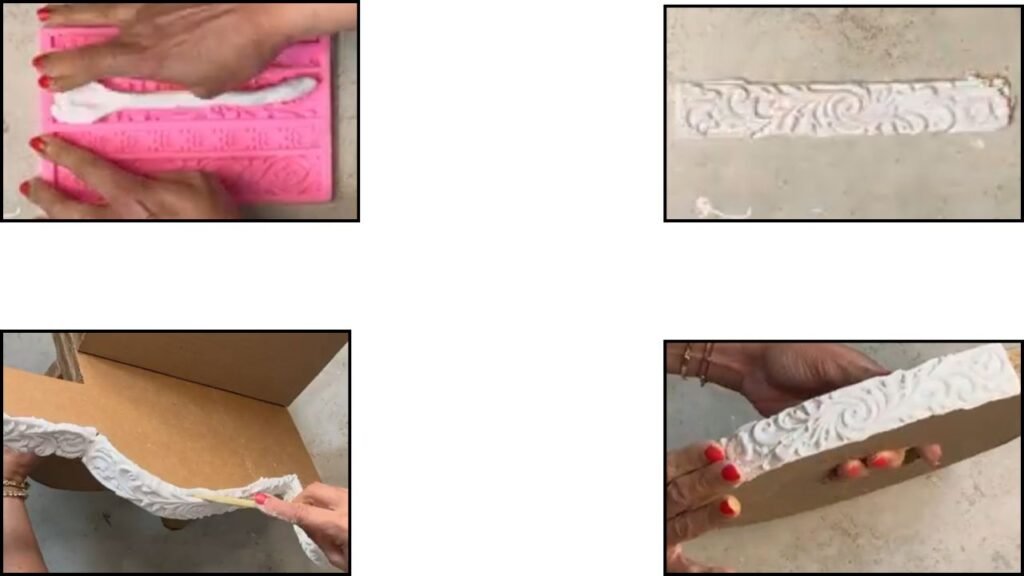
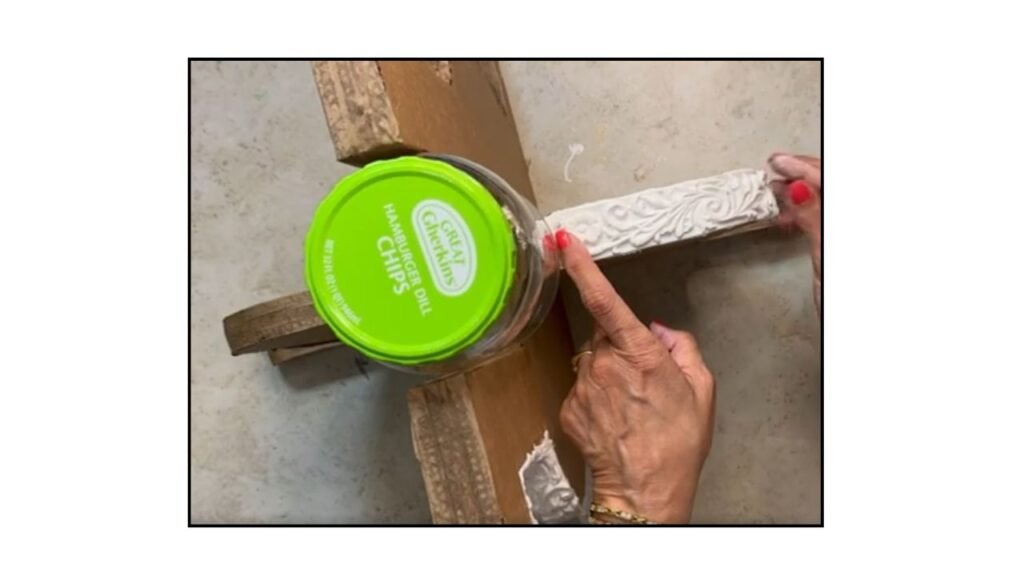
14. Next, I made decorative border using silicon mold and airdry clay. Stuck the clay borders on the borders of the base and the circle top of the vase stand.
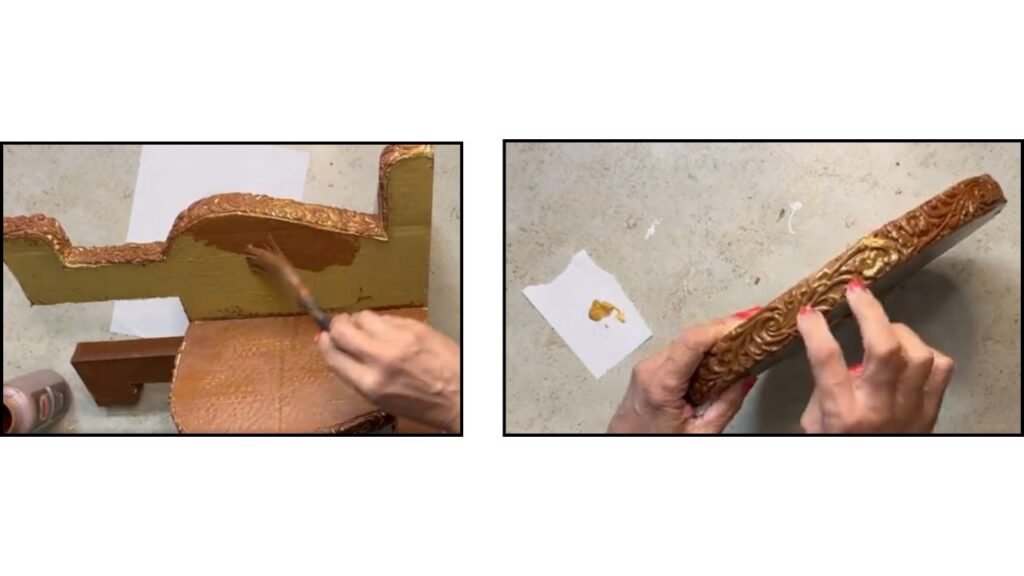
15. When the clay borders dried, I painted the stand using Brown acrylic paint to make it look like wood. When the paint dried, I painted the borders with Metallic Gold acrylic paint.
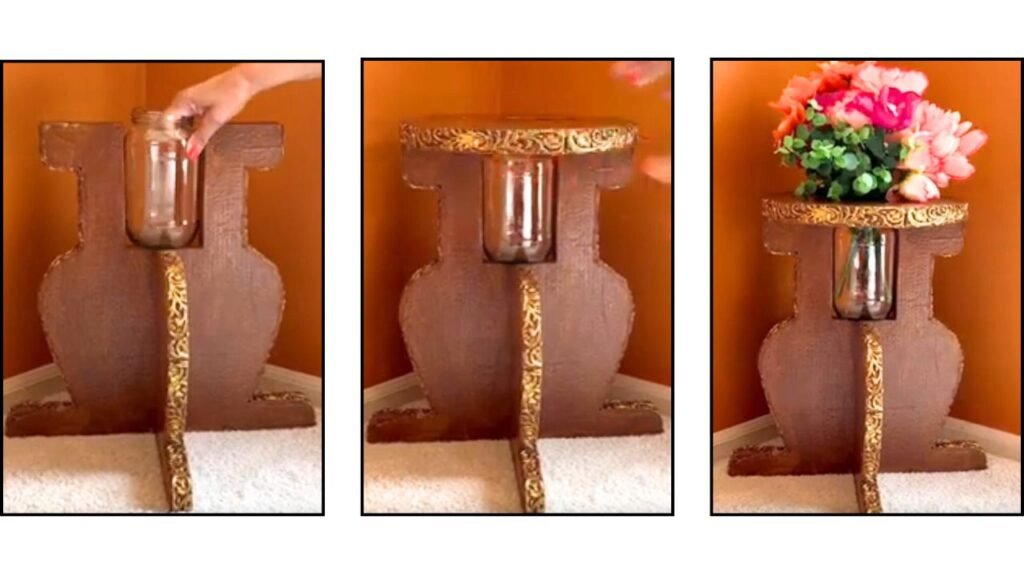
16. When paint dried, Place the jar in the vase stand base. Fit the circle on the jar. Then I placed the flowers in the jar. This is how it looks.
Tips and Tricks
- The size and shape of the jar may affect the final shape of the vase stand. I used a glass jar, but you can also use a ceramic or plastic jar.
2. You can even use real flowers, since the jar material (glass, plastic, or ceramic) is water-safe.
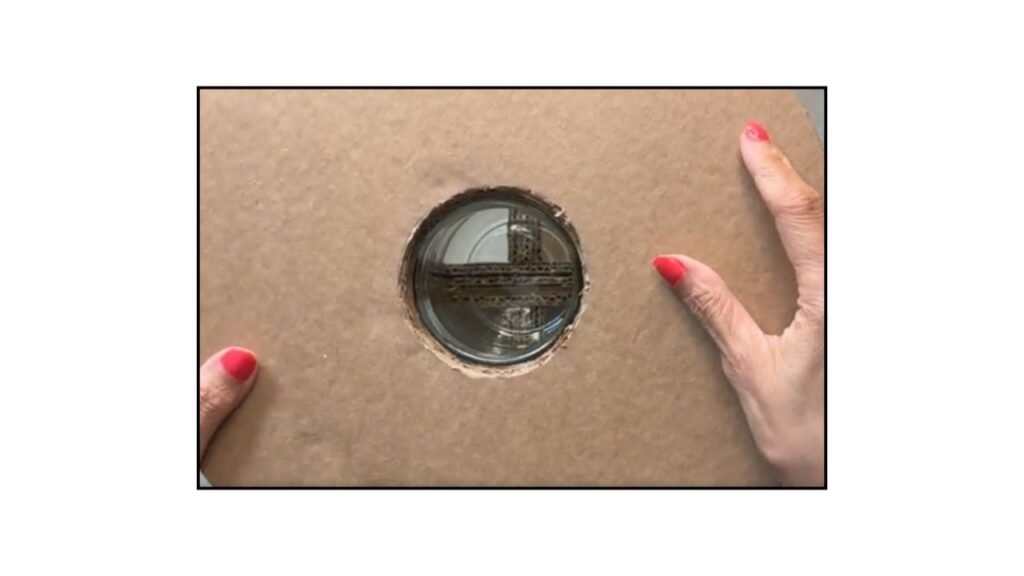
3. While attaching the clay borders, make sure the jar remains in position so that no clay gets placed underneath it, as shown in the photo below. If this step is missed, the jar may not sit stable.
4. I painted the stand to give it a wood-like finish. However, you can paint it white, off-white, or any color of your choice
Final Word
I hope you like this unique vase stand with an inbuilt vase. It instantly adds charm to any space. As I mentioned earlier, the special feature of this design is its versatility; you can use it with both real and artificial flowers. This stand can also double as a decorative side table.
I have several other carved cardboard furniture projects on my blog, so please take a look. You might feel inspired to create one of your own. I’d also love to hear from you, so feel free to share your thoughts in the comments below.
If you enjoy eco-budget friendly DIY crafts, please subscribe to receive my monthly newsletter.
Happy crafting, and thank you for stopping by!