
Description:
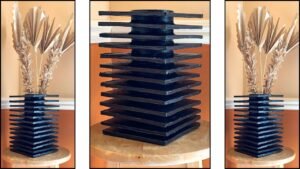
This elegant wall art home decor may look rich and luxurious, but it’s made from 6″ cardboard squares and 3″ mini canvases. It has high-end vibe but since its made with recyclables and affordable material, its very budget friendly. Additionally This wall art home decor is very easy to make.
Backstory:
This idea wasn’t something I found online. It just came to me, almost out of nowhere. Maybe I had seen something similar a long time ago, and it stayed with me in my subconscious until now. Coming up with ideas like this feels like a spiritual experience to me. Crafting is fun, but the process of creating is where the real magic happens.
Material Used:
1.Cardboard
2. Mini Canvases (I used 3″)
3. Mod Podge or School Glue Or white glue
4. Gold Leaf
5. Gold Glitter
6. Gold Mica powder
7. Paper napkin
8. Wet Towel
9. Paint Brushes
10. Gold Acrylic Paint
11 Black acrylic Paint
12. Gesso
To watch Full video tutorial click on the video below.
For those who prefer written step-by-step instructions:
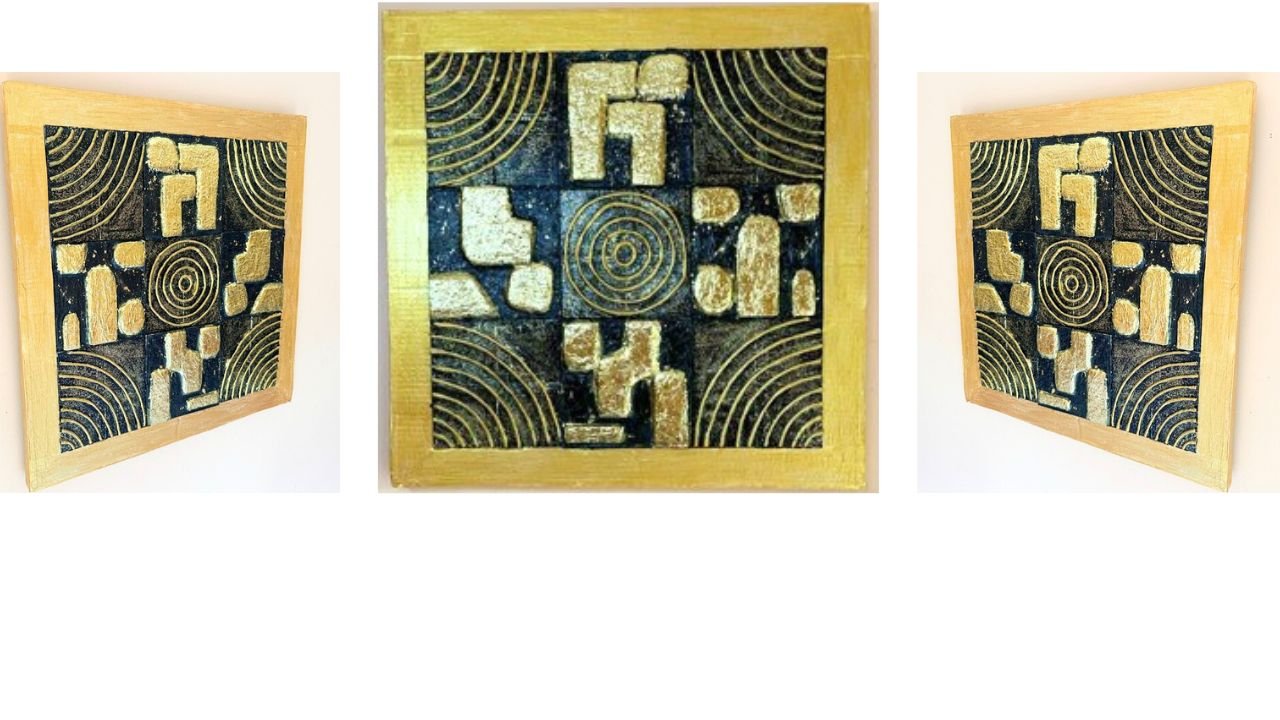
- Make Cardboard Tiles. Use two 6″ cardboard squares. Stick them together. Make 4 cardboard tiles the same way. Photos show how.


2. From here I show designing only one of the four tiles from start to finish. The process is same across all four tiles.
Cut a few abstract shapes, arrange them as you like and then stick them in place.


3. Next, apply Glue all over on one side of the tile as shown. Then Stick paper napkin on it. layer by layer as shown.


4. After napkin dried applied Gesso on top. When Gesso Dried Applied black acrylic paint and when black paint dried applied Gold Acrylic paint.

Gesso


5. After Gold paint dried applied glue on the gold raised parts. Then applied gold leaf on raised parts. Note, that I applied gold paint first so the black paint won’t show up if gold leaf tears off in some part or a little gap stays while sticking the gold leaf.

Applying Glue on Golden parts in The Above Photo


After sticking gold leaf I wiped extra gold leaf stuck on my fingers to the background black part of the tile to make it jazzy!
6. Make canvas tiles by sticking four 3″canvas tiles as shown. Made all together 5 tiles with twenty mini canvases.


7. Here too, I show designing only 1 of the canvas tiles, because the process is same across all five tiles.
First I stick masking tape where I joint the canvases to get an even surface to work with.

8. Next, using carbon paper I transferred a simple line drawing on the canvas tile.


9. Next, on a wet towel, rolled paper napkins into a rope. Stuck these ropes on the lines I drew on the canvas.


10. After the paper napkin dried applied Gesso on the tile. After Gesso dried painted with black acrylic paint. After black paint dried painted the rope with gold acrylic paint.


11. For extra shine I mixed Mod Podge, Gold Mica Powder and Gold Glitter. Applied this mixture to the ropes.


12. After gold mixture dried I mixed Mod Podge and Gold Glitter and applied this mixture to Black part of the tile.


13. Needed a frame to fit all 9 tiles. Took two 22″ cardboard squares for the backing of the frame. and stuck them together. Cut out two outer borders measured 22″ by 1.875″. Stuck one outer frame to the cardboard backing.


Above is 22″ squares stuck together for backing of the frame.

Two Outer borders

Stuck one outer border to backing.
14. Next applied Gesso on second outer border. After Gesso Dried stuck second outer border on top of first outer border.


14. After sticking second outer border, to hide rough edges of the frame covered the edges with masking tape.


15. Painted the outer border with mixture of Mod Podge, Mica and gold glitter.


16. Next Applied glue on the backing and arranged tiles on it.


Finally it looks like this.

Tips:
- Each tile in this wall art is a 6″ square. I arranged 3 tiles in each row, so I expected the total width to be exactly 18″. But it turned out to be slightly more. Why? Because the mini canvases are stretched over a wooden frame, which adds a bit of extra thickness to the edges. That small detail affected the final measurement. You’ll see this more clearly in the photos below

The cardboard for backing of the frame was 22″ square . The outer border was 2″ wide so the middle part measured 18″. But in the above photo, you can see the tiles didn’t fit within 18″.

I started by keeping tile within the boundary on one end.

In the above photo you can see the canvas is not staying within boundary of outer border on the other side.
That’s why the outer border measures 1.875″ wide instead of 2″. Just remember, the space within the boundary has to be tight.
2. Paper Napkin Rope:
When paper napkins dry, they shrink slightly. I made the mistake of sticking the ropes while they were still wet, which led to some warping and extra work.
Solution: Let the napkin ropes dry completely before gluing them down it’s much easier to handle and gives better results.
3. Gold Leaf (Glue Tip):
Avoid applying too much glue when sticking gold leaf. If there’s too much, the leaf tends to cling to your fingers instead of the surface!
4. Gold Leaf (Sizing Tip):
Always cut the gold leaf sheet to match the size of the area you’re covering. This minimizes waste and helps it adhere neatly in place.
Final Note:
Along with these written steps, I recommend watching my video. You’ll get a better understanding of how this DIY comes together visually.
Got a question or suggestion? I’d love to hear from you . just drop a comment below!
Thanks for stopping by. Hoping to see you here again soon.