
Description:
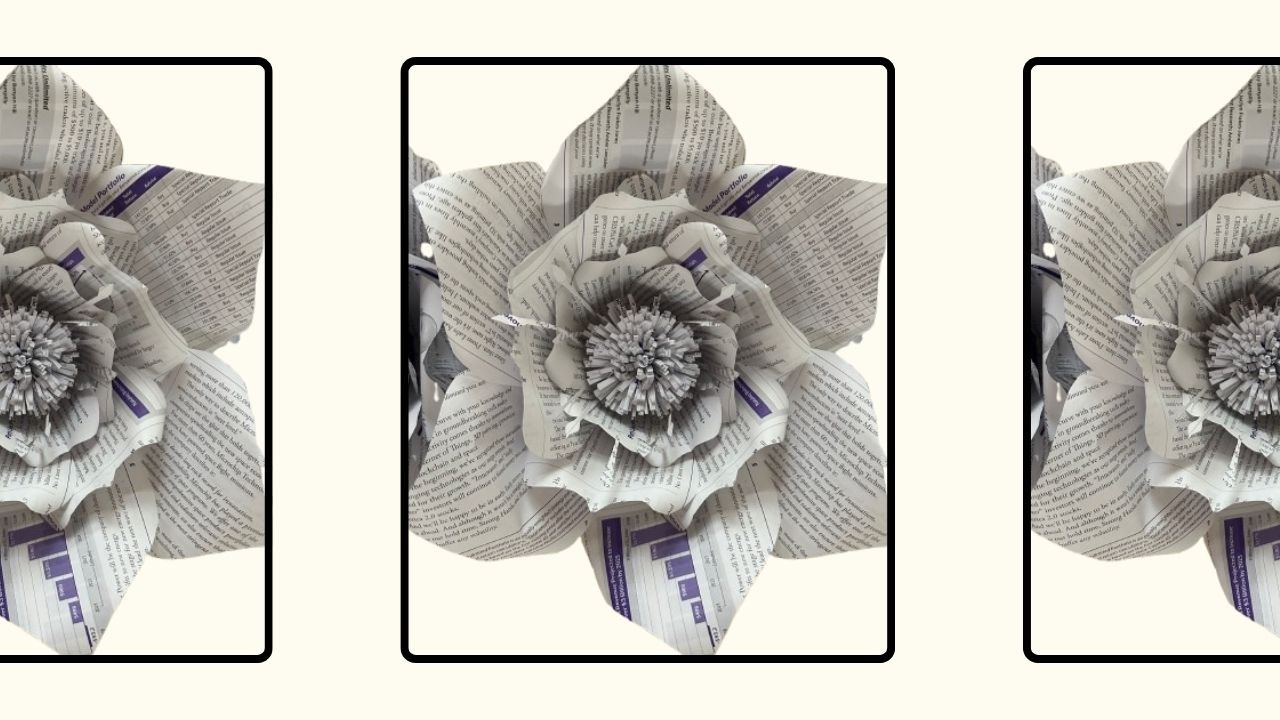
I The giant flower shown above was made using brochure paper (similar to printer paper) a creative and zero-cost DIY to reuse waste paper!
Materials Used
- Used Printer paper or brochure paper
2. glue gun
3. School Glue
4. A piece of soft cardboard (box of Crackers)
Backstory:
We had a huge stack of old brochures lying around at home . My husband was about to shred and recycle them when he asked if I wanted to use them for a craft. I jumped with joy and said yes! Instead of tossing them, I turned them into 14 giant flowers and created a beautiful photo backdrop for Mother’s Day.
Isn’t this a much better way to recycle waste paper?
Not only did it save paper from the bin, but it also added a creative and meaningful touch to our celebration.
Scroll down to see how I made one giant flower, and don’t forget to check out more of my trash to treasure crafts! You’ll find the full backdrop revealed at the end of the video.
For Video Tutorial Click below
Written Step-By-Step Instructions For the Flower DIY
- Get brochure papers and cut templates out of them.

2. Used 3 sheets of brochure papers folded them as shown and using the templates cut out the petal shapes as shown.


For smaller petals too folded three sheets of brochure paper and Traced smaller petals and cut them out as shown below.


Now I have three kinds of petals, 6 petals of each kind.
3. Cut about 1″ slits on the bottom of largest petals as shown and smaller slits on the medium and smallest petals as shown.


4. Next shaped the petals with scissors as shown.


5. Using school glue stuck the flaps on the bottom of the all the petals by placing one flap over the other making a seat for each petal as shown


6. Took a piece of soft cardboard and cut it out in hexagon shape to form a base to stick petals on. Started sticking biggest petals first then medium size and then smallest size petals at last as shown. Because of the seat on the petals they sit up right on the cardboard base.


7. Next I start making the center of the flower. First I made the long filaments as shown. Made two of them.


Stuck the filaments in the center of the flower using white/school glue.

8. Got two strips of brochure paper.

stacked the strips and cut the filaments as shown.

9. Rolled the paper as shown.


10. Opened the filaments wide and stuck them in the center of the flower as shown.


11. Now the flower is ready I stuck masking tape on the back side of it to display it on the wall.


12. Finally stuck the flower in place on the wall as a part of a backdrop

Final Note
In this post, I’ve shown how to make just one type of flower. If you’d like tutorials for the others, let me know in the comments! I hope you enjoyed this creative way to recycle discarded paper.
Don’t forget to check out my post on making a rose branch from used printer paper, along with other DIYs using cardboard, jars, and newspapers.
If you liked this post, please subscribe to my blog, hit the like button, and share your thoughts in the comments. I’d love to hear from you!
Thanks For Stopping By!